

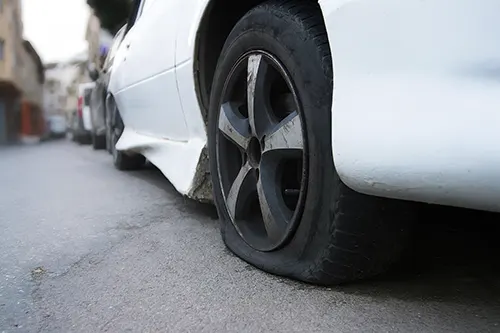
Few things are more frustrating than having to add air to the same tire every few days or weeks. You’ve checked the pressure, filled it to the recommended PSI, and yet — a few days later — that one tire is visibly softer or the low-pressure warning light is back. This is a classic symptom of a slow leak. Unlike a sudden blowout or a fast flat, a slow leak can be tricky to locate because the hole or damage is often very small. But don’t ignore it. A chronically underinflated tire hurts fuel economy, reduces handling and braking performance, causes uneven tread wear, and can even lead to a dangerous tire failure at highway speeds due to excessive heat buildup.
In this guide, we’ll walk you through the three most common culprits behind a single tire losing pressure slowly: the valve stem, the bead seal (where the tire meets the rim), and a puncture in the tread. We’ll also cover less common causes like sidewall damage, rim cracks, and corrosion. By the end, you’ll know exactly how to diagnose the problem yourself, when to repair versus replace, and how to prevent slow leaks in the future.
Why One Tire and Not the Others?
Before diving into causes, it’s important to understand that a single tire losing pressure points to a localized issue with that wheel assembly. If all tires were losing pressure equally, you’d suspect seasonal temperature drops (which affect all tires) or a problem with the tire pressure monitoring system (TPMS). But when it’s just one tire, the leak is almost always physical: a failed component, a small hole, or a compromised seal. The leak rate can vary from losing 1-2 PSI per day to 1-2 PSI per week. The slower the leak, the harder it is to find — but the methodical approach below will help you pinpoint it.
Common Cause #1: Valve Stem Leaks
The valve stem is the small rubber (or metal) protrusion you see on your wheel where you attach the air hose. It contains a spring-loaded valve core that opens when you add air and closes when you remove the chuck. Over time, valve stems can fail in several ways:
- Rubber valve stem cracking: Older rubber stems become brittle, dry, and develop tiny cracks that leak air slowly.
- Loose valve core: The tiny internal core can become slightly unscrewed or its rubber seal can degrade.
- Damaged or missing valve cap: While the cap is not the primary seal, it keeps dirt and moisture out. Debris in the valve can prevent proper seating.
- TPMS sensor seal failure: On vehicles with direct TPMS, the sensor attaches to the valve stem. The sealing grommet can leak.
How to test: Mix a solution of water and dish soap (about 1 part soap to 10 parts water). Spray or brush it generously over the valve stem, especially around the base where it meets the wheel and around the valve core opening. Watch for tiny bubbles forming — that’s the leak. A simple fix is to tighten the valve core with a valve core tool (costs a few dollars). If the rubber stem is cracked, the tire must be dismounted to replace the stem. TPMS valve service kits are available and inexpensive.
Common Cause #2: Bead Leaks
The “bead” is the inner edge of the tire that seals against the rim flange. This seal is critical for holding air. A bead leak occurs when air escapes between the tire and the wheel. Causes include:
- Corrosion on alloy wheels: Road salt and moisture cause the rim surface to become rough, pitted, or flaky, breaking the seal.
- Dirt, rust, or old tire sealant: Debris trapped between the tire bead and rim prevents a tight seal.
- Damaged tire bead: If the tire was mounted improperly or hit a pothole, the rubber bead can be cut or deformed.
- Bent or damaged rim flange: A physical impact can warp the edge of the wheel.
How to test: Inflate the tire to its recommended pressure. Spray soapy water along the entire circumference of the bead — both on the outer side (between the tire sidewall and rim) and, if accessible, on the inner side. Bubbles will appear at the leak point. Sometimes the leak is intermittent, so you may need to apply pressure or rotate the tire. A bead leak can often be repaired by breaking the bead, cleaning the rim surface with a wire brush, applying bead sealer, and re-seating the tire. Severe corrosion may require wheel refinishing or replacement.
Common Cause #3: Puncture in the Tread
This is what most people think of when they imagine a tire leak: a nail, screw, or other sharp object piercing the tread. However, slow leaks from punctures can be tricky because the object may still be embedded (partially sealing the hole) or the hole may be very small (like a pinprick from a wire or staple).
- Nails and screws: Often cause slow leaks because the head of the nail or screw slows air escape but doesn’t stop it completely.
- Small wire or staple punctures: Hard to see with the naked eye but will leak over time.
- Puncture in the tread repair area: If a tire was previously patched or plugged, that repair can fail and start leaking again.
How to test: Visually inspect the tread for any foreign objects. Even if you don’t see anything, spray soapy water over the entire tread area, rotating the tire to check every inch. Look for tiny bubbles. Also check the tread grooves for cuts or cracks that might be deep enough to leak. A tread puncture can be repaired only if it is within the tread area (not near the sidewall or shoulder) and the hole is ¼ inch or smaller. The proper repair is a combination patch/plug from the inside. Do not rely on external “string” plugs alone — they are temporary.
Other Less Common Causes of Slow Leaks
If you’ve ruled out the valve stem, bead, and tread punctures, consider these possibilities:
- Sidewall damage: Small cracks, cuts, or impact breaks in the sidewall can leak slowly. Sidewall punctures cannot be repaired; the tire must be replaced.
- Wheel cracks or porosity: Cast aluminum wheels can develop hairline cracks from pothole impacts or manufacturing porosity. This is rare but does happen. A crack may only leak under load or at certain temperatures.
- Weld failures on steel wheels: Steel wheels have welded seams that can split.
- Improper wheel mounting: Lug nuts that are too tight or uneven can distort the wheel flange, causing a bead leak.
- TPMS sensor housing crack: On some systems, the sensor body itself can crack and leak air through the wheel cavity.
How to test for these: Submerge the entire wheel and tire assembly in a water tank (or use a large tub). This is the most definitive test because you can see bubbles from any location. For cracks, sometimes the wheel must be removed from the tire and inspected with dye penetrant or by a professional.
Step-by-Step Diagnostic Workflow
Follow this systematic approach to identify your slow leak without wasting time or money:
- Mark the tire and wheel position: Use chalk or tape so you know which tire is the problem.
- Inflate to proper PSI (cold): Use a reliable gauge. Over-inflating slightly (by 2-3 PSI) can make leaks more apparent but don’t exceed the tire’s max pressure.
- Listen first: In a quiet garage, put your ear near the valve stem, bead, and tread. Hissing sounds are obvious.
- Soapy water spray test: This is your primary tool. Spray systematically: valve stem (base and core), bead area both sides, tread entire circumference, and sidewall.
- If no bubbles appear, the leak may be very slow or only occurs when the tire is under load. Drive the car for a few miles to flex the tire, then retest. Or use a dunk tank.
- Remove the wheel: For a dunk test, remove the wheel and lay it flat in a large container of water (or use a professional dunk tank). Watch for a stream of bubbles.
- Once identified, decide on repair: valve core tightening, valve stem replacement, bead cleaning, patch/plug, or tire/wheel replacement.
Repair or Replace? Guidelines for Tire Safety
Not all slow leaks can or should be repaired. Safety comes first. Here’s a quick decision table:
| Leak Location | Repairable? | Recommended Action |
|---|---|---|
| Valve stem (rubber) – cracked | Yes | Replace valve stem (tire must be dismounted or use “quick” stems on some wheels – professional recommended) |
| Valve core – loose or damaged | Yes | Tighten or replace valve core ($1 tool and $0.50 part) |
| Bead leak – minor corrosion or dirt | Yes | Clean rim bead seat, apply bead sealer, remount and balance |
| Bead leak – severe rim corrosion or bent flange | Maybe | Wheel replacement or professional refinishing if cost-effective |
| Tread puncture within repairable area (center 75% of tread) | Yes | Proper inside patch/plug repair (not just external plug) |
| Tread puncture near shoulder or sidewall | No | Tire replacement – unsafe to repair |
| Sidewall crack or puncture | No | Tire replacement immediately |
| Wheel crack | Maybe | Professional welding (steel) or wheel replacement (alloy) |
Important: The Tire Industry Association (TIA) and Rubber Manufacturers Association (RMA) state that tire repairs are only valid for tread punctures less than 1/4 inch in diameter and not in the shoulder or sidewall. Also, never repair a tire that has been driven on while flat (run-flat tires have special rules).
Preventing Future Slow Leaks
Once you’ve fixed the current leak, take these steps to avoid repeat problems:
- Replace rubber valve stems every time you buy new tires. They are cheap and rubber ages.
- Keep valve caps on. Metal caps with rubber seals are best for keeping out moisture and dirt.
- Clean your wheels regularly, especially in winter. Remove salt and grime from the bead area.
- Avoid potholes and curbs that can damage tire beads and rims.
- Check tire pressure monthly (including the spare). Early detection of a slow leak saves tires.
- When mounting new tires, insist that the technician cleans the rim bead seat with a wire brush and applies a thin layer of bead sealer.
- Consider using TPMS-compatible metal valve stems if your car has direct TPMS; they are more durable than rubber.
DIY vs. Professional Repair: What You Need to Know
Many slow leak fixes are DIY-friendly, but some require professional tools. Here’s a breakdown:
- DIY with basic tools: Tightening or replacing valve core, spraying soapy water, applying bead sealer (if you can break the bead with a bead breaker), and using a plug kit for emergency temporary repairs.
- Requires professional equipment: Tire dismounting and mounting (to replace valve stem or patch from inside), wheel balancing, repairing wheel cracks, and TPMS sensor service. Most shops charge $15-$30 for a flat repair, which is often cheaper than buying tools.
- Warning: Do not use fix-a-flat sealants unless it’s an emergency. They can corrode wheels, damage TPMS sensors, and create a mess that tire shops will charge extra to clean.
Real-World Example: Diagnosing a Mystery Slow Leak
Let’s walk through a typical scenario. You have a 2018 sedan, and the right rear tire loses about 3 PSI every week. No visible nail. You spray soapy water on the tread — nothing. Valve stem — nothing. Bead — nothing. What now? Remove the wheel and lay it flat in a shallow water tank. Slowly rotate. Bubbles appear from a spot on the inner bead. Upon closer inspection, the alloy wheel has a small patch of corrosion exactly where the bead seats. The solution: have a shop dismount the tire, grind down the corrosion, apply bead sealer, and remount. Problem solved. Without the dunk test, you might have replaced the tire unnecessarily.
When to Just Replace the Tire
Sometimes a slow leak is a symptom of a tire that’s already at the end of its life. Replace the tire if:
- The tread depth is below 2/32 inch (use the penny test).
- The tire is more than 6-10 years old (check DOT date code).
- There are multiple punctures close together (within 16 inches).
- There is sidewall damage, even if not currently leaking.
- The tire has been run flat (sidewall internal structure is compromised).
Conclusion: Don’t Ignore the Slow Leak
A tire that keeps losing pressure slowly is not just an annoyance; it’s a safety hazard and a money waster. By methodically checking the valve stem, bead, and tread, you can pinpoint the source in most cases. Simple fixes like tightening a valve core or cleaning a corroded bead cost pennies and extend tire life. For punctures, a proper inside patch/plug is safe and durable. But when in doubt, or if the leak is in a dangerous area like the sidewall, invest in a new tire — your safety is worth far more than the cost of a replacement.
Final pro tip: Keep a small spray bottle with soapy water in your trunk alongside a tire inflator. The next time your low-pressure light comes on, you can quickly diagnose whether it’s a simple valve core issue or something more serious before you drive. And always remember: proper tire maintenance is one of the easiest and most effective ways to stay safe on the road.