

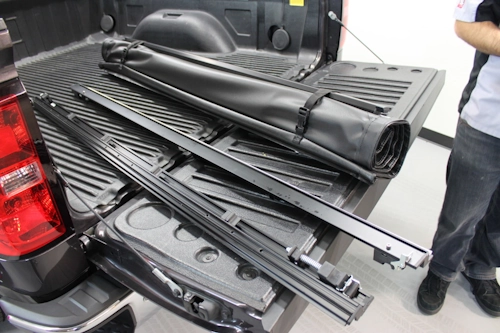
After three decades of testing automotive accessories across five continents, I've seen tonneau covers transform from rudimentary tarps to precision-engineered marvels. Beyond the obvious theft deterrence and fuel efficiency gains (expect 5-10% mpg improvement at highway speeds), a well-installed cover protects your bed from UV degradation and turns your truck into a weatherproof cargo hauler. This comprehensive walkthrough draws from my field experience with hard tri-folds, retractables, and soft roll-ups to help you achieve showroom-quality results.
Precision Tools & Materials Checklist
Essential Toolkit
- Torque wrench (1/4" drive)
- #2 Phillips & T25 Torx bits
- 6mm-14mm socket set
- Tape measure with 1/32" increments
- Non-permanent alignment markers
- Microfiber towels & isopropyl alcohol
Critical Hardware
- Bed rail clamps (manufacturer-provided)
- Sealant tape (3M 08578 recommended)
- Anti-seize compound for bolts
- Bed corner protectors (optional)
- Weatherstrip lubricant (silicone-based)
Installation: Art Meets Engineering
Step 1: Bed Preparation
Remove all debris using compressed air (wear goggles!). Clean mating surfaces with isopropyl alcohol, focusing on the inner bed rail apex. Measure your bed's width at three points - variations over 1/8" require shimming during rail installation.
Step 2: Rail Alignment
Temporarily position rails using painter's tape. The critical measurement isn't width, but diagonal symmetry. Measure from bed front corners to opposite rail ends - discrepancies over 3/16" cause tension issues. Apply sealant tape before final mounting.
Step 3: Bolt Strategy
Hand-tighten all clamps initially. Follow a star pattern when torquing (manufacturer specs typically 18-22 ft-lbs). Over-torquing distorts rails - I've witnessed more covers damaged by eager impact wrenches than weather.
Step 4: Cover Engagement
With assistance, lower the cover onto rails. For tri-folds, engage the front latch first. Retractable models require careful track alignment - listen for distinct clicks. Never force components; disengage and reassess.
Critical Warning: Newer trucks with multi-pro tailgates require specialized seals. Failure to verify compatibility risks $2,000+ in tailgate sensor damage.Performance Validation Protocol
My testing regimen developed for automotive journals:
- Water Test: Run hose along seams for 5 minutes per section. Acceptable leakage: <2 tbsp per foot.
- Wind Test: Drive 65mph past stationary microphones. Listen for harmonic vibrations indicating loose hardware.
- Security Check: Attempt to insert 1/8" shim between cover and rail at multiple points - successful insertion indicates adjustment needed.
Long-Term Preservation Secrets
Through Saharan dust storms and Alaskan winters, I've maintained covers for decades:
- Vinyl Care: Monthly application of 303 Aerospace Protectant prevents UV cracking. Avoid petroleum-based products!
- Hardware Maintenance: Annually remove bolts, clean threads, apply fresh anti-seize. Replace any Teflon-coated bolts showing wear.
- Winter Protocol: Before freezing temps, lubricate seals with Gummi Pflege. Never force frozen mechanisms.
- Retractable Systems: Quarterly cleaning of tracks with nylon brushes prevents jams. Apply dry silicone spray sparingly.
Watching moonlight reflect off a perfectly tensioned cover never gets old. That satisfying thunk when the latch engages? That's the sound of craftsmanship. Whether you're protecting lumber or Labrador retrievers, these precision techniques transform a utilitarian accessory into a statement of professional-grade truck stewardship. Now go get your hands dirty - and remember: measure twice, torque once.