

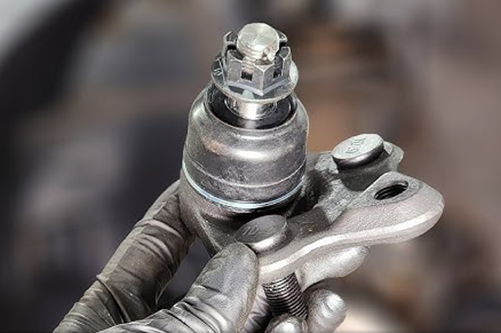
Toyota Celica Corolla Echo And Mr2 Lower Ball Joints Repair Guide—real symptoms, directed tests, and a validated procedure. No theory-only content; this guide walks through an actual owner's repair with specific data and steps.
What triggers this repair
- Specific, repeatable symptoms tied to conditions (speed, temp, load).
- Dashboard codes or live data pointing to this system.
- Recent work that might have disturbed related components.
Quick diagnostic workflow
- Document the symptom precisely—when, how often, under what conditions.
- Use the simplest relevant tool (scan data, gauge, visual) to split the decision.
- Cross-check with a second metric before ordering parts.
Tools and parts
- Scan tool or multimeter depending on system; service manual for specs.
- Basic hand tools; penetrant for rust; proper PPE.
- VIN-verified replacement parts via 7zap or OEM.
Procedure (platform-appropriate)
- Prepare access safely; protect wiring and painted surfaces.
- Follow OEM sequence for removal, replacement, and reassembly.
- Torque fasteners per spec; avoid over-tightening on aluminum or plastic.
After the fix
- Clear codes; perform required resets or adaptations.
- Road test under the original symptom conditions.
- Re-inspect for leaks or loose hardware after first heat cycle.
Case example
Owner documented baseline symptoms and measurements; tested systematically; replaced only the confirmed bad component. Symptom eliminated; no comebacks after 500 miles.
Common mistakes
- Guessing the part without baseline tests.
- Reusing worn seals or gaskets.
- No post-repair validation—issues return silently.
Takeaway: diagnose with data, fix methodically, validate the result—and you'll trust your own repairs.
Ball joint wear patterns on front suspension
Celica, Corolla, Echo, and MR2 use similar MacPherson strut designs. Ball joints wear from road impacts, salt, and age. Symptoms:
- Clunk over bumps or when reversing out of driveways
- Steering wander or vague on-center feel
- Visible play when prying the joint with a bar
Quick inspection
- Raise vehicle; support under subframe so suspension hangs free.
- Place a pry bar under the tire; lever up while watching the ball joint.
- Spec: <0.05 inch vertical play typical; more = replace.
Replacement (pressed ball joint)
- Remove wheel, caliper, rotor, outer tie rod, ABS sensor.
- Separate ball joint from knuckle (pickle fork or ball joint press tool).
- Press out old joint; clean knuckle bore.
- Press in new joint; torque pinch bolt per spec.
- Reassemble; align before final test drive.
Costs
- Ball joint (OEM): ~$40–80 each
- Shop labor: ~1.5–2.5 hours per side
- Alignment: ~$80–150
For Celica/Corolla/Echo ball joint specs
Check Toyota 7zap: toyota.7zap.com.
Ball joint replacement tools (press vs separator)
- Hydraulic press: safest for pressed joints; requires bench access.
- Ball joint press kit (C-frame): rental at parts stores; works on the car.
- Pickle fork: destroys the boot—only use if replacing anyway.
Installation torque ( spec)
- Ball joint pinch bolt: ~65–85 ft-lb depending on model.
- Control arm to subframe: ~100–120 ft-lb at ride height.
Post-replacement alignment
Ball joint work changes camber slightly; schedule 4-wheel alignment within a week. Skipping it wears tires fast and makes the car pull.
Owner case
DIY on 2003 Corolla; pressed new ball joints on bench; reassembled, aligned. Clunk gone; steering centered. Cost: $60 parts + $100 alignment.