

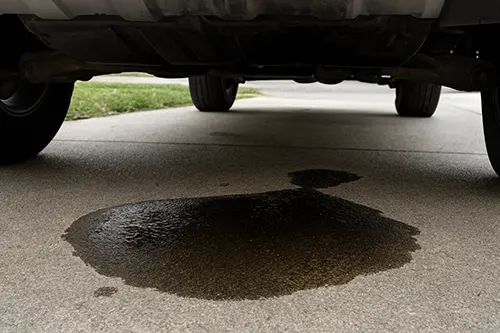
You’ve just finished a meticulous oil change—new filter, fresh synthetic oil, and a clean drain plug. You wipe everything down, lower the car, and start the engine. No drips. Perfect. But the next morning, there’s a small puddle of amber oil under the engine bay, or a persistent damp ring around the filter housing. Frustrating, isn’t it? This all‑too‑common post‑service seepage is usually not a sign of a defective part. Instead, it points to one of three installation errors: a pinched gasket, overtightening of the housing, or a dirty mating surface. Understanding which one happened—and how to avoid it—saves time, money, and the mess of a second oil change.
The Anatomy of an Oil Filter Housing Seal
Modern vehicles use two main types of oil filter systems: the traditional spin‑on metal canister and the cartridge‑style filter housed in a removable plastic or aluminum cap. Both rely on a rubber or silicone gasket to create a high‑pressure seal. In a spin‑on filter, the gasket sits flush against the engine’s mounting flange. In a cartridge housing, the large O‑ring (or sometimes a flat gasket) seals the cap to the housing body. This gasket must be compressed to a precise specification—enough to prevent leaks, but not so much that it extrudes, tears, or causes the housing to crack. When seepage appears right after service, the root cause almost always traces back to the three culprits named above.
1. Gasket Pinch – The Silent Leaker
A pinched or rolled gasket is the most common reason for a post‑service weep. It happens when the new filter is installed without properly lubricating the gasket, or when the housing is threaded on at an angle.
- How it occurs: During installation, the rubber seal gets caught between the housing threads or the metal canister’s edge and the engine flange. Instead of seating evenly, a portion of the gasket folds over or gets pushed out of its groove.
- What you see: A slow, steady seepage that may only appear after the engine warms up and oil pressure rises. Often, you’ll see oil running down the side of the filter or pooling in the housing recess. In severe cases, you might notice a visible bulge or missing chunk of the gasket.
- Why it’s dangerous: A pinched gasket can suddenly blow out at highway speeds, causing rapid oil loss and catastrophic engine damage.
- Prevention: Always apply a thin film of clean engine oil to the new gasket before installation. Spin the filter or housing by hand until you feel resistance, then back it off slightly and retighten to ensure the gasket isn’t binding.
2. Overtightening – More Force Isn’t Better
Many DIYers and even some professionals believe that “tight is safe.” With oil filter housings, the opposite is often true. Overtightening distorts the gasket, cracks the housing, or strips the threads.
- How it occurs: Using a wrench or ratchet to muscle the filter or cap far beyond the specified torque (typically 15–25 Nm or 11–18 lb‑ft for spin‑on filters, and 25–30 Nm for cartridge caps). Plastic housings are especially vulnerable.
- What you see: Oil may weep from the gasket area immediately after starting, but often the leak is delayed. Overtightening can also cause hairline cracks in plastic housings that only leak under pressure. You might also notice that the filter is extremely difficult to remove at the next service.
- The science: Rubber gaskets are designed to compress within a specific range. Too much compression forces the rubber to extrude outward or lose its resilience, creating a permanent path for oil to escape.
- Prevention: Always use a torque wrench. If you don’t have one, tighten the filter by hand until the gasket contacts the flange, then give it an additional ¾ to 1 full turn. For cartridge housings, tighten until the cap bottoms out, then add the specified fraction of a turn (usually ¼ to ½ turn).
3. Dirty Mating Surface – The Overlooked Culprit
Before installing a new filter, the engine’s sealing surface must be spotless. Any old gasket residue, dirt, or oil sludge prevents the new gasket from seating perfectly.
- How it occurs: The previous gasket leaves a thin, hardened ring on the flange. Or road grime builds up around the housing area. The new gasket contacts these uneven deposits, creating microscopic gaps.
- What you see: A slow, intermittent seep that often appears worse after driving. The leak may stop when the engine is cold and restart when hot. Inspection often reveals a clean line of oil tracing around a piece of debris or old gasket material.
- Hidden risk: A dirty surface can also cause the filter to “false torque” – you think you’ve tightened it correctly, but the gasket is actually riding on a lump of debris, leading to immediate leakage.
- Prevention: Always wipe the engine flange or housing groove with a clean, lint‑free rag. For stubborn old gasket material, use a plastic scraper (never metal, which can score the surface) and brake cleaner. Finish with a final wipe to remove any solvent residue.
Diagnostic Flowchart: Identifying Your Leak
Still unsure which mistake you made? Use this quick guide:
- Oil runs down the filter body → Likely a pinched gasket or overtightening. Remove the filter and inspect the gasket for tears, rolling, or extrusion.
- Cracked plastic housing → Almost certainly overtightening. Replace the housing and use a torque wrench next time.
- Oil seeps from the base even after cleaning and re‑tightening → Check the mating surface for old gasket bits, nicks, or pitting. Also inspect the housing’s sealing groove for cracks.
- Leak appears only when engine is hot and oil is thin → Could be any of the three, but a dirty surface is a prime suspect because debris expands differently than metal.
How to Fix a Post‑Service Seep (Step‑by‑Step)
Don’t just live with the leak. It will worsen and can lead to belt contamination, smoke, and engine damage. Here’s the proper repair procedure:
- Safety first: Park on level ground, engage the parking brake, and let the engine cool completely. Wear gloves and safety glasses.
- Catch the oil: Place a drain pan under the filter area. If the filter is on top (many cartridge systems), use absorbent pads.
- Remove the filter/housing: Use the correct tool (oil filter wrench, socket, or cap wrench). Note how tight it feels – excessive resistance suggests overtightening.
- Inspect the old gasket: Look for flat spots, rolling, or tears. If it’s intact but flat, that indicates normal compression. If it’s twisted or has a chunk missing, you had a pinch.
- Clean thoroughly: Wipe the engine flange or housing bore with a shop towel and brake cleaner. Remove every trace of old gasket material. For cartridge housings, clean the cap’s groove where the O‑ring sits.
- Inspect the housing: Check for cracks, especially around the thread area. If you see any, replace the housing (many are sold as an assembly with the filter cap).
- Prepare the new filter: If you’re using a new filter (recommended), apply fresh oil to the new gasket. For cartridge O‑rings, also lightly oil the ring.
- Reinstall correctly: Thread the filter or cap by hand until the gasket makes contact. Then tighten to the manufacturer’s torque specification. No torque wrench? Spin‑on: hand‑tighten plus ¾ turn. Cartridge cap: tighten until it stops, then ¼ turn (usually 25 Nm).
- Verify: Start the engine and let it idle for 2 minutes. Check for leaks. Then take a short drive and re‑inspect.
Beyond the Big Three: Other Causes of Seepage
While gasket pinch, overtightening, and dirty surfaces account for >90% of post‑service seeps, a few other issues can mimic them:
- Wrong filter: Using a filter with an incompatible gasket size or profile. Always verify the part number.
- Missing or double gasket: The old gasket stuck to the engine, and you installed a new filter on top of it. This creates a massive gap. Always check that the old gasket came off with the filter.
- Worn housing threads: On plastic cartridge housings, threads can strip over time, preventing proper clamping force. Replace the housing.
- Thermal cycling damage: Repeated overtightening can fatigue the housing over months, causing micro‑cracks that only leak when hot.
Preventive Maintenance Checklist for Oil Changes
Use this checklist every time you service your oil filter to ensure a dry, leak‑free result:
- ☐ Verify correct filter or cartridge part number.
- ☐ Inspect the new gasket for defects (cracks, flat spots).
- ☐ Lubricate the new gasket with fresh engine oil.
- ☐ Clean the engine mounting flange with a rag and brake cleaner.
- ☐ Ensure the old gasket is not stuck to the engine.
- ☐ Hand‑thread the filter or cap until snug.
- ☐ Use a torque wrench for final tightening (or count turns if you’re experienced).
- ☐ After installation, start the engine and check for immediate leaks.
- ☐ Re‑check oil level and top up if needed.
- ☐ After a short drive, inspect again.
When to Replace the Entire Oil Filter Housing
On many modern engines (especially BMW, Ford Ecoboost, and GM 3.6L V6), the oil filter housing is an integrated plastic or aluminum component that also serves as an oil cooler adapter. If you notice a persistent leak that returns even after a correct filter change, the housing itself may be warped or cracked. Symptoms include oil mixing with coolant (milky residue in the coolant reservoir) or a constant drip from the housing seam. In these cases, no amount of gasket care will fix the issue—you need a new housing assembly. It’s a more involved job, but it’s the only permanent solution.
Conclusion: Stop the Seep, Save the Engine
An oil filter housing seep after service is rarely a mystery. By methodically checking for a pinched gasket, overtightening, or a dirty mating surface, you can diagnose the problem in minutes. The fix is almost always simple: remove, clean, lubricate, and reinstall with the correct torque. Taking these extra steps not only keeps your engine bay clean and your oil level stable, but also prevents the catastrophic failure that a sudden gasket blowout can cause. Next time you change your oil, slow down, inspect your work, and torque it right. Your engine will thank you with thousands of leak‑free miles.
Remember: If you’re ever in doubt, consult your vehicle’s service manual for the exact torque specification and procedure. And when in a hurry, resist the urge to “give it an extra ugga‑dugga.” A clean, correctly torqued filter is the hallmark of a true professional—whether you’re working in a home garage or a high‑volume shop.