

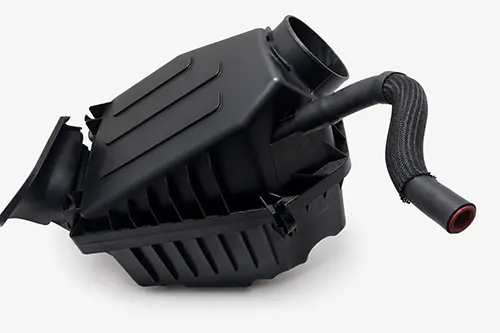
You’ve just installed a fresh air filter – premium brand, correct part number, everything looks right. Then you close the lid, and it won’t snap shut. Or it closes, but you can still see a gap. Maybe the clips feel loose, and then comes that dreaded little “whistle” from the engine bay. A poorly sealed air filter box lets unfiltered air bypass the filter, carrying dirt, dust, and even sand straight into your engine. Over time, that can lead to premature ring wear, cylinder scoring, and MAF sensor contamination. Not exactly a small issue. Let’s diagnose the three most common culprits: warped lids, wrong filter height, and clip seating problems – and fix them for good.
Why a Perfect Seal Matters More Than You Think
Your air filter box is the last line of defense between the atmosphere and your engine’s combustion chambers. When the lid seals properly, all incoming air has to pass through the filter media. A leak as small as 1mm can allow thousands of microscopic abrasive particles to enter over a single tank of fuel. That’s a lot of damage potential from a gap you can barely see.
- Unusual whistling or hissing from the air box area, especially under partial throttle
- Dust or dirt tracks around the lid edge after driving on unpaved roads
- MAF sensor readings that fluctuate erratically, triggering lean or rich codes
- Prematurely dirty oil analysis showing high silicon content
Before blaming the filter itself, it is worth checking each possible failure point in a logical order.
1. The Warped Lid Problem
Plastic air box lids – especially on older cars or aftermarket replacements – can warp from engine heat cycles, overtightening, or poor manufacturing. Once that happens, the lid no longer mates flat against the filter or the lower housing.
How to test for a warped lid:
- Remove the filter. Place the bare lid onto the lower box (without any filter). Press down gently around the perimeter. If you see daylight or feel rocking, the lid is warped.
- Lay the lid upside down on a known flat surface, like a glass table. If it wobbles, the plastic has distorted.
Fixes:
- Heat reshaping (temporary): Warm the lid gently with a heat gun (300-350°F) and press it flat on a workbench using weights. Let it cool completely. This can work for minor warpage, but it may come back later.
- Add a foam gasket: Apply ¼” closed‑cell weatherstripping to the sealing groove of the lower box. The foam compresses to fill small gaps.
- Replace the lid: Check a local salvage yard for an OEM lid – factory parts often fit better than cheap reproductions.
2. The Wrong Filter Height Trap
Even “correct” part numbers sometimes come with dimensional variations. Filter height is critical because the lid compresses the filter’s sealing edge to create an airtight closure. If the filter is too short, the lid bottoms on the lower housing before compressing the filter. If it’s too tall, the lid may not latch at all, or it forces the box to bulge open. This happens more often than people think.
Diagnosing filter height issues:
- Measure the depth of the lower box from the sealing surface down to the bottom. Then measure the filter’s uncompressed gasket height. The filter should be 2-4mm taller than the box depth.
- Perform the “dime test” – close the lid without clips. Insert a dime between the lid and the lower housing near each clip. If the gap is larger than 3mm, the filter is probably too short.
- Compare the new filter to the old one. Place them side by side on a flat surface and measure overall height. Aftermarket filters can vary by up to 5mm from OEM specs.
Solutions:
- Return and replace: Buy a different brand – Wix, Mann, or OEM are generally more consistent. Avoid no‑name “eBay specials”.
- Add a shim: In a pinch, place a 2-3mm thick closed‑cell foam donut under the filter’s bottom edge (not on the sealing surface). This lifts the filter slightly and increases compression.
- Use a thicker sealing ring: Some filters have removable rubber gaskets. Install an aftermarket thicker gasket, available at auto parts stores, to take up the slack.
3. Clip Seating Problems – More Common Than You Think
Most air boxes use spring steel clips or screw‑down clamps. Those clips can lose tension, become misaligned, or simply fail to seat correctly. Quite often, the problem is just installation technique — the lid isn’t fully positioned before the clip gets forced into place.
Common clip‑related fails:
- Misalignment: The lid’s tongue‑and‑groove edges aren’t fully engaged. One side sits higher than the other.
- Weak or broken clips: Over time, clip springs relax. Or a previous owner broke a clip tab and “fixed” it with a zip tie.
- Bent hinge pins: The pivoting part of the clip can bend, reducing clamping force.
How to fix clip seating issues:
- Correct seating order: Always engage the hinge side first, the two prongs that hook into the lower box. Then lower the lid from the opposite side. Finally, snap each clip in sequence – never force a clip if the lid isn’t fully seated.
- Rebend spring clips: Remove the clip and gently bend the spring loop inward using pliers to restore tension. Reinstall and test.
- Replace clips: Many vehicles have replaceable clip kits (Dorman, Help! brands). If not, retrofit a “hood pin” style clamp – a clean but effective DIY fix.
- Use a secondary latch: For racing or off‑road applications, add a small bolt through the lid and lower box at the farthest point from the factory clips.
Quick Reference Table: Symptoms & Solutions
| Symptom | Most Likely Cause | Quick Fix | Long‑Term Solution |
|---|---|---|---|
| Lid won’t close without extreme force | Filter too tall OR debris in box | Check for foreign objects under filter | Buy correct height filter; clean box |
| Clips latch but lid moves when pressed | Filter too short / gasket compressed | Add foam weatherstripping to seal groove | Replace filter with OEM height |
| Visible gap on one side only | Warped lid or misaligned hinge | Inspect lid flatness; re‑seat hinge pins | Replace lid or heat‑straighten |
| Clip springs feel loose / floppy | Worn or bent clips | Bend spring loop inward for more tension | Replace clips or use auxiliary clamp |
| Dust tracks on lid after driving | Poor seal anywhere along perimeter | Perform “dime test” to locate gap | Replace both filter and lid gasket |
Step‑by‑Step: How to Verify a Perfect Seal
After you’ve addressed the likely causes, run this final verification process. It’s simple, and important.
- Clean all mating surfaces – remove old gasket residue, dirt, and oil from the lower box and lid.
- Install the new filter exactly as intended. Some have a top/bottom orientation, so look for the “AIR FLOW” arrow.
- Close the lid without clips. The lid should sit flush around the entire perimeter, with no more than 2mm gap anywhere.
- Engage the hinge side first (if applicable), then lower the lid. Snap clips in alternating order, almost like tightening a cylinder head.
- Perform the “blower test” – with the engine off, use a leaf blower or shop vac in reverse to blow air into the air inlet tube. Listen for air escaping around the box. Soapy water brushed around the seam will bubble if there’s a leak.
- Road test and re‑inspect – after 50 miles, re‑open the box. Look for dust trails inside the clean side, the area after the filter. If it’s spotless, you’ve nailed it.
Aftermarket Air Boxes & Performance Filters – Special Cases
Cold air intake kits and aftermarket “high flow” boxes often come with their own sealing headaches. Cheap plastic can warp from under‑hood heat, and some cone filters have uneven base plates. What is important here is not assuming “performance” automatically means “better fit.” Sometimes it means the exact opposite.
- Use a quality silicone coupler with constant‑tension clamps instead of cheap rubber.
- If the box is made of thin ABS plastic, reinforce the lid with a metal plate (aluminum sheet) to prevent flexing.
- For cone filters with a metal adapter plate, apply RTV silicone to the mating surface before clamping. Let it cure overnight.
Final Thoughts: Don’t Ignore a Bad Seal
Many drivers treat a loosely sealing air box like a minor annoyance. It isn’t. It’s more or less like removing your oil filter and hoping for the best. Every particle that sneaks past the filter becomes a tiny cutting tool inside your engine. The good news is that most sealing problems are easy to diagnose with a flashlight and a flat surface. Start with the filter height, then check the lid for warpage, and after that inspect the clips. In 90% of cases, one of those three fixes will give you a solid, reliable seal. For the remaining 10%, replace the lid or the entire air box – it’s still a lot cheaper than an engine rebuild.
Remember: A sealed air filter box is silent, dust‑free, and keeps your mass air flow sensor happy. Take the extra 15 minutes to verify your work. Your engine will thank you with miles of reliable, clean‑burning service.