

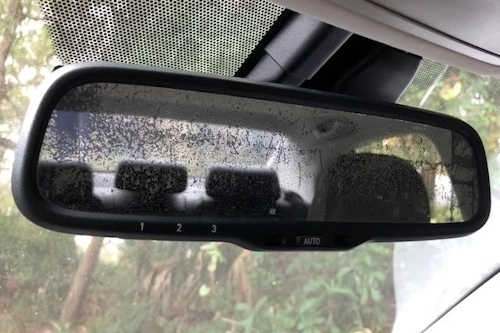
As an automotive journalist who's test-driven thousands of vehicles over three decades, I can confidently say your rear view mirror is more than just reflective glass—it's your third eye on the road. When it cracks, wobbles, or detaches, the loss of critical visibility transforms a minor annoyance into a major safety hazard. This comprehensive guide distills my hands-on experience into actionable steps for replacing your rear view mirror like a seasoned technician.
Mirror Mounting Systems: Know Your Adhesion Method
Before grabbing tools, identify your mounting system—this dictates your replacement strategy:
| Mount Type | Identification | Common Vehicle Applications |
|---|---|---|
| Button Mount | Small metallic disc glued to windshield with protruding stud | 90% of modern vehicles (2010+) |
| Stem Mount | Metal arm directly bonded to windshield with set screw | Older vehicles (pre-2005), trucks |
| Clip Mount | Plastic housing clipped onto windshield bracket | European models (BMW, Mercedes) |
| Sensor-Integrated | Built-in cameras, rain/light sensors | Luxury vehicles with advanced safety systems |
Critical Safety Note: Never attempt replacement while driving or with compromised windshield integrity. Cracks near the mounting area require professional windshield replacement first.
DIY Replacement: Step-by-Step Guide
Tools You'll Need:
- Torx or Allen wrench set (size varies by vehicle)
- Heat gun or hair dryer
- Fishing line or dental floss
- Razor blade scraper
- Isopropyl alcohol & lint-free cloth
- New mirror assembly
- Primer & adhesive kit (for button mounts)
Removing the Old Mirror:
- Clean Work Area: Protect dashboard with microfiber cloth
- Heat Adhesive: Apply heat to mounting area for 2 minutes (softens adhesive)
- Cut Through Adhesive:
- Button mounts: Slide fishing line behind button using sawing motion
- Stem mounts: Loosen set screw with appropriate wrench
- Clip mounts: Press release tab while gently pulling downward
- Clean Residue: Scrape remaining adhesive with razor blade at 45-degree angle
- Final Clean: Wipe area with alcohol-soaked cloth
Pro Tip: Use a suction cup mirror holder ($15 auto parts stores) to temporarily mount your old mirror during adhesive curing period.
Installing the New Mirror:
- Positioning: Hold new mount against windshield to verify alignment with roof line
- Surface Prep:
- Apply adhesion promoter to windshield with included swab
- Let dry 60 seconds (do not touch!)
- Apply Adhesive: Squeeze pea-sized amount onto mounting surface
- Mount Firmly: Press mirror assembly onto windshield with firm pressure for 60 seconds
- Curing Time:
- Minimum 1 hour before driving
- 24 hours before car washes or rough roads
Special Considerations by Vehicle Type
Sensor-Integrated Mirrors:
- Disconnect battery before unplugging electrical connectors
- Label connectors with masking tape for reinstallation
- Never force connectors - most use sliding lock mechanisms
Auto-Dimming Mirrors:
- Verify compass calibration procedure in owner's manual
- Test dimming function by covering forward-facing sensor
Trucks & SUVs:
- Heavier mirrors may require supplemental support brackets
- Consider upgraded adhesive (3M VHB tape works well)
When to Call a Professional
- Windshield has star cracks or damage near mirror zone
- Mirror contains integrated telematics (OnStar, etc.)
- Electrically adjustable mirrors with position memory
- Camera-based systems (lane departure, recording devices)
- If adhesive fails repeatedly after proper installation
Mirror Selection Guide
Upgrade wisely with these professional recommendations:
| Mirror Type | Best For | Price Range | Considerations |
|---|---|---|---|
| Basic Replacement | Budget-conscious owners | $20-$50 | Verify curvature matches OEM |
| Auto-Dimming | Night drivers, glare sensitivity | $80-$200 | Requires 12V power connection |
| Frameless Design | Modern aesthetics | $60-$120 | More fragile than framed versions |
| Integrated Dash Cam | Security-conscious drivers | $120-$400 | Check local recording laws |
| OEM Replacement | Factory specifications | $150-$500+ | Dealer markup can be significant |
Maintenance Tips for Longevity
- Clean Properly: Use ammonia-free glass cleaner applied to cloth first
- Avoid Hanging Weight: Dashboard cams/toll transponders add vibration stress
- Check Tightness: Quarterly, gently test mirror stability
- Park Smart: Use sunshade in extreme heat to reduce adhesive breakdown
- Winter Care: Never use ice scrapers near mounting area
The Final Reflection
Replacing a rear view mirror blends precision with practicality—a satisfying DIY project when approached methodically. While 75% of replacements follow the standard button-mount procedure, always respect the complexities of modern integrated systems. Remember: that mirror isn't just showing you what's behind; it's a carefully engineered safety component. Whether you choose a basic replacement or upgrade to smart mirror technology, proper installation ensures years of clear visibility. When in doubt, mobile glass services offer affordable expertise, often completing the job in under 30 minutes with professional-grade adhesives. Drive safe, see clearly, and may your rear view always show trouble fading into the distance.