

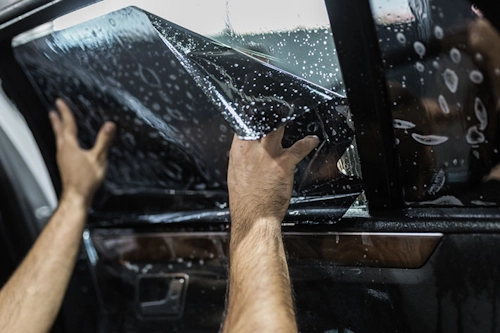
As someone who's breathed tire smoke for three decades, I'll let you in on a trade secret: Window tinting is the most cost-effective upgrade for both aesthetics and functionality. Done right, it transforms your driving experience - reducing glare, protecting interiors from UV damage, and giving your ride that sleek, mysterious edge. After tinting hundreds of windows from Detroit muscle cars to JDM legends, I'm sharing my battle-tested techniques to help you achieve professional results without the shop prices.
Why Tint? Beyond Just Looking Cool
Tinting isn't just for gangster movie replicas. Consider these benefits:
- UV Defense: Blocks 99% of skin-damaging UV rays
- Heat Reduction: Lowers cabin temperatures by up to 60%
- Glare Elimination: Reduces eye strain during dawn/drive drives
- Privacy & Security: Obscures valuables from prying eyes
- Interior Preservation: Prevents dashboard cracking and upholstery fading
The Golden Rule: Know Your Local Laws
Before cutting a single sheet, research your state/province regulations. Tint darkness is measured in Visible Light Transmission (VLT) percentage:
- California: 70% VLT front side windows
- New York: 70% VLT front, any darkness rear
- Texas: 25% VLT front side windows, 25% rear
- UK: 75% VLT front, 70% rear windshield
Medical exemptions exist in most regions - check DMV websites. Nothing ruins a perfect tint job like a "fix-it" ticket!
Battle-Proven Tools of the Trade
Gather these essentials before starting:
- High-quality tint film (Carbon or Ceramic recommended)
- Precision razor blades (10+)
- Hard card squeegees (blue and yellow edges)
- Soft felt squeegee
- Microfiber towels (5-7 lint-free)
- Spray bottles (2 minimum)
- Heat gun (professional grade)
- Slip solution (baby shampoo/distilled water mix)
- Application solution (isopropyl alcohol/distilled water)
- Olfa knife or precision cutter
- Lint roller
The Tinting Temple: Workspace Setup
Your environment makes or breaks the job:
- Dust Control: Work in a garage after wetting floors to settle dust
- Lighting: Use LED work lights at multiple angles to spot contaminants
- Temperature: Maintain 65-75°F (18-24°C) - cold film cracks, hot film over-adheres
- Vertical Space: Ensure clearance for full door opening
- Cleaning Station: Prep a separate table for film cutting
The Sacred Ritual: Step-by-Step Tinting Process
Phase 1: Surgical Cleaning (The Foundation)
I've seen more tint jobs fail here than anywhere else:
- Remove door panels to access window seals (prevents water damage)
- Scrape old adhesive with razor at 30-degree angle
- Spray application solution, scrub with steel wool (#0000 grade)
- Rinse with distilled water
- Wipe with 70% isopropyl alcohol
- Final pass with lint roller
Pro Test: Wipe with black glove - if any fibers appear, reclean!
Phase 2: Precision Templating
Modern cars have complex curves - here's how to conquer them:
- Cut film 2" larger than glass outline
- Spray exterior glass with slip solution
- Apply film to outside with liner facing out
- Use heat gun at 6" distance to shrink film to curvature
- Trace edges with sharpie using window seals as guides
- Cut inside lines with swivel knife
Phase 3: The Perfect Application
- Peel liner while spraying adhesive side with slip solution
- Flood glass interior with slip solution
- Position film starting from top edge
- Use hard card at 45° angle to push water toward edges
- Work top-to-bottom in overlapping "S" patterns
- Check for contaminants with angled light
- Trim final edges with 1/16" gap using hook blades
Phase 4: The Water Chase (48-Hour Battle)
This separates amateurs from pros:
- Hour 0-6: Squeegee every 30 minutes using vertical strokes
- Hour 6-24: Switch to soft squeegee every 2 hours
- Day 2: Morning and evening passes with microfiber wrapped card
Critical: Don't roll windows down for 3-5 days! Park facing south - solar heat accelerates curing.
Nuclear Mistakes to Avoid
After mentoring dozens of tint apprentices, these are the recurring nightmares:
- Death by Heat Gun: Holding heat source too close creates bubbles that never disappear
- Seal Butchery: Cutting film too close to edges causes peeling
- Fingerprint Apocalypse: Touching adhesive without latex gloves leaves permanent marks
- Chemical Warfare: Using ammonia-based cleaners destroys tint's UV coating
- Haste Makes Waste: Rushing the water chase results in "milkiness"
Maintenance for Decades-Long Performance
My personal Porsche 911 has had the same tint for 12 years. Here's how:
- First Month: Clean only with distilled water
- Long-Term: Use vinegar solution (1:4 vinegar/distilled water)
- Tools: Microfiber towels only - paper towels are abrasive
- Protection: Apply UV protectant to exterior seals annually
- Defrosters: Never scrape ice from tinted rear windows
When to Call Reinforcement
While I believe anyone can learn tinting, complex situations warrant professional help:
- Antique cars with brittle glass
- Modern windshields with embedded sensors/cameras
- Convertibles with frameless windows
- Severe contamination issues (hard water regions)
Window tinting is equal parts art and science. When you're driving down the highway with reduced glare and cooler cabin temperatures, you'll appreciate every minute invested. Remember: Patience isn't just a virtue in tinting - it's the law. Now go claim that automotive trophy you deserve!