

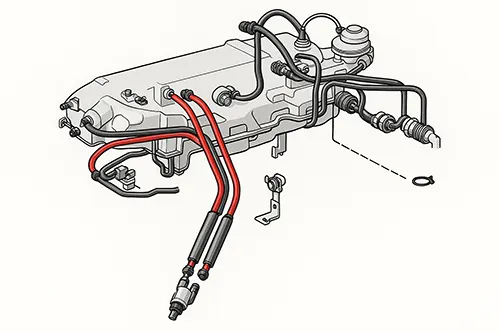
Read the diagram once
A vacuum diagram is not meant to be memorized—it’s meant to be followed. The fastest way to get lost is jumping between lines. Read it once from the vacuum source outward, then pick one branch and stay on that branch until it’s confirmed.
Mark vacuum source line
Start at the source (intake vacuum or pump) and physically find that hose on the vehicle. Put a small tape mark on it. That one mark prevents the classic mistake: testing a downstream branch while assuming the source is healthy.
Hand pump testing steps
- Use a handheld vacuum pump on one component at a time.
- Apply vacuum and watch for decay (a rapid drop usually means a leak in that component or its hose).
- Verify that valves flow in the correct direction (many are one-way).
- Write down what held vacuum and what didn’t—don’t rely on memory.
Smoke test the network
When the system has many branches, smoke is faster than guessing. Use low pressure and isolate sections by pinching/clamping hoses (gently) so you can narrow where smoke escapes. The key is to test one section, mark the leak, then move on—not to flood the whole network and chase ten wisps at once.
Common leak locations
- Elbows and tees: small cracks hide on the underside.
- Hard-to-see hoses: lines routed near heat sources age faster.
- Grommets and pass-throughs: leaks at the firewall or intake boots can mimic valve failure.
- Check valves: a stuck valve can look like a leak because vacuum won’t hold.
Routing labels that last
Label both ends of a hose if it crosses the engine bay. Use a simple scheme: “A1 ↔ A1”, “B2 ↔ B2”. It looks silly until you reinstall everything in 10 minutes instead of an hour.
After-repair idle checks
After fixing a leak, watch idle stability and throttle response. A vacuum leak fix often improves cold idle and reduces hesitation. If the symptom changes but doesn’t disappear, you may have more than one leak—or a control component that was compensating and is now exposed.
Emissions and driveability notes
Vacuum routing mistakes can create strange driveability issues (hesitation, rough idle) and emissions-related codes. If a fix makes the car “different but not better,” stop and compare your routing to the diagram again—one swapped line can undo hours of work.
Parts and hose sizing
Replace brittle hoses with the correct inner diameter. A hose that’s slightly loose will seal “today” and leak “next week.” If you need clamps, use small spring clamps rather than overtightening a worm clamp that cuts the hose.
Keep a test log
The practical difference between guessing and diagnosis is a log. Write: branch tested, result (held/didn’t hold), and next action. That makes a complicated diagram job feel linear.
Diagram habit that helps: circle each component you’ve physically located on the vehicle, then draw one check mark next to each hose you’ve verified end-to-end. It turns a messy bay into a completed checklist.
If you have multiple small lines, replace them in short sections rather than all at once. One wrong connection can mimic a vacuum leak and send you back to step one.
Pinch-test to isolate branches
If the diagram has many branches, isolate them one at a time. A gentle hose pinch (or a temporary clamp) can show whether a branch is responsible for an idle change. The key is to pinch briefly and only on hoses that can tolerate it—avoid damaging old brittle lines.
What to do when the diagram doesn't match
Sometimes a vehicle has been modified or a previous repair rerouted lines. If the diagram and reality disagree, step back and identify the vacuum source and the destination components first, then rebuild routing logically. Document your final routing with a photo so you don’t have to rediscover it next time.