

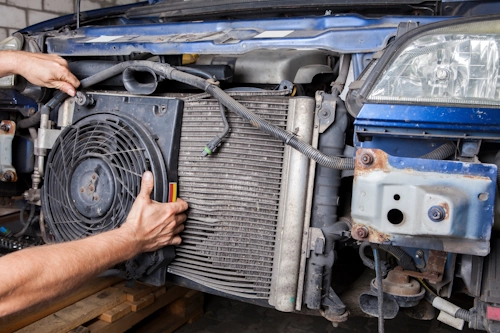
Why Your Radiator Matters More Than You Think
Your vehicle's radiator isn't just another component - it's the heart of your cooling system and the guardian against catastrophic engine failure. When internal combustion temperatures can soar beyond 3,600°F, this sophisticated heat exchanger stands between smooth operation and a melted engine block. Modern radiators work by circulating coolant through a network of precisely engineered tubes and fins, transferring engine heat to the atmosphere before returning cooled fluid to absorb more thermal energy. This continuous cycle maintains your engine at its optimal operating temperature, ensuring efficiency and longevity.
Despite their critical function, radiators often go unnoticed until trouble appears. Recognizing early warning signs like coolant puddles (typically pink, green, or orange), rising temperature gauges, or unexplained overheating episodes can save you from expensive engine repairs. When these symptoms appear, understanding radiator types and replacement procedures becomes essential knowledge for every car enthusiast.
Choosing Your Radiator: Material Matters
Not all radiators are created equal. The material composition dramatically affects performance, weight, and cost:
| Material Type | Best For | Pros | Cons |
|---|---|---|---|
| Plastic/Aluminum | Most modern passenger vehicles | Lightweight, affordable, corrosion-resistant | Limited performance upgrades, plastic tanks can crack |
| Full Aluminum | Performance vehicles, racing, towing | Superior heat transfer, durable, ideal for high-heat applications | Higher cost, sometimes requires custom fabrication |
| Copper/Brass | Classic cars, heavy-duty industrial use | Easier to repair, excellent thermal conductivity | Heavy, expensive, limited availability for modern vehicles |
For stock vehicles, an OEM-spec plastic/aluminum replacement offers the perfect balance. Performance enthusiasts pushing engines harder should consider upgrading to full aluminum units with increased thermal capacity. Copper/brass radiators remain popular for restorations where authenticity matters.
Flow Design: Crossflow vs Downflow
The direction coolant travels through your radiator significantly impacts efficiency:
| Design Type | Coolant Flow | Vehicle Applications | Performance Notes |
|---|---|---|---|
| Crossflow | Horizontally from side tank to side tank | Most modern vehicles | Lower profile allows hood design flexibility, superior cooling efficiency due to longer core exposure |
| Downflow | Vertically from top tank to bottom tank | Classic cars, older trucks | Simpler design, easier to fit in narrow engine bays, slightly less efficient than crossflow |
Crossflow designs dominate modern automotive engineering thanks to their lower profile and superior cooling efficiency. The horizontal layout allows coolant more contact time with cooling fins as it travels across the core rather than straight down. Downflow units remain popular with restorers working on vintage vehicles where maintaining original specifications is paramount.
Core Configurations: The Hidden Cooling Factor
Beneath those sleek end tanks lies the radiator core - the true heart of the cooling system. Core design dramatically impacts thermal efficiency:
- Single-Row Core: Single tube layer with extended fins. Adequate for stock engines with moderate cooling needs.
- Dual-Row Core: Two tube layers for increased coolant volume and surface area. Ideal for towing or high-temperature environments.
- High-Efficiency Single-Row: Uses wider tubes with turbulator technology to increase surface turbulence. Matches dual-row cooling in smaller packages.
While more rows generally mean more cooling capacity, modern aluminum cores achieve remarkable efficiency through advanced fin designs and larger tubes. Performance radiators often incorporate staggered tube layouts and louvered fins that create air turbulence, breaking up boundary layers that insulate tubes from cooling airflow.
Professional-Grade Replacement Protocol
Essential Tools & Safety Preparations
- Socket wrench set with extensions
- Hose clamp pliers (spring clamp and screw-type)
- Drain pan (minimum 2-gallon capacity)
- Jack stands or ramps
- Coolant vacuum refill kit (optional but recommended)
- Factory service manual for your specific vehicle
- Torque wrench (inch-pounds capacity)
- Safety glasses and nitrile gloves
- Coolant system pressure tester
Pro Tip: Never work on a hot cooling system! Coolant under pressure can reach temperatures exceeding 260°F - hot enough to cause third-degree burns instantly. Let your vehicle sit overnight or until the upper radiator hose feels cool to the touch.
Step-by-Step Replacement Procedure
- System Draining: Position drain pan under radiator petcock. Open drain valve and remove radiator cap to allow complete drainage. For integrated transmission coolers, expect additional fluid loss - have extra transmission fluid ready.
- Component Disconnection:
- Disconnect battery negative terminal
- Remove cooling fan electrical connector
- Detach upper and lower radiator hoses (inspect for deterioration)
- Label and disconnect transmission cooler lines (if equipped)
- Remove fan shroud mounting bolts
- Unbolt A/C condenser (support carefully without straining lines)
- Radiator Removal: Lift straight up with even pressure. Avoid twisting or prying against adjacent components. Note orientation of mounting isolators for proper reinstallation.
- New Radiator Installation:
- Transfer isolators and brackets to new unit
- Position carefully without forcing into place
- Reconnect transmission lines first (use new sealing washers)
- Reinstall A/C condenser brackets
- Reattach all electrical connectors
- Cooling System Refill:
- Use manufacturer-specified coolant type (HOAT, OAT, or IAT)
- Mix concentrate with distilled water to recommended ratio
- Fill radiator slowly to allow air pockets to escape
- Fill reservoir to "COLD FULL" mark
- Air Purging Procedure:
- Leave radiator cap off and start engine
- Run at 1500 RPM until thermostat opens (upper hose warms)
- Rev engine briefly to 2500 RPM to dislodge trapped air
- Top off coolant and install cap
Critical: Never use tap water in cooling systems! Minerals create scale deposits that insulate heat transfer surfaces and degrade corrosion inhibitors. Distilled water only.
Post-Installation Validation & Testing
Your job isn't complete until you've verified proper operation:
- Leak Check: Pressure test system to 15-18 PSI (specified on radiator cap). Inspect all connections with flashlight.
- Thermal Cycling: Run engine to operating temperature with heater on full blast. Verify both radiator hoses become equally hot.
- Road Test: Drive under varying loads - observe temperature gauge after highway climbs and extended idling.
- Follow-up: Recheck coolant level after 50 miles and again at 500 miles. Top off as needed as air pockets fully purge.
Monitor transmission operation carefully if you replaced a radiator with integrated cooler. Air pockets in cooler lines can cause shifting irregularities that usually resolve after several drive cycles.
Cost Analysis: DIY vs Professional Installation
Understanding the financial implications helps make informed decisions:
| Cost Factor | DIY Approach | Professional Service |
|---|---|---|
| Radiator Unit | $150-$400 (aftermarket) | $300-$600 (OEM) |
| Coolant & Supplies | $50-$100 | Included in service |
| Labor | Your time (4-6 hours) | $200-$800 |
| Warranty | Parts only (90 days-1 year) | 36-month comprehensive |
| Hidden Costs | Tool investment Potential mistakes | Shop supplies fee Diagnostic charges |
| Total Estimate | $200-$500 | $700-$1,000+ |
While DIY offers significant savings, professional installation brings expertise and warranty protection. For complex modern vehicles with tightly packed engine bays or integrated cooling modules, professional help often prevents costly mistakes.
Critical Mistakes That Can Ruin Your Engine
These catastrophic errors have destroyed more engines than failed radiators:
Cross-Threaded Transmission Lines: Aluminum radiator threads strip easily. Always start fittings by hand before applying wrench.
Inadequate Air Bleeding: Air pockets create hot spots that warp heads and blow head gaskets. Follow manufacturer bleeding procedures exactly.
Coolant Contamination: Mixing incompatible coolants forms sludge that blocks passages. Completely flush old coolant before converting types.
Over-Tightened Hoses: Cracked plastic necks from excessive clamp pressure leak under pressure. Snug clamps to 1/4 turn past resistance.
Fan Shroud Misalignment: Improperly positioned shrouds allow fan contact at high RPM. Verify 360° clearance before starting engine.
Performance Upgrade Opportunities
Replacement offers the perfect chance to upgrade cooling capacity:
- High-Density Cores: Replace single-row with dual/triple-pass designs for 30%+ capacity increase
- Upgraded Fans: Install dual electric fans with shroud for low-speed cooling
- Coolant Additives: Water wetter products reduce surface tension for improved heat transfer
- Oil Coolers: Add auxiliary coolers for engine/transmission to reduce radiator load
- Sealing Systems: Install radiator seal kits to direct airflow completely through core
For modified engines producing 20%+ over stock horsepower, upgrading radiator capacity isn't optional - it's essential insurance against heat-related engine failure. Larger cores with increased tube surface area and optimized fin density keep temperatures stable under maximum load.
Maintenance Secrets for Maximum Longevity
Extend your new radiator's lifespan with these professional practices:
- Coolant Replacement: Flush every 30,000 miles or 2 years (whichever comes first)
- Pressure Testing: Annually check system integrity before summer heat arrives
- Visual Inspections: Monthly checks for leaks, damaged fins, or debris accumulation
- Proper Concentration: Maintain at least 40% antifreeze concentration year-round
- Distilled Water Only: Prevent mineral scale that insulates heat transfer surfaces
Radiator life spans vary from 80,000 miles to over 150,000 with proper maintenance. Watch for early failure signs like fin corrosion, plastic tank discoloration, or sediment accumulation in the coolant reservoir.