

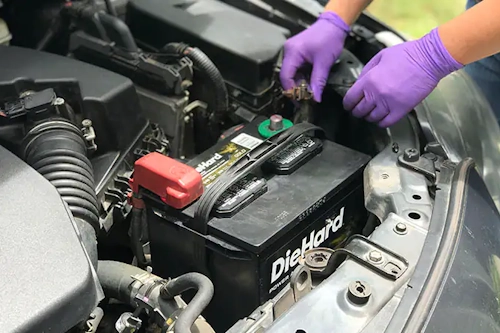
Replacing a car battery may look simple — remove the old one, drop in a new one, and drive off. Yet, modern vehicles are equipped with complex electrical systems and sensitive control modules that require care during battery disconnection and installation. This guide explains, step-by-step, how to safely replace a car battery, avoid electrical faults, and correctly reset onboard electronics afterward.
1. Understanding When to Replace a Battery
Most car batteries last between 3 to 5 years, depending on climate, driving habits, and the type of battery installed. Common signs of a weak or failing battery include:
- Sluggish engine cranking or delayed ignition response.
- Dim headlights, flickering dashboard lights, or warning messages like “Battery” or “Check Charging System.”
- Electrical accessories (radio, power windows, etc.) behaving erratically.
- Corrosion or leakage on the battery terminals.
Before purchasing a new battery, verify the specifications recommended by your vehicle manufacturer, including voltage (usually 12V), cold cranking amps (CCA), and physical dimensions that fit your battery tray.
2. Safety First: Preparing for the Replacement
Car batteries store significant electrical energy and release hydrogen gas, which can ignite under certain conditions. Follow these safety rules:
- Wear protective gloves and safety goggles.
- Work in a well-ventilated area away from sparks, flames, or smoking.
- Keep a 10mm wrench or socket, wire brush, and battery cleaner nearby.
- Turn off the ignition, remove the key, and ensure all electrical accessories are off.
Some vehicles use an intelligent battery sensor (IBS) or memory saver. Using a portable 12V memory saver plugged into the OBD port can help preserve radio codes, seat positions, and ECU adaptations while the battery is disconnected.
3. Step-by-Step Battery Removal
Let’s go through the process of safely removing the old battery:
- Locate the battery. In most vehicles, it’s under the hood; in some models (BMW, Audi, Mercedes), it may be in the trunk or under a seat.
- Disconnect the negative terminal first. Use a 10mm wrench to loosen the black (-) cable. Always start with negative to avoid short circuits.
- Disconnect the positive terminal. Loosen the red (+) cable carefully, avoiding contact with metal surfaces.
- Remove the hold-down clamp or bracket. Batteries are secured to prevent vibration. Remove bolts and lift the battery vertically. Note: a car battery can weigh 15–25 kg, so handle carefully.
- Clean the tray and terminals. Use a wire brush or contact cleaner to remove corrosion and dirt. Check cables for cracks or looseness.
4. Installing the New Battery
Installation is essentially the reverse of removal, but there are key precautions:
- Position the new battery correctly. Ensure the terminals are in the same orientation as the original battery (positive to positive, negative to negative).
- Secure the battery firmly. Use the original hold-down bracket to minimize vibrations — loose batteries can cause internal damage or short circuits.
- Connect the positive terminal first. Tighten the red (+) cable and check for firm contact.
- Connect the negative terminal. Tighten securely but avoid over-torquing.
- Apply terminal grease or petroleum jelly. This helps prevent oxidation and corrosion over time.
5. Restoring Onboard Electronics
After reconnecting the battery, modern vehicles often require certain electronic systems to be reinitialized. Depending on your model, you may need to:
- Reset clock and date — via infotainment or instrument cluster settings.
- Re-enter radio code — if the head unit is anti-theft protected.
- Calibrate power windows and sunroof — fully close and hold the switch for 3–5 seconds to reset limit positions.
- Steering angle sensor calibration — turn the steering wheel fully left and right, then drive straight for a short distance.
- Start-stop and battery management systems — some vehicles require registration of the new battery using diagnostic software (especially BMW, VW, Audi, Mercedes, Ford).
If warning lights remain on after installation, an OBD-II scanner can help reset or confirm system readiness.
6. Specific Notes for Popular Models
Here’s how the procedure differs slightly for certain common brands:
- BMW / Mini: The battery is located in the trunk. Always register the new battery via diagnostic software (ISTA or compatible tool) to ensure proper charging profile.
- Volkswagen / Audi: Similar to BMW, these models may store the battery under the trunk lining. Avoid disconnecting IBS sensors and register replacement with VCDS or ODIS tools.
- Toyota / Lexus: Simple top-mount setup. After replacement, reset the window limits and steering angle sensor if applicable.
- Ford: Some models trigger “battery management reset.” Use FORScan or a dealership tool to inform the ECU of the new battery’s capacity.
- Mercedes-Benz: Many models have an auxiliary battery (for start-stop). Replace both if error codes persist.
7. Post-Replacement Checks
Before driving off, verify the following:
- All terminal connections are tight and clean.
- No warning lights remain illuminated on the dashboard.
- Headlights, interior lights, and infotainment function normally.
- Voltage reading (with the engine running) is around 13.8–14.4V — indicating that the alternator is charging correctly.
If voltage stays below 13V, inspect the alternator, belt, or fuse connections — low charging voltage can destroy even a new battery.
8. Extending the Life of Your New Battery
To ensure maximum lifespan and performance:
- Keep terminals clean and check for corrosion every few months.
- Avoid frequent short trips — the alternator may not fully recharge the battery.
- Use a smart charger if your car is parked for long periods.
- Check voltage regularly using a multimeter — healthy voltage at rest should be around 12.6V.
- Replace the battery proactively every 4–5 years or when capacity drops below 70%.
9. Common Mistakes to Avoid
- Disconnecting the positive terminal first — this can cause sparks or ECU damage.
- Mixing up terminal polarity — always double-check before tightening clamps.
- Skipping registration for vehicles that require it — can lead to undercharging or warning lights.
- Leaving metal tools on the battery — risk of short circuit or explosion.
- Overtightening clamps — can crack the battery posts or damage cables.
10. Conclusion
Replacing a car battery today is more than a simple mechanical task — it’s an electrical operation that affects the entire onboard system. Following safety procedures, using the correct tools, and reinitializing your vehicle’s electronics ensures smooth operation and prevents future faults. Whether you own a compact city car or a premium sedan, careful battery replacement will save you both time and costly repairs.
By understanding your car’s electrical architecture and handling the replacement with precision, you maintain not only the battery’s health but the stability of the entire vehicle network that depends on it.