

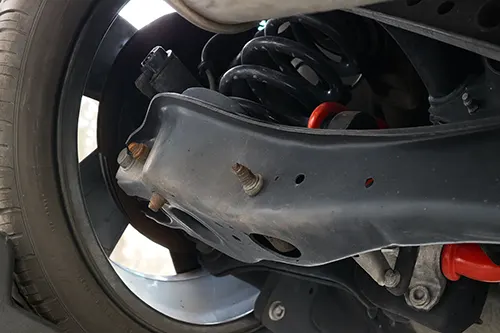
Few things ruin the driving experience like a mysterious clunk coming from the rear of your vehicle. You hit a small bump—a pavement crack, a manhole cover, a gravel transition—and thunk. It’s not a violent crash, just a dull, annoying knock that makes you question your suspension’s health. Is it a worn sway bar link? A failing shock mount? Or simply that forgotten water bottle rolling under the seat? As someone who has chased chassis noises across decades of shop floors, I can tell you: the rear end clunk over small bumps is often misdiagnosed, leading to expensive part swaps that don’t solve the problem. This article delivers a practical, step-by-step isolation plan to pinpoint the culprit without guesswork.
Understanding the Usual Suspects: Why Small Bumps Expose the Problem
Large potholes and speed bumps tend to create a heavy “thud” or bottoming-out sound. But small, sharp bumps are different—they generate high-frequency, low-amplitude vibrations that expose any play or looseness in the rear suspension. The classic trio of suspects includes:
- Sway bar links (stabilizer links): Small, ball-joint-ended rods that connect the sway bar to the control arm or axle. When their sockets wear, they produce a distinct metallic rattle or clunk over uneven pavement.
- Shock mounts / upper strut mounts: The rubber-isolated top attachment point of the shock absorber. Dried, cracked, or separated rubber allows metal-to-metal contact over sharp bumps.
- Loose cargo or interior components: The most overlooked cause—a jack, spare tire tools, or even a loose rear seat latch can mimic suspension noise perfectly.
Other possible causes include worn trailing arm bushings, exhaust hangers, or loose spare tire winches, but the three above account for over 80% of “clunk over small bumps” complaints. Let’s build a logical isolation plan to identify which one is haunting your ride.
The Practical Isolation Plan: Step by Step
This plan requires no special tools initially—just a quiet road, a helper, and basic hand tools for later steps. Perform each test in order, and don’t skip steps.
Step 1: Eliminate Loose Cargo and Interior Noise (Zero-Cost Check)
Before touching any suspension component, empty your trunk, cargo area, and rear seat pockets completely. Remove the spare tire, jack, and tool kit. Fold down rear seats and check that seat latches are tight (many vehicles have known issues with rear seat latch clunks). Drive over the same bumpy road. If the clunk disappears, you’ve found the cause. Reintroduce items one by one to isolate the offender.
Pro tip: A loose exhaust heat shield or a dangling trailer hitch receiver can also produce a clunk. Give the exhaust a firm shake from the rear—listen for contact with bodywork or crossmembers.
Step 2: The Bounce Test (Listen for Abnormal Noises)
With the vehicle parked on level ground, push down firmly on each rear corner of the bumper. Release and let the suspension rebound. A healthy shock/strut will settle in one or two cycles with no noise. If you hear a metallic click or clunk during compression or rebound, suspect a worn shock mount or a loose shock absorber bolt. Perform this test on both sides and compare.
Step 3: Visual and Movement Inspection of Sway Bar Links
Jack up the rear axle (use jack stands for safety). Locate the sway bar—a steel rod running side-to-side, connected to the chassis via bushings and to the suspension via end links. Grab each sway bar link and try to move it by hand. There should be zero play. Any rotational or axial movement indicates a worn ball joint inside the link. Also inspect the rubber boots: torn boots lead to dirt intrusion and rapid wear.
For a more precise test, use a large pry bar to gently apply leverage between the link and the control arm. Even 1-2mm of movement is enough to cause a clunk over small bumps.
Step 4: Shock Mount and Upper Nut Inspection
Still under the vehicle, trace the top of each rear shock absorber. In many cars (especially independent rear suspensions), the shock mounts to a stud or bolt through a rubber-isolated bracket. Common failure modes:
- Loose top nut: Often accessible from inside the trunk or wheel well. A loose nut allows the shock shaft to move axially, creating a sharp clunk.
- Cracked rubber isolator: Look for dry rot, tears, or the metal sleeve separating from rubber.
- Missing or damaged washers: Some designs use specific cupped washers; if they’re missing, the mount cannot preload properly.
Test method: With the suspension unloaded (axle hanging on jack stands), grip the shock body and attempt to move it side-to-side and up-down. Any clunk or excessive free play points to the mount. Then, lower the vehicle slightly to load the suspension and re-test—sometimes the noise only appears under load.
Step 5: The Road Test with Variable Load (The Ultimate Confirmation)
If steps 1-4 didn’t reveal obvious damage, perform a controlled road test:
- Drive over a known bumpy road (a parking lot with speed bumps or a residential street with patched pavement). Note the character of the clunk: single thud vs. multiple rattles, metallic vs. rubbery.
- Repeat the same route with the sway bar disconnected. On most vehicles, you can unbolt one end of each sway bar link and wire the sway bar up out of the way. If the clunk disappears, the sway bar links or sway bar bushings are at fault.
- If the clunk remains, reattach the links. Then, temporarily remove the rear shocks (drive very slowly around a parking lot only – the vehicle will have almost no damping). If the clunk goes away, the shock or its mount is the issue.
Safety warning: Never drive without shocks at highway speeds. Use this test only at low speeds (under 10 mph) for a short distance to isolate noise.
Comparative Diagnosis Table: Sway Bar Link vs. Shock Mount vs. Loose Cargo
| Characteristic | Sway Bar Link | Shock Mount | Loose Cargo / Interior |
|---|---|---|---|
| Typical Noise | Metallic rattle or sharp clunk, often both sides or alternating | Single, dull thud or "thunk" over sharp bumps; sometimes a squeak | Varies – plastic-on-metal, rolling, or a single knock |
| Frequency | Multiple small bumps = rapid series of clunks | One clunk per bump, consistent | Random; may shift with vehicle motion |
| Affected by turning? | Yes – clunk may occur when one wheel hits a bump while cornering | No – bumps straight or turning produce same sound | No – but lateral forces may shift cargo |
| Visual signs | Torn rubber boot, grease leakage, obvious play when pried | Cracked rubber, rust around top nut, loose nut | None – but empty trunk test confirms |
| Bounce test result | Usually silent; sometimes click if severely worn | Clear clunk or metal-on-metal sound | Silent |
Beyond the Big Three: Other Potential Culprits
If you’ve isolated away from sway bar links, shock mounts, and cargo, consider these less common but still possible causes:
- Trailing arm bushings: Especially on multi-link rear suspensions. Worn bushings allow the control arm to move fore-aft, clunking as it hits its stop.
- Exhaust system movement: Broken hangers let the exhaust pipe contact the rear axle or subframe. Use a rubber mallet to tap the exhaust while parked—listen for metallic contact.
- Spare tire winch mechanism: A loose spare tire can bounce on its cable. Tighten the winch and verify the spare is secure.
- Rear differential mount (RWD/AWD): If your vehicle has a solid rear axle, a worn differential bushing can cause a clunk when the axle rotates slightly over bumps.
- Brake caliper slide pins: Rare, but a severely worn caliper can rattle over small bumps. Check by kicking the tire at 9 and 3 o’clock—a rattle indicates caliper or pad movement.
DIY Repair Tips: Fixing the Most Common Culprits
Once you’ve identified the source, here’s how to address each:
Replacing Sway Bar Links
Sway bar links are inexpensive and straightforward. Use a hex key or Allen socket to hold the stud while loosening the nut. Apply anti-seize to the threads of the new link. Torque to manufacturer specification (typically 30-50 lb-ft). Always replace in pairs—if one side is worn, the other isn’t far behind.
Fixing Shock Mounts
Upper shock mounts vary by vehicle. On many sedans, you can access the top nut through the trunk after removing trim panels. If the rubber is cracked, replace the entire mount assembly (or the shock with pre-assembled mount). Use a torque wrench and never over-tighten the center shaft nut—it can damage the shock’s internal valving.
Securing Loose Cargo
For loose tools, wrap them in a microfiber cloth and store them in a dedicated organizer. Check rear seat latch mechanisms—a zip tie or a wrap of electrical tape around the striker can silence a rickety seat. Also inspect the spare tire hold-down bolt: many clunks come from an under-tightened spare.
When to Seek Professional Help
While the isolation plan above empowers most DIYers, some scenarios warrant professional attention:
- Structural rust or broken mounting brackets – welding or bracket replacement may be needed.
- Internal shock failure – if the shock mount is fine but the shock itself is making noise (rare), replacement is still straightforward but may require spring compressors on some vehicles.
- Subframe or chassis cracks – more common on older vehicles in salt-belt regions. A professional inspection is essential for safety.
Preventive Maintenance: Keeping the Rear End Quiet
The best repair is prevention. Add these tasks to your annual or 30,000-mile service:
- Inspect sway bar link boots for cracks – replace proactively every 60k miles.
- Check shock absorber upper nuts for proper torque (use a service manual for specs).
- Lubricate sway bar bushings with silicone grease if they start to squeak.
- Every time you rotate tires, give each rear suspension component a firm shake to detect developing play.
Conclusion: Methodical Diagnosis Saves Time and Money
A rear end clunk over small bumps is rarely a mystery once you apply a logical isolation plan. Start with the simplest possibility—loose cargo—and work your way toward suspension components. Use the bounce test, visual inspection, and the sway bar disconnect method to differentiate between sway bar links, shock mounts, and other suspects. Remember that small bumps are the ultimate test for loose connections because they create rapid, low-energy inputs that expose any free play. By following the steps outlined here, you’ll avoid the common trap of replacing parts at random and instead fix the actual problem on the first try. Now go enjoy a quiet, clunk-free ride.
Final safety note: Always support your vehicle with jack stands when working underneath. Never rely on a hydraulic jack alone. If you’re unsure about any diagnostic step, consult a professional mechanic—chasing noises isn’t worth compromising your safety.