

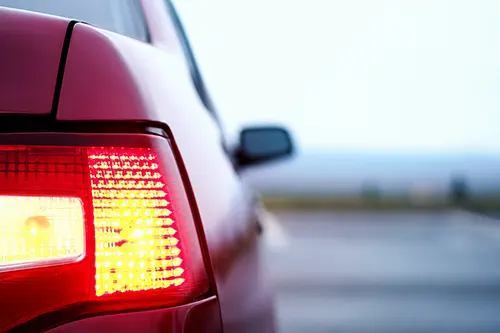
You signal for a lane change, and suddenly your blinker sounds like a machine gun – click-click-click-click at double the normal speed. The dashboard indicator flashes wildly, and the exterior bulb on one side strobes like a police light. This phenomenon, commonly called “hyper-flashing” or “rapid flash,” isn’t just annoying; it’s your vehicle’s way of telling you something is wrong with the turn signal circuit on that side.
After three decades of turning wrenches and diagnosing electrical gremlins, I’ve seen this issue hundreds of times. Most drivers immediately blame the bulb. And often, they’re right – but not always. The real culprits usually fall into three categories: incorrect electrical load (bulb type or failure), poor ground connection, or heat-damaged socket. Let’s break down each one so you can stop guessing and start fixing.
Why Hyper-Flash Happens: The Flasher Relay’s Logic
Before diving into diagnosis, understand how your turn signal system works. Traditional vehicles use a thermal flasher relay or an electronic flasher module. The thermal type relies on current draw from the bulbs to heat a bimetallic strip, which bends, breaks contact, then cools and reconnects – creating the blink. If one bulb burns out or has lower resistance (like an LED), the current drops, the strip doesn’t heat enough, and it cycles much faster. Electronic flashers are smarter: they monitor load and speed up the flash specifically to warn you of a bulb failure. Newer cars with body control modules (BCMs) do the same digitally.
The golden rule: When one side flashes faster than the other (or both sides flash fast), the system is detecting a reduction in electrical load on that circuit. The faster flash is a warning, not a malfunction of the flasher itself. Your job is to find what reduced the load – or, less commonly, what created an intermittent path (bad ground) that mimics low load.
Cause #1: Bulb Load Mismatch – The Most Common Offender
Let’s start with the obvious: a burned-out bulb. On a two-filament bulb (1157, 3157, etc.), one filament is for the turn signal, the other for the parking light. If the turn signal filament breaks, the total circuit resistance increases (less current flow), causing hyper-flash. Check the bulb visually – look for a broken filament or blackened glass.
The second, and increasingly frequent, cause is LED retrofit bulbs. LED turn signals draw only 10-20% of the current of a standard incandescent bulb (e.g., 0.2 amps vs. 2.1 amps). The flasher relay sees this as a “missing bulb” and triggers rapid flash. This is not a defect – it’s physics. You can fix it by:
- Adding load resistors (6-ohm, 50-watt) in parallel with each LED bulb to mimic incandescent current. Splice them between the positive and ground wires. Be aware: resistors get hot – mount them on metal surfaces away from plastic.
- Replacing the flasher relay with an LED-compatible (electronic) flasher. This works for older vehicles with separate flasher cans. Newer cars with BCM often require resistors or programming.
- Choosing “CAN-bus ready” LED bulbs that have built-in resistors – though they still generate heat and are less reliable than external resistors.
Also check for incorrect bulb type – using a single-filament bulb where a dual-filament belongs, or wrong wattage. Always consult your owner’s manual or the bulb’s base markings.
Cause #2: Bad Ground – The Sneaky Intermittent Culprit
Poor ground connections cause all kinds of electrical chaos. Turn signals rely on a clean ground path from the socket to the chassis. When the ground corrodes, loosens, or rusts, the circuit struggles to complete. The flasher may see fluctuating resistance – sometimes working, sometimes not – and often triggers hyper-flash or erratic blinking.
How to spot a bad ground:
- The fast flash occurs only intermittently or when you hit a bump.
- The bulb may glow dimly or not at all, even though the filament looks fine.
- Other lights on the same corner (parking, brake) also act weird – dimming or flickering when the turn signal is on.
- You see greenish-white crusty corrosion on the socket terminals or on the ground screw/bolt.
Fix: Disconnect the battery negative terminal. Remove the taillight or headlight housing. Locate the black ground wire attached to the chassis – usually a ring terminal under a screw. Remove the screw, clean the ring and chassis contact area with a wire brush or sandpaper until shiny. Apply dielectric grease (a thin smear) and reattach tightly. Also clean the socket’s metal base and the bulb’s contact points. Reassemble and test.
Cause #3: Socket Heat Damage – The Silent Killer
Over years of use, especially with higher-wattage bulbs (like 21W turn signals), the plastic socket and wiring connectors experience thermal stress. The constant heating and cooling cycles cause:
- Melting or warping of the socket housing, which prevents the bulb from seating properly or creates intermittent contact.
- Carbonized (burnt) terminals – a black, crusty layer on the metal contacts that increases resistance.
- Brittle, cracked insulation on wires near the socket, leading to short circuits or opens.
Heat damage often goes unnoticed until hyper-flash appears. Unlike a bad ground, heat damage is permanent and tends to affect only one socket. Inspect the socket closely: look for melted plastic, discoloration, or burnt smell. Check the connector pigtail for stiffness or cracking.
Fix: Minor carbon deposits can be scraped off with a small pick or fine sandpaper, then treated with dielectric grease. However, if the plastic is deformed or terminals are loose, replace the entire socket. Many vehicles have replaceable pigtail sockets (e.g., Dorman, Standard Motor Products) that you splice into the existing harness. Use heat-shrink butt connectors or solder and wrap with high-temperature tape. Avoid cheap twist-on wire nuts in automotive applications.
Less Common Causes: Don’t Overlook These
While the big three account for 95% of hyper-flash problems, a few other gremlins exist:
- Corroded or loose fuse box terminals – The flasher relay or BCM receives poor power or ground. Check the turn signal fuse and its socket.
- Damaged turn signal switch (multi-function switch) – Internal contacts wear out, causing high resistance on one side. Test by wiggling the turn signal stalk while listening for changes.
- Water intrusion – Moisture inside the lens housing corrodes the socket. Drill a tiny weep hole at the lowest point of the housing if sealing is poor.
- Aftermarket trailer wiring – Poorly installed T-connectors or damaged converter boxes can add extra load or create ground loops. Disconnect trailer harness to test.
Step-by-Step Diagnostic Guide
Follow this logical flow to pinpoint the exact issue without throwing parts at the problem:
| Step | Action | What to look for |
|---|---|---|
| 1 | Turn on hazard lights (both sides flash simultaneously). | If both sides flash fast, the flasher relay or BCM may be faulty – but check all bulbs first. If only one side flashes fast, problem is isolated to that side’s circuit. |
| 2 | Visually inspect the hyper-flashing side’s bulb. | Broken filament? Black glass? If yes, replace bulb with correct type. If filament is intact, proceed. |
| 3 | Swap the bulb from the working side to the fast-flashing side. | If the problem moves to the other side, the bulb is the issue (even if it looks fine – sometimes internal resistance is off). If the problem stays, it’s the socket, ground, or wiring. |
| 4 | Remove bulb, inspect socket for corrosion, melting, or carbon. | Any visible damage? Clean or replace socket. Use a multimeter to check for 12V at the center contact when signal is on, and continuity to ground on the shell. |
| 5 | Check ground connection. | Find the black wire from the socket – follow it to chassis. Clean the contact area. Measure resistance from socket shell to battery negative – should be under 0.5 ohms. |
| 6 | Test with a standard incandescent bulb if you’re using LEDs. | Remove LED, install a known-good incandescent. If flash returns to normal, you need resistors or an LED flasher. |
Prevention Tips: Keep Your Blinking Healthy
Once you’ve fixed the hyper-flash, take these steps to avoid repeat failures:
- Use dielectric grease on every bulb socket and connector. It prevents corrosion and eases future bulb changes.
- Upgrade to an electronic flasher if your car uses a thermal one – even with stock bulbs, it provides more consistent blink rates and won’t hyper-flash due to minor load variances.
- Inspect sockets annually, especially if you live in a wet or snowy climate. Pull bulbs, clean terminals, and check for early signs of heat stress.
- If you retrofit LEDs, do it properly – use load resistors rated for at least 50 watts, mount them to metal with thermal paste, and never let them touch plastic wiring looms.
- Address any moisture in the lens housing – replace cracked lenses or reseal with butyl tape. Water and electricity don’t mix.
Final Thoughts: Don’t Ignore the Fast Flash
That rapid clicking isn’t just an annoyance – it’s a built-in diagnostic system. Ignoring it leaves you with a non-functional turn signal on one side, which is both illegal and dangerous. The fix is often simple and cheap: a $3 bulb, 10 minutes of cleaning a ground, or a $15 resistor kit. Even replacing a melted socket costs under $30 and takes an hour of DIY time.
From my years behind the wheel and under the hood, I’ve learned that turn signal issues are rarely the flasher relay itself. Nine times out of ten, it’s at the corner that’s blinking too fast. Start your diagnosis there, and you’ll have normal, safe signals in no time.
Remember: Always disconnect the battery before working on any electrical component. Use a test light or multimeter to verify circuits. And when in doubt, consult your vehicle’s service manual for specific wiring diagrams and flasher locations. Safe driving starts with signals the way they were meant to be – steady, predictable, and working correctly.