

Want to add or fix fog lights on your Subaru Forester (2014–2018)? Whether you're installing an aftermarket kit or replacing failed OEM fogs, this guide covers wiring harness routing, switch placement, and the relay setup that prevents headlight circuit overload.
Owner's case
Paul's 2016 Forester 2.5i base trim came without fog lights; he wanted to add them for winter driving. He bought an OEM fog light kit but wasn't sure about wiring integration and switch mounting.
OEM vs aftermarket fog kits
- OEM kit: plug-and-play harness, pre-wired switch bezel, relay included; ~$250–400. Fits perfectly, no cutting.
- Aftermarket: universal or Forester-specific; ~$80–200. May require splicing and custom switch mounting.
Forester-specific wiring
The OEM harness on Forester has provisions for fog lights even on base trims:
- Connector behind the bumper (driver's side) is often present but capped.
- Relay socket in the fuse box (engine bay) may have the relay or just an empty slot.
- Switch bezel: the dash panel has a blank where the fog switch goes (pop it out, install OEM switch).
Installation, step by step (OEM kit)
- Remove front bumper (6 clips top, 4 screws underneath, 2 in wheel wells)—takes 20 minutes with care.
- Mount fog lights in bumper brackets; route harness to the capped connector.
- Plug in harness; verify polarity and locking tabs.
- Install relay in fuse box per kit instructions.
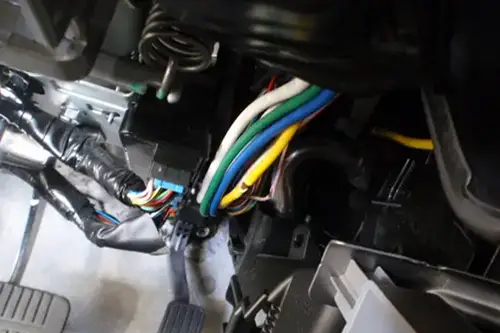
- Pop out dash blank; install fog light switch; connect to harness behind the dash.
- Reinstall bumper; test fogs (they should activate with low beams, not high beams).
Aftermarket install notes
- Tap power from low beam circuit via relay—do NOT run fogs directly through the headlight switch.
- Ground near fog light mounting point; verify with a test light.
- Switch: dash-mount toggle or OEM-style blank replacement (cleaner look).
Paul's outcome
Installed OEM fog kit in 3 hours; harness plugged in perfectly; switch fit the dash blank. Fogs work as designed; no electrical gremlins. Total: $320 kit, DIY install.
Tools
- Trim tools for bumper clips, T25/T30 Torx, Phillips screwdriver
- Test light, multimeter, wire strippers if splicing
- Zip ties, electrical tape
For Forester fog light wiring diagrams and OEM kit part numbers
Check Subaru 7zap: subaru.7zap.com.
Common mistakes
- Wiring fogs to high beam circuit—they won't work with low beams (unsafe).
- No relay—overloads headlight switch, causes failure.
- Skipping bumper removal and trying to "fish" wires—takes longer and looks messy.
Aim adjustment after install
- Park 25 feet from a wall; measure fog light center height on the car.
- Mark the wall at the same height; turn on fogs.
- Adjust aim screws (usually on fog housing) until hotspot is slightly below and to the right of the mark.
Result: Paul's Forester now has clean, factory-looking fog lights that improve visibility in snow and rain—no messy wiring, no overloaded circuits.
Paul's aim adjustment detail
- Fogs aimed too high initially—adjusted screws on housing (typically one horizontal, one vertical).
- Final aim: hotspot ~2 inches below and right of center mark at 25 feet.
- Verified no glare in oncoming driver's eyes during a parking lot test.
Practical section
- Do fogs help in rain? Yes—low mounting reduces glare off raindrops vs high beams.
- Can I wire to DRLs? Technically yes, but fogs with DRLs burn in daytime—shortens bulb life.