

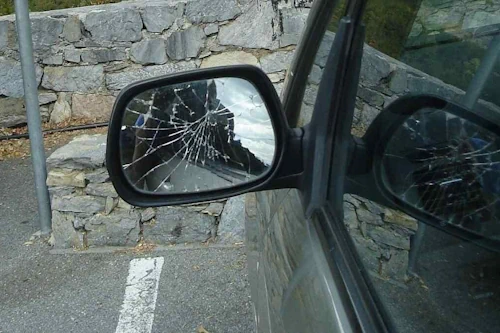
Why DIY Mirror Replacement Makes Sense
A broken side mirror isn't just an eyesore – it's a safety hazard that can lead to costly tickets. While insurance might cover repairs, most claims fall below deductibles, making DIY replacement the smart choice (average cost: $51–100). Modern aftermarket mirrors come pre-painted using factory color codes, eliminating dealership markups.
Tools & Materials You'll Need
- 4-in-1 screwdriver set
- Trim panel removal tools ($10–20 at auto shops)
- Hooked pick for hidden screws
- Replacement mirror assembly
- Automotive touch-up paint (if unpainted)
The 5-Step Replacement Process
1. Access Hidden Fasteners Like a Pro
Start by removing decorative vanity caps (DVCs) with a hooked pick – these often hide critical screws in armrests, door handles, or speaker grilles. Power mirrors require door panel removal: use a trim tool to pop out Christmas tree fasteners without damaging clips.
2. Mirror Assembly Removal
Locate 3–4 mounting screws inside the door frame. For power mirrors, disconnect the electrical connector carefully – no need to disconnect the battery unless specified in your vehicle manual.
3. Install & Test New Mirror
Before reassembly:
- Test mirror adjustments
- Check heating elements (if equipped)
- Verify blind-spot monitoring functionality
4. Reassemble Door Components
Use a rubber mallet to reseat trim fasteners. Automotive expert Chris “Moose” Pyle advises: "Never force panels – if something doesn’t fit, you’ve missed a fastener".
Critical FAQs Answered
| Question | Expert Answer |
|---|---|
| Can I drive temporarily? | Remove loose pieces, but repair immediately – 37% of lane-change accidents involve mirror issues |
| Mirror glass vs full assembly? | Full assembly replacement is 3x faster and avoids motor damage risk |
| Paint matching tips | Use factory color code (found in door jamb) and apply 2–3 light coats |
Pro Tips from 45-Year Auto Veteran
- Avoid Breaking Clips: Heat trim panels with a hairdryer in cold weather
- Document Disassembly: Take phone photos at each step
- Upgrade Opportunity: Consider adding turn signals or auto-dimming features
When to Call a Professional
While most replacements take 2–4 hours, seek help if:
- Your vehicle has lane-assist cameras
- Wiring harness shows corrosion
- Door airbags are present (common in luxury models)
Future-Proof Your Mirrors
Emerging technologies like:
- Collapsible mirror designs (prevents breakage)
- Self-healing coatings (repairs minor scratches)
- Camera-based virtual mirrors