

Leak symptoms worth chasing
An exhaust leak is rarely “just noise.” The useful clues are when it happens: a sharp tick on cold start, a hiss under load, a smell near the cabin at idle, or a noise that changes when you blip the throttle. Those patterns tell you where to look and whether the leak is upstream (hotter, sharper) or downstream (deeper, sometimes droning).
Safety: fumes and heat
Do this outside or in a well-ventilated space. Exhaust components get dangerously hot fast, and fumes are not a joke. Keep hands, sleeves, and tools away from rotating parts. If you need to raise the car, use stands—no shortcuts.
DIY smoke setup
You don’t need a commercial smoke machine for a basic hunt. What matters is low pressure and visible smoke. Many DIY setups use a small smoke source and a hose, but the rule is the same: do not pressurize the exhaust aggressively. Too much pressure can push smoke out of joints that don’t leak under normal flow and send you on a false chase.
Low-pressure smoke technique
- Start with a cold system if possible (safer and easier to work around).
- Introduce smoke at a convenient point and block the tailpipe lightly so smoke moves through joints.
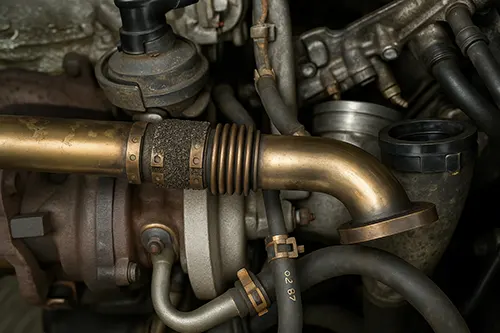
- Watch flanges, gasket seams, flex sections, and welded cracks.
- Mark the exact leak point with chalk or a paint pen.
Soap-and-listen cross-check
Smoke is great, but confirm it. A light soap-water spray at a suspected seam can show bubbling when the system pulses. Also use your ears: a thin leak often sounds like a sharp “tss-tss” near the source, while a larger leak becomes a harsher chuff.
Flange and gasket fixes
If the leak is at a flange, the fix is often boring: clean mating surfaces, correct gasket, and even tightening. Over-tightening one side can warp a flange. If hardware is rusted, replacing fasteners can be the difference between a one-time repair and a recurring leak.
Cracks and flex joints
Flex joints can leak at the braid or at their welded ends. Cracks often appear at weld transitions and hanger points where vibration concentrates. If the crack is in a thin section, patching can be temporary; replacing the section is usually the durable answer.
Cold start retest
After repair, do a cold-start listen test. Many leaks are loudest in the first 30 seconds. Then recheck after a short drive, because heat expansion can reopen a marginal seal if hardware wasn’t seated evenly.
Cost and time reality
- Diagnosis time: 20–60 minutes depending on access and rust.
- Repair time: gasket/flange work can be quick; cut-and-replace sections take longer.
- Budget note: rusted hardware is often the real cost driver, not the gasket itself.
Mistakes that waste hours
The big time-waster is chasing smoke that appears only because you over-pressurized the system. Keep smoke pressure gentle, confirm with a second method, and mark the leak before you pick up tools.
Practical tip: if you suspect a manifold-to-head leak, listen at cold start with a length of hose held near your ear (keep clear of belts). A sharp tick near the flange that fades as metal expands is a strong clue.
Rust reality: if a flange bolt snaps, don’t keep tightening the remaining hardware hoping it seals. Plan the extraction/repair first, otherwise the leak becomes worse and you’ll redo the gasket anyway.
Where leaks hide most often
On real cars, the frequent hiding spots are flange corners, flex joint braids, and weld transitions near hangers. If the noise gets sharper when you snap the throttle, check closer to the engine. If it’s a deeper puff, check further downstream. This simple ‘tone map’ narrows the search fast.
After-repair sanity check
After the fix, do two checks: a cold-start listen test and a short warm drive, then recheck hardware. Heat cycling can loosen a fastener that felt tight cold. If the leak returns only when hot, suspect flange flatness or a gasket that shifted during tightening.