

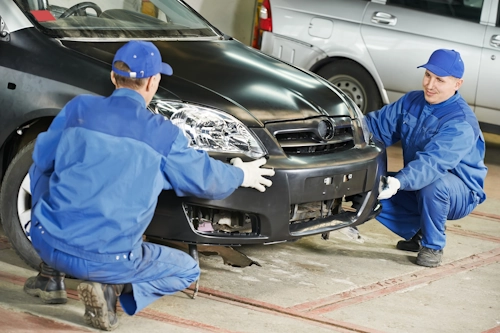
The Pro's Toolbox: Essential Equipment for Bumper Surgery
Skip the frustration of makeshift solutions. These are the tools I keep in my bumper repair kit:
| Tool | Purpose | Pro Alternative |
|---|---|---|
| Trim Removal Kit | Prying without paint damage | Nylon pry bars |
| Jack Stands (2 pairs) | Safe access to undercarriage | Vehicle lift |
| Plastic Welding Kit | Repairing torn mounting tabs | Professional plastic welder |
| 3M VHB Tape | Temporary hold during alignment | Automotive adhesion promoter |
| Bumper Bracket Kit | Reinforcing weak points | Custom-fabricated brackets |
Step-by-Step Bumper Resurrection: A Professional Approach
Stage 1: Safe Removal & Damage Assessment
- Elevate Securely: Drive onto ramps or lift with floor jack, supporting with stands at frame points - never trust a jack alone.
- Undo Hidden Fasteners: Remove wheel well liners using trim tools. Most bumpers have 8-12 hidden screws here.
- Unplug Electronics: Disconnect fog lights, parking sensors, or wiring harnesses before fully separating bumper.
- Damage Triaging: Lay bumper on moving blankets. Identify:
- Cracked mounting tabs (60% of failures)
- Bent reinforcement bar
- Deformed plastic retainers
- Corroded brackets
Stage 2: Repair Techniques Based on Damage Type
A. Plastic Tab Reconstruction (Most Common):
- Clean broken area with plastic-prep solvent
- Butt-weld cracks using plastic welding iron at 350°F
- Back with aluminum mesh embedded in molten plastic for reinforcement
- Shape with soldering iron tip to match OEM contours
B. Bracket Replacement:
- Grind off rusted rivets with Dremel cutting wheel
- Test-fit replacement bracket before final install
- Secure with automotive-grade bolts (M6 or 1/4") + threadlocker
- Apply corrosion inhibitor to new hardware
C. Impact Absorber Reset:
- Remove crushed energy absorber (usually 4 bolts)
- Place in bench vise and slowly compress further
- Heat with heat gun at 400°F for 90 seconds to "reset" foam memory
- Reinstall immediately before it cools
Stage 3: Precision Reinstallation & Alignment
- Dry-fit bumper without fasteners to check gaps
- Temporarily secure with painter's tape along fender lines
- Install from center outward - never corner-first!
- Torque bolts to factory spec (usually 8-12 ft-lbs) using crisscross pattern
- Check gaps with 5mm feeler gauge - should slide evenly along entire seam
- Test fitment by opening/closing adjacent doors and hood
Pro Secrets for Invisible Repairs
- The Toothpick Trick: Insert wooden toothpicks into stripped screw holes, snap off flush, then reinstall screw - creates instant grip in plastic.
- Thermal Expansion Hack: Park car in direct sunlight before reinstallation - warm plastic is more flexible and forgiving during alignment.
- Magnetic Alignment: Tape neodymium magnets to fender edges to "float" bumper into perfect position before fastening.
- Dielectric Grease Defense: Coat electrical connectors with silicone grease to prevent future corrosion-induced failures.
- UV Sealant: Apply plastic conditioner with UV blockers to prevent polymer degradation that causes brittleness.
When DIY Becomes DDIH (Don't Do It Yourself)
While most bumper reattachments are DIY-friendly, seek professional help when you encounter:
- Structural damage to crash bar or frame horns
- Advanced plastic fatigue where material crumbles to touch
- Integrated radar/lidar sensors requiring calibration
- Active aerodynamics components (e.g., retractable splitters)
- Parking sensor misalignment causing false warnings
Preventative Maintenance: Keeping Your Bumper Secure
Extend your repair's lifespan with these habits:
- Quarterly Under-Car Inspection: Check mounting points during oil changes using inspection mirror.
- Pressure Washer Caution: Never direct high-pressure spray at bumper seams where clips reside.
- Winter Wash Ritual: Remove road salt weekly to prevent bracket corrosion.
- Parking Curb Awareness: Approach curbs at 45-degree angles to avoid low-impact scraping.
- Vibration Monitoring: New rattles from front/rear often signal failing clips.
The Final Alignment Check
Before considering the job done, conduct these professional validation tests:
- Run hand along bumper/fender seam - should feel consistently smooth
- Measure gap at four points - variance shouldn't exceed 2mm
- Press firmly on bumper corners - no creaking or movement
- Drive over speed bumps at varying angles - listen for new noises
- Spray water along seams - no water intrusion into engine bay or trunk
Epilogue: I've seen bumpers repaired with coat hangers, duct tape, and even hope. While those might get you home, this professional approach ensures your repair lasts for years. Remember: A properly mounted bumper isn't just cosmetic - it's a critical safety component designed to manage impact energy. Take pride when you step back and see those perfect body lines restored. You haven't just fixed plastic - you've preserved your vehicle's integrity. Now go admire your handiwork... and maybe park a little farther from curbs.