

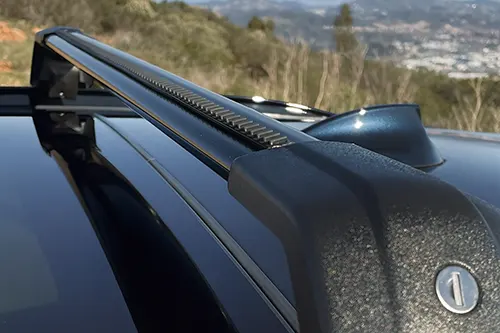
You’re cruising at 65 mph on a perfect highway, windows up, music low – and then it starts. A high‑pitched whistle, sometimes a low‑frequency drone, or a sharp “tseeeee” that drills into your skull. It comes from above. Your roof rack is singing, and not in a good way. For countless drivers, roof rack wind noise isn't just an annoyance; it's a puzzle that turns long trips into endurance tests. The good news? Most of the time, the fix is simpler than you think. This guide breaks down the two main culprits – crossbar position and seal / gap issues – and gives you a practical, step‑by‑step plan to restore peace and quiet at highway speeds.
Why Does a Roof Rack Whistle? The Physics of Unwanted Noise
Before diving into fixes, understand the enemy. When air flows over a vehicle, it’s smooth until it hits an obstacle. A roof rack crossbar – especially one with a generic square or oval profile – creates a sudden change in shape. Air accelerates around the bar, separates into tiny vortices, and those vortices shed at high frequency. That’s the whistle. Gaps between the crossbar and the roof, or between the bar and its end caps, act like miniature organ pipes: air rushing through a narrow slit produces a pure tone. At highway speeds (typically above 50 mph or 80 km/h), the energy in the airflow is high enough to make these sounds very noticeable inside the cabin. The pitch and intensity depend on the shape of the bar, the gap size, and the vehicle’s speed.
Factory roof rails and crossbars are often wind‑tunnel tested, but aftermarket racks, universal fitments, or even improperly reinstalled OEM bars can introduce noise. The two most common sources are: crossbar placement (fore‑aft position and spacing) and seal / rubber gasket gaps (especially at the interface between the bar and the mounting feet). We’ll tackle both, in order of easiest to most involved.
Fix Plan Part 1: Optimize Crossbar Position (The 15‑Minute Adjustment)
Most roof racks have some adjustability. The position of the front and rear crossbars relative to the roof curvature and the vehicle’s windshield wake dramatically affects noise. Here’s how to dial it in.
Step 1: Measure the Current Gap
Park on level ground. Measure the distance from the front edge of the front crossbar to the windshield header (the metal roof panel just above the windshield). Also measure the distance between the two crossbars (center‑to‑center). Write these down – you’ll need them for comparison.
Step 2: The “Roof Peak” Rule
Every car roof has a point of highest curvature – typically just behind the B‑pillar. For most sedans, SUVs, and wagons, the quietest front crossbar position is directly above or slightly behind the B‑pillar. The rear crossbar should be as far back as possible, but not beyond the rearmost roof rail mounting point. Why? The airflow reattaches after the windshield and B‑pillar; placing bars in the “dirty” turbulent zone (right above the front seats) creates more buffeting and whistle. Slide the front bar back by 2‑4 inches (5‑10 cm) if possible, and move the rear bar rearward.
Step 3: Uneven Spacing Trick
Many factory recommendations say to space crossbars equally. For noise reduction, unequal spacing sometimes works better. It breaks up the harmonic resonance between the two bars. Try making the distance from front bar to rear bar about 60% of the roof length, leaving the rear bar near the tailgate. Test each adjustment with a highway drive.
Step 4: Use a Wind Fairing as a Last Resort
If repositioning alone doesn’t kill the whistle, add a polycarbonate wind fairing. It mounts to the front crossbar and lifts the air stream over the bars. Brands like Thule, Yakima, or universal eBay fairings work. Position the fairing about 1‑2 cm above the roof skin – not touching. This alone can eliminate 90% of crossbar noise.
| Vehicle Type | Ideal Front Bar Location | Ideal Rear Bar Location | Spacing (center‑to‑center) |
|---|---|---|---|
| Sedan / Hatchback | Above B‑pillar or 4‑6 in. behind windshield header | Within 6 in. of roof end (antenna clearance) | 28‑36 inches |
| SUV / Crossover | 2‑4 in. behind sunroof (if present) or B‑pillar | As far back as factory rails allow | 32‑44 inches |
| Wagon / Minivan | Above front seat headrests (approx.) | Within 8 in. of liftgate edge | 36‑50 inches |
| Truck with cap | Above cab roof rear edge | Near cap rear edge | 40‑55 inches |
Fix Plan Part 2: Seal Gaps and Rubber Gasket Solutions (The Whistle‑Killer)
If the whistle is sharp and changes pitch with crosswinds, you likely have a gap somewhere – between the crossbar and its mounting foot, between the foot and the roof rail, or even a missing rubber strip on the crossbar itself. These gaps create a “jet whistle” effect. Here’s your systematic fix.
Inspect All Interfaces
- End caps: Plastic end caps on crossbars often loosen over time. Check for gaps larger than 1 mm. If you can slide a business card into the gap, air can whistle.
- Rubber sealing strips: Many crossbars have a top groove with a rubber insert. If that strip is missing or shrunk, the groove becomes a whistle channel. Replace it or fill with automotive weatherstrip.
- Mounting tower to rail gap: The clamp that attaches to your roof rail might not sit flush. Some racks use rubber pads; if those pads are hardened or missing, metal‑on‑metal gaps cause noise.
- Roof rail end caps: Factory roof rails themselves have plastic end caps. A loose cap can whistle independently of the crossbar.
Practical Gap‑Filling Materials (No Permanent Damage)
- 3M VHB tape (clear or black): Cut small strips to cover gaps on the underside of crossbars. Not visible from above.
- Neoprene rubber strips (self‑adhesive): Available on Amazon or hardware stores. 1‑2 mm thick, 10‑15 mm wide. Apply to the bottom edge of the crossbar where it meets the mounting foot.
- Silicone tubing (hollow): For round crossbars, slit a piece of silicone tubing lengthwise and wrap it around the bar at the foot interface. Creates a flexible seal.
- Heat shrink tubing (large diameter): For thin gaps around square bars, heat shrink can be applied over end caps after removal. Advanced DIY.
- Black electrical tape (temporary): For diagnosis only. Tape over a suspected gap, drive, and see if the whistle stops. If yes, replace with permanent rubber seal.
Step‑by‑Step Seal Fix Procedure
- Clean all surfaces with isopropyl alcohol. Remove wax or dirt.
- Identify the whistling gap using a helper or a phone recording from outside the car while you drive slowly (safely). Alternatively, use a leaf blower or shop vac in reverse to blow air over the stationary car – you can hear the whistle in the driveway.
- Apply rubber strip to the underside of the crossbar, covering the gap between the bar and the foot. Make sure the strip compresses slightly when the bar is reinstalled.
- Fill the T‑slot groove (if your crossbar has one) with a rubber filler strip. Many aftermarket sellers offer “aerodynamic rubber insert” for exactly this reason.
- Check the mounting bolt covers: Some racks have small plastic covers over bolts. If they’re loose, secure them with a dab of silicone sealant (removable).
Case Study: Whistle from the Front Crossbar End Cap
A 2019 Subaru Outback owner reported a loud, high‑frequency whistle at 70 mph only with crossbars installed. Inspection revealed that the passenger‑side end cap of the front crossbar had a 2 mm vertical gap where the plastic cap met the aluminum bar. The fix? A 1.5 mm thick neoprene strip cut to shape, inserted into the gap, and trimmed flush. Whistle gone completely. Cost: $4. Time: 10 minutes.
Fix Plan Part 3: Advanced Aerodynamic Mods for Persistent Noise
If repositioning and sealing fail, your crossbar profile itself might be the problem. Square or round bars are inherently noisy. Consider these more involved fixes:
- Wrap a spiral of paracord or rubber rope around the crossbar (like a barber pole). This disrupts the vortex shedding and converts the whistle into a low‑frequency hum that’s less annoying. Use 5‑6 mm diameter cord, with wraps spaced 1‑2 inches apart.
- Install a rubber lip spoiler on the leading edge of the front crossbar. Adhesive‑backed “car door edge guard” (often used for trunk lids) works perfectly. The lip trips the airflow and prevents laminar vortex formation.
- Replace crossbars with wing‑shaped (airfoil) bars. Thule WingBar or Yakima JetStream are almost silent at highway speeds because they mimic an airplane wing. Expensive but permanent solution.
- Add a rubber air dam between the roof and the front crossbar – a piece of 1/8” thick rubber sheet cut to the width of the crossbar and attached to the bottom of the bar, hanging down to within 5 mm of the roof. This blocks air from rushing under the bar. Test with cardboard first.
The Ultimate Practical Fix Plan: A Flowchart Summary
        Highway whistle detected?
                │
        ┌───────▼───────┐
        │ Is the whistle  │
        │ sharp & high?   │
        └───────┬───────┘
                │
        ┌───────▼───────┐                 ┌─────────────┐
        │ YES → GAP     │                 │ NO → Crossbar│
        │ problem       │                 │   position   │
        └───────┬───────┘                 └──────┬──────┘
                │                                 │
        ┌───────▼───────┐                 ┌───────▼───────┐
        │ Inspect end   │                 │ Move front bar│
        │ caps, rubber  │                 │ back 2-4 inches│
        │ strips, feet  │                 └───────┬───────┘
        └───────┬───────┘                         │
                │                                 │
        ┌───────▼───────┐                 ┌───────▼───────┐
        │ Apply neoprene│                 │ Test drive    │
        │ tape or       │                 │ still whistles?│
        │ silicone tube │                 └───────┬───────┘
        └───────┬───────┘                         │
                │                      ┌──────────┴──────────┐
                │              ┌───────▼───────┐    ┌────────▼────────┐
                └──────────────┤ Whistle gone? ├────┤ Add wind fairing│
                               └───────┬───────┘    │ or paracord wrap│
                                       │            └─────────────────┘
                                   ┌───▼───┐
                                   │  DONE │
                                   └───────┘
Prevention: Choosing and Installing a Quiet Roof Rack from Day One
If you’re buying a new roof rack, skip the headache. Look for these features:
- Airfoil / wing‑shaped crossbars – not round, not square.
- Integrated rubber seals in the T‑slot and at end caps.
- Flush mounting feet that wrap around the rail without large gaps.
- Low profile – bars that sit close to the roof (within 2‑3 inches) generate less noise than tall towers.
During installation, tighten all bolts to spec, but don’t overtighten plastic end caps. Apply a thin film of silicone grease to rubber seals to keep them flexible. And always do a highway test immediately after installation – before you leave on a long trip.
Conclusion: Silence is Golden
Roof rack whistle is not something you have to live with. In 90% of cases, a combination of moving the crossbars to the optimal position and sealing tiny gaps with inexpensive rubber strips will eliminate the noise entirely. The remaining 10% may require a wind fairing or spiral cord wrap, both under $30. For those who demand absolute quiet and have the budget, upgrading to wing‑shaped crossbars is the ultimate fix. The key is methodical testing: adjust one variable at a time, test drive at the same speed on the same road, and listen. Your ears (and your passengers) will thank you.
Final Pro Tip: If you’ve tried everything and still hear a whistle, remove the rack completely and drive. If the whistle persists, it’s not the rack – check your door seals, side mirror gaps, or windshield trim. But nine times out of ten, it’s the roof rack. Now go fix it and enjoy the quiet.