

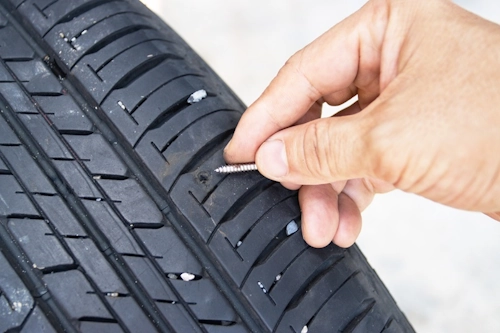
Discover the step-by-step process to repair punctured tires and get back on the road with confidence.
When Can You Repair a Tire?
Tire damage doesn't always mean replacement. According to the U.S. Tire Manufacturers Association, repairs are viable only when damage is within the tread area and meets these critical criteria:
- Puncture diameter is ≤ ¼ inch (6mm)
- Damage is ≥ 1.5 inches from sidewall edges
- No overlap with existing repairs
Warning: Sidewall damage cannot be safely repaired. When in doubt, consult a professional technician.
Tire Plug Kit Essentials
A proper repair requires these specialized components found in quality plug kits:
| Component | Purpose |
|---|---|
| Tire Plugs | Nylon/leather cords with adhesive rubber compound that seals punctures |
| T-Handle Reamer | Prepares puncture hole by removing debris and smoothing edges |
| T-Handle Insertion Tool | Drives plug securely into puncture channel |
| Rubber Cement | Lubricates plug and enhances sealing (not in all kits) |
Pro Tip: Keep flush-cut pliers handy for trimming excess plug material.
Step-by-Step Repair Process
Step 1: Safety Preparation
Park on level ground, engage parking brake, and place wheel chocks. If possible, jack up the vehicle and remove the tire for better access and reduced air loss.
Step 2: Object Removal
Extract nails, screws, or debris with pliers or screwdriver. Prep your kit first to minimize air loss during removal.
Step 3: Hole Preparation
Insert the reamer tool vigorously. Move it up/down while rotating to:
- Create uniform hole width
- Remove jagged rubber edges
- Roughen interior for better adhesion
Step 4: Plug Installation
Thread plug through insertion tool eyelet until even lengths protrude. Apply rubber cement generously if included. Align tool perpendicular to tire surface and push firmly until only 1" of plug remains visible.
Step 5: Tool Removal & Finishing
Yank tool straight out in one swift motion. Wait 5-10 minutes, then trim excess plug to ⅛" above tread. Wipe away residual cement.
Step 6: Leak Testing
Inflate to recommended PSI. Apply soapy water over repair. Absence of bubbles indicates success. Recheck pressure after 24 hours.
Critical Post-Repair Considerations
Is a Plug Permanent?
While plugs can last thousands of miles, the USTMA considers them incomplete without an interior patch. Professional patch-plug combos are the only industry-approved permanent repair. Treat plugs as temporary solutions until professional repair is possible.
Monitoring Repaired Tires
Check weekly for:
- Pressure loss >3 PSI
- Visible plug deterioration
- Bulges near repair site
Immediately replace tires showing these warning signs.
Pro Safety Tips
⚠️ Critical Limitations
Never repair:
- Punctures angled >25°
- Tires with internal damage or separation
- Run-flat tires (unless manufacturer-approved)
Speed Limit: Do not exceed 50 MPH with plugged tires. Avoid sustained high-speed driving.
FAQs: Tire Plugging Explained
How long can I drive on a plugged tire?
While some plugs last years, they should be professionally inspected within 100 miles and permanently patched within 500 miles. Industry standards require immediate interior inspection for hidden damage.
Can I plug a tire without removing it?
Yes for emergencies, but this risks missing internal damage. Always remove tires for proper inspection when possible.
Why do shops refuse some plug-only repairs?
Liability concerns and adherence to USTMA standards that require patch-plug combos for air-tight seals. Plug-only repairs may leak slowly over time.
Final Recommendation: Carry a quality plug kit for off-road emergencies, but visit a tire professional ASAP. Proper repairs combine interior patches with plugs to prevent air channel leaks - the industry gold standard for safety.