

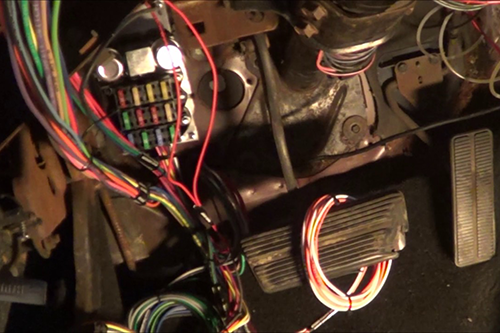
Blown fuses, random warning lamps or an accessory that dies on bumps—wiring problems in a Camaro can steal hours if you attack them without a plan. The factory diagrams look intimidating until you reduce them to three ideas: where power comes from, where ground returns, and what’s in between. This guide shows you how to read one circuit at a time, measure instead of guessing, and open the loom only where the numbers say so.
1. Shrink the diagram to one story
- Start at the fuse supplying the dead device; highlight its path through splices and connectors.
- Ignore unrelated branches; focus on the segment that actually feeds your problem area.
- Note every ground symbol in that loop; one rusty lug can upset several modules.
2. Three core measurements
- Continuity (power off): near‑zero ohms on a short segment; any extra resistance is suspicious.
- Voltage drop (power on): more than ~0.2–0.3 V across a connection under load means heat and loss.
- Substitute load: a test lamp often tells the truth when a digital meter says “okay”.
3. Safer way to hunt shorts
- Replace the blowing fuse with a resettable breaker or a fused jumper.
- Power the circuit and watch current draw; gently flex harness sections along the documented path.
- When the breaker stops tripping or current drops, you are near the rub point—open only that section.
4. Camaro‑specific hot spots
- Door jamb boots: wires break inside the rubber from years of flexing.
- Trunk loom at hinges: insulation chafes on bare metal edges.
- Aftermarket audio/alarm splices near the fuse box: twisted and taped joints that corrode.
5. Repair like the next tech is you
- Use proper crimp connectors and heat‑shrink, not bare twists and tape.
- Route and secure the loom as the factory did; moving it away from clip points just moves the rub.
- Update a printed or digital copy of the diagram with your repair notes.
Bottom line: once you see power, ground and signal separately, Camaro wiring diagrams stop being a wall of lines and become a clear map—follow it with a meter, not a guess.
Where people usually get lost in diagrams
- Chasing colors instead of following connector IDs and pin numbers.
- Ignoring shared grounds—the “mystery” intermittent is often just a loose lug.
- Assuming an old repair followed the original routing when it clearly didn’t.
Step‑by‑step: reading one Camaro circuit
- Pick one symptom (e.g. inoperative brake light) and find that symbol on the page.
- Trace backward to power: fuse → splice → ignition feed.
- Trace forward to ground: lamp → connector → ground point ID.
- Mark each junction you’ve tested physically so you don’t double back.
Building your own short fault log
- Write down voltage and continuity readings per point instead of trusting memory.
- Photograph connector faces before de‑pinning; note cavity numbers.
- Save good scope or meter captures—they’re gold next time the fault repeats.
When to suspect the diagram is out of date
- The car has obvious aftermarket alarm/audio work spliced into factory looms.
- Wire colors in the harness don’t match the legend but connector IDs and pin numbers do.
- Previous collision repairs shifted or replaced harness sections.
Combining diagrams with real‑world layout
- Print or screenshot just the circuit you need instead of a huge multi‑page layout.
- Mark each connector you physically find in the car with a pen on the diagram.
- Note where harnesses change direction in the car so you can narrow where to open the loom.
Safety and comfort while chasing 12 V faults
- Use proper back‑probe pins instead of stabbing insulation whenever possible.
- Support doors/trim you remove so you’re not fighting panels while measuring.
- Keep a small LED work light on a hook—seeing clearly means fewer mistakes.