

If you've ever worked on a modern car—replacing a headlight, removing a door panel, or installing mud flaps—you've probably met the dreaded plastic push clip. These little fasteners seem simple enough, yet they break if you so much as look at them wrong. Why do they snap so easily? Is it your technique, the temperature, or just lousy design? The truth is, most broken clips are avoidable. Understand how these fasteners are built, use the right removal method, and know when a clip is still worth reusing, and you’ll save money, aggravation, and one more trip to the parts store.
The Anatomy of a Plastic Push Clip: Designed to Fail?
Most automotive plastic clips use a two‑piece design: an outer grommet, or anchor, and an inner pin, or rivet. Push the pin flush and the legs expand against the grommet, locking the assembly into a hole. Pull the pin back out, the legs retract, and the clip should pop free. In theory, it’s reusable. In practice, the plastic—usually nylon or acetal (POM)—gets brittle, the legs deform, and the pin’s pull tab snaps off. Manufacturers often pick these materials because they are low cost, corrosion resistant, and easy to assemble, not because they can be reused forever. Still, with the right approach, you can stretch their lifespan quite a bit.
Why Do Clips Break? The Three Culprits
Before getting into removal technique, it helps to know why plastic push clips fail in the first place. The big three are:
- Age and UV exposure: Over time, UV radiation degrades the polymer chains. The clip becomes dry, brittle, and cracks under stress.
- Temperature extremes: Plastics have a glass transition temperature. In cold weather, they lose flexibility and snap like glass. In high heat, they may soften and deform permanently.
- Aggressive removal technique: Using metal pry bars, screwdrivers, or yanking the pin with pliers concentrates stress on weak points. The pull tab is the first to go.
Once you understand those three factors, a lot of clip breakage stops looking mysterious. It’s mostly physics and patience. Or lack of patience, honestly.
Mastering Removal Technique: The Gentle Art of Persuasion
Most broken clips come from rushing the job. Slow down a little and the odds improve fast. Here’s the professional way to remove them cleanly.
1. Identify the Clip Type
Not all push clips work the same way. Common types include:
- Two‑piece push‑pin: The most common. A round head with a center pin. Use a clip removal tool or a flat pry bar to lift the pin 3‑5mm, then pull the whole clip.
- Christmas tree / fir tree clip: One‑piece with flexible barbs. These are designed to be pried out directly but are also the most fragile in cold weather.
- Screw‑type push clip: Has a Phillips or hex head. Turn counter‑clockwise to release the screw, then pull the clip.
- Expansion rivet with arrowhead: Requires a small flathead to lift the center, similar to the two‑piece pin.
Use the wrong method on the wrong clip, and breakage is almost guaranteed. At first glance they all look alike, but they really aren’t.
2. Choose the Right Tool – No Screwdrivers!
Metal screwdrivers are the number one clip killer. They create point loads that puncture or crack the plastic. Use these instead:
- Nylon or plastic trim removal tools (set of 4‑5 pieces). These are soft enough to avoid scratching paint or snapping clip flanges.
- Specialized clip pliers (scissor‑action). They grip the entire head and apply even upward force.
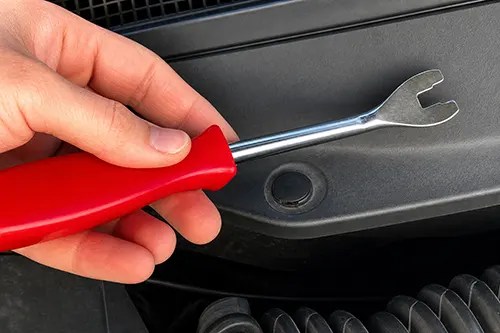
- Forked clip remover (looks like a miniature pry bar with a curved notch). Slides under the clip head and lifts with distributed pressure.
Spend $15 on a decent nylon tool set and it will usually pay for itself in one project. That’s not marketing talk. It just does.
3. The Step‑by‑Step Procedure for a Standard Two‑Piece Push Clip
- Clean the area: Dirt and grit around the clip head can bind the pin. Use compressed air or a brush.
- Insert the tool: Place the forked end or a flat nylon pry bar under the outer edge of the clip head (not directly under the pin).
- Apply gentle, even prying pressure: Do not jerk or twist. You should see the pin rise about 2‑3mm. Stop as soon as the pin moves.
- Switch to a larger pry bar under the whole clip: Once the pin is partially out, slide a tool under the outer flange and pry the entire clip upward. It should pop out with a soft “click”.
- If the pin won’t move: Do not force it. Spray a plastic‑safe lubricant (silicone spray or soapy water) around the pin. Let it penetrate for 30 seconds, then try again.
For stubborn Christmas‑tree clips, grab the sides of the head with a pair of right‑angle needle‑nose pliers, then rock gently side‑to‑side while pulling straight out. Never pull at an angle. That little detail matters more than people think.
Temperature Matters More Than You Think
Plastic push clips are famous for shattering in cold weather, and no, that’s not your imagination. It’s physics. Most automotive nylon clips have a glass transition temperature (Tg) around 50‑70°C (122‑158°F) for the crystalline phase, but below freezing they become glassy and brittle. At -10°C (14°F), impact resistance drops by 70% or more.
Golden rule: Never force a plastic clip when the ambient temperature is below 10°C (50°F). Instead, do one of the following:
- Warm up the work area: If possible, bring the vehicle into a heated garage for an hour before removal.
- Use a heat gun or hair dryer on low setting: Gently warm the clip and surrounding panel to about 25‑30°C (77‑86°F). Keep the heat gun moving to avoid melting the paint or the clip. The plastic will become noticeably more pliable.
- Alternatively, use warm water: If the clip is accessible, pour warm (not boiling) water over it. Dry the area before prying.
In very hot conditions, especially inside a car that has been sitting in the sun, the opposite problem can show up. The plastic gets too soft. Wait until the interior cools to room temperature, or the clip may stretch and lose its holding force.
Temperature Cheat Sheet
| Temperature Range | Clip Behavior | Recommended Action |
|---|---|---|
| Below -5°C (23°F) | Extremely brittle – high risk of shattering | Do not attempt removal. Warm up first. |
| -5°C to 10°C (23‑50°F) | Brittle, but careful warming can help | Use gentle heat or postpone. |
| 10°C to 25°C (50‑77°F) | Optimal flexibility | Safe to remove with proper tools. |
| Above 35°C (95°F) | Plastic softens, may deform | Allow to cool to room temperature first. |
Reuse Rules: When Can You Save a Clip?
Just because a clip survives removal does not mean it should go back into service. Reusing a damaged one can lead to rattles, loose trim, or even a panel coming off while driving. So inspect each clip carefully.
Signs a Clip Can Be Reused
- The pin or center post is not cracked, stretched, or missing the pull tab.
- The outer grommet has no splits or missing barbs.
- The clip still holds its spring tension – when you push the pin flush, the legs expand noticeably and the clip stays compressed.
- No melting, distortion, or warping from heat.
When to Throw It Away (Do Not Reuse)
- Visible cracks or white stress marks – these are failure points waiting to happen.
- Missing or broken pull tab – you won’t be able to remove it next time without destroying it.
- Flattened or bent barbs – the clip will not lock securely.
- The pin slides in and out without resistance – retention is gone.
- After exposure to high heat (engine bay clips) – many engine bay clips are one‑time use due to thermal aging.
If a clip looks a little suspicious, trust that instinct. Plastic rarely gets stronger with age.
Pro Tip: Mark Your Reusable Clips
When you’re disassembling a large panel, like a door card or bumper cover, place reusable clips in a small container or tape them to a sheet of cardboard with their locations marked. Don’t mix them with new clips. You’ll usually want fresh ones in high‑stress spots, especially near latches, hinges, or areas with lots of vibration.
The One‑Time Use Trap: Manufacturer Recommendations
Many automakers specifically call certain push clips “one‑time use” in their service manuals. This is especially common for clips securing airbags, seatbelt components, and under‑hood electronics. Why? Because after removal the clip may lose a precise amount of clamping force, and in a crash that small difference can matter. For body trim, wheel well liners, and interior panels, reuse is generally fine if the clip is still in excellent shape. For safety‑critical applications, though, always install new clips.
Example: BMW and Mercedes specify replacing all plastic rivets used in under‑panel trays after removal. The cost is tiny compared with having a loose panel at highway speeds. No one wants that surprise.
Preventative Measures: How to Make Your Clips Last Longer
Even if your removal technique is solid, a few simple habits will help clips last longer:
- Apply a thin coat of silicone grease to the pin before installation. This reduces friction and stress on the locking mechanism.
- Store spare clips in a dark, cool, dry container. UV light and heat accelerate aging.
- When reinstalling, press the pin flush with your thumb – never hammer it. Impact forces crack the plastic internally.
- Replace clips that feel “loose” after removal. Even if they look fine, loss of spring tension means they won’t hold the panel tight.
Important, small habits matter here more than people expect. Most clip damage happens before the clip ever sees the second removal.
What to Do When a Clip Breaks Anyway
Even if you do everything right, some clips will still snap—especially once they are over five years old or have spent their life in harsh conditions. Keep an assortment box of automotive push clips in your garage. Universal kits with 150‑300 pieces usually cost $15‑30 and include the common sizes: 6mm, 8mm, 10mm holes, Christmas trees, and so on.
- Remove the broken pieces from the hole using a pick or small flathead screwdriver. Be careful not to damage the panel.
- Select a replacement clip that matches the original head diameter, shaft length, and leg design.
- Test‑fit the new clip – it should click securely without excessive force.
Don’t use a generic clip that is merely “close enough.” It’ll either rattle because it’s too loose or crack the panel because it’s too tight. Neither outcome is fun.
Summing Up: Respect the Plastic Push Clip
Plastic push clips are little engineering exercises in cost‑effectiveness and simplicity, but they do ask for some respect. The difference between a broken clip and a reusable one usually comes down to three things: temperature, tool choice, and patience. Warm the clip in cold weather, use nylon pry tools instead of metal screwdrivers, and never force a stuck pin. Follow those rules, plus the reuse guidelines above, and you’ll keep your trim intact, avoid unnecessary parts-store runs, and end up with a much quieter, rattle‑free car.
Remember: When in doubt, replace it. A fresh clip costs pennies. A lost bumper cover or rattling door panel costs a lot more in time, money, and irritation. Keep a small selection of new clips in your toolbox, treat each fastener with a bit of care, and your DIY projects will go quicker, cleaner, and with a lot less drama.