

Water on Front Passenger Floor Only When AC Runs: Evaporator Drain Restriction or Case Leak?
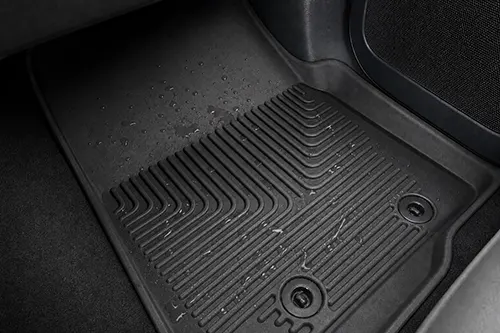
You park the car after a long drive on a humid summer day, glance down at the front passenger footwell, and find the carpet soaked. There was no rain, the windshield isn’t leaking, and the coolant level is fine—yet the floor is wet and the air conditioning was running the whole time. If water shows up only on the front passenger side, and only when the AC operates, the cause usually narrows to two primary suspects: a restricted evaporator drain or a leak in the HVAC case itself. Telling those two apart, without pulling half the dashboard apart, is the challenge this article addresses.
The Two Likely Culprits
Every automotive air conditioning system produces condensate. Warm, humid air passing over the cold evaporator core sheds moisture much like a glass of ice water on a summer afternoon. Under normal conditions, that water drips into a collection pan at the base of the HVAC case and exits through a rubber drain tube onto the ground beneath the vehicle. A puddle under the car after a drive is actually a good sign. It means the system is draining like it should.
When that water appears inside the cabin instead, the drainage path has been interrupted or the case integrity has been compromised. An evaporator drain restriction means the tube, or the drain port at the pan, is partially or fully blocked. Water backs up inside the HVAC housing until it finds another way out—usually through a seam in the case or the blower motor opening—and then drips onto the floor. A case leak is different. In that situation, the plastic housing, its seals, or the gasketed joints between case halves have failed, allowing water to escape before it ever reaches the drain.
Why the Passenger Side Specifically
On the vast majority of vehicles, the evaporator core and its drain pan sit biased toward the passenger side of the center stack. That packaging reality explains why a passenger-side-only leak rarely involves the heater core—heater core leaks tend to affect both sides or the driver’s side depending on core placement, and the fluid is coolant, not clear water. It also explains why a clogged evaporator drain almost always shows up on the front passenger floor first.
Left-hand-drive and right-hand-drive vehicles share this asymmetry: the HVAC case is wider on the passenger side to house the evaporator, and the drain exits through the firewall on that same side. Once water escapes containment, gravity decides the rest. It lands on whatever is directly below—the front passenger carpet and padding.
Differentiating a Drain Restriction from a Case Leak
Distinguishing between these two conditions takes observation before disassembly. The following diagnostic steps apply to most vehicles and can be done with basic tools.
Check for an external puddle while the AC runs. Park the vehicle on a dry surface, set the AC to maximum cooling with the blower on high, and let it run for ten to fifteen minutes on a humid day. Look beneath the vehicle near the passenger-side firewall for a steady drip of clear water. If no puddle forms, or if only a few drops appear, a drain restriction is the leading candidate. If a healthy puddle forms outside yet the carpet still gets wet, a case leak becomes more probable—water is finding two paths, one intended and one not.
Inspect the drain tube from underneath. The evaporator drain typically exits the firewall low on the passenger side as a short rubber elbow or a straight plastic nipple. On many vehicles it protrudes just above the exhaust pipe or frame rail. Squeeze the rubber portion; debris often lodges right at the exit. A small screwdriver or zip tie can dislodge a plug of mold, leaves, or insect nests. Be ready for a sudden gush of water if the blockage clears. Better keep your face out of the way.
Sniff and feel the liquid. Condensate is essentially distilled water. It has no odor, no color, and feels like water between the fingers. If the liquid on the carpet smells sweet and feels slightly oily, you are dealing with a heater core leak, not an AC drainage problem. If it has a musty, moldy smell, it is standing water that has been soaking the carpet padding for some time, confirming a drainage issue of some duration.
Listen for sloshing. With the engine off and the blower motor stopped, rock the vehicle side to side. If you hear water sloshing inside the dashboard, the drain pan is holding a significant amount of water, which points firmly toward a restriction. A case leak that occurs at a gasket joint typically does not pool large volumes inside the case, because the water escapes before it can build up.
Inspect the blower motor and resistor area. Remove the under-dash panel on the passenger side and look up at the blower motor housing. Water stains, drip marks, or active moisture around the blower motor flange suggest that backed-up water is exiting through the blower opening. That finding strongly supports a drain restriction, since water rises inside the case until it spills out through the lowest available opening—often the blower motor seal.
Restricted Drain: Diagnosis Confirmed
Once a restriction is identified, clearing it completely means addressing both the drain tube and the drain pan port inside the case. Blowing compressed air into the drain tube from underneath is a common shop practice, but it carries a risk: it can dislodge the rubber drain elbow from the case inside the vehicle, creating a leak that requires dashboard disassembly to repair. A safer method uses a flexible nylon line or speedometer cable through the drain tube while rotating it, mechanically breaking up the blockage without pressurizing the case.
Persistent or recurring clogs often mean mold and biofilm buildup is coating the evaporator and drain pan. After clearing the drain, spraying a foaming evaporator cleaner into the drain tube or through the blower resistor opening kills the biological growth that contributes to recurring restrictions. Some vehicles also benefit from adding an aftermarket drain tube extension with a screen or a duckbill valve, though these can freeze shut in cold climates and should be selected carefully. At first glance, a clog may seem like a one-time nuisance. Sometimes it is. Sometimes it keeps coming back until the growth inside the case is dealt with.
Leaves, pine needles, and other debris enter the HVAC case through the fresh air intake at the cowl. Inspecting and cleaning the cowl area, and making sure the cabin air filter is properly installed and replaced on schedule, helps prevent foreign material from reaching the evaporator in the first place.
Case Leak: When the Housing Itself Fails
A case leak is less common than a drain restriction, but it is more labor-intensive to repair. The HVAC case is typically a two-piece plastic shell joined with screws, clips, and a foam or rubber gasket along the parting line. Over years of thermal cycling, the plastic can warp, the gasket can compress and take a set, or the case halves can separate slightly. When condensate pools in the bottom of the case, a compromised joint at or below the waterline allows a slow weep that soaks the carpet padding beneath.
Diagnosing a case leak definitively usually requires dye. With the interior panels removed and the carpet peeled back to expose the lower HVAC case, an ultraviolet AC leak detection dye (water-soluble type) can be introduced into the case through the blower resistor opening or an access port. Running the AC and shining a UV light on the case seams reveals the exact leak path. Even without dye, carefully drying the case exterior with compressed air and watching for the first bead of moisture to appear as the AC runs can pinpoint the source. What is important is patience here—water has a way of making the source look like it’s somewhere else.
Repair approaches vary by vehicle and by access. Minor seepage at a seam accessible from the footwell can sometimes be sealed with a high-quality automotive-grade RTV silicone applied from the outside after thorough cleaning and drying. This is a stopgap measure, not a perfect one. Sealing from the inside is more durable, but it requires case removal. A warped case or a failed internal seal generally demands case replacement or removal and resealing, a job that on many vehicles requires evacuating the AC refrigerant, disconnecting the heater core and evaporator lines, and pulling the entire HVAC assembly from the dashboard. The labor cost reflects that complexity.
Don't Overlook the Cowl and Fresh Air Intake
Water entering through the fresh air intake at the cowl can mimic an AC condensate leak. If the cowl drain—a separate drain path for rainwater entering the cowl area—becomes clogged with leaves and debris, water can overflow into the HVAC fresh air inlet and drip onto the passenger floor. This leak occurs with or without the AC running, and it is often worse after rain or a car wash. Inspecting the cowl drains and the seal around the HVAC fresh air inlet door rules out this possibility before condemning the evaporator drain or case.
A Systematic Path to a Dry Floor
When water appears on the front passenger floor only while the AC runs, the sequence of investigation should be this: confirm the liquid is water, not coolant; check for an external condensate puddle; inspect and clear the drain tube; listen and feel for sloshing or standing water inside the case; examine the blower motor area for water escape; and only after exhausting those steps, suspect a case seam or gasket leak. Most vehicles are fixed by clearing the drain tube, using a foaming evaporator cleaner, and installing a fresh cabin filter. For the ones that are not, the leak point is usually visible with the carpet pulled back and a careful look at the case seams. A dry passenger floor is achievable without guesswork, provided the diagnosis follows the water from its source to its unwanted destination.