

Replacing a car windshield is one of those jobs that may look intimidating, but with patience, the right tools, and proper safety measures, it can be done in your own garage. In this guide, you will learn how to remove an old windshield, prepare the frame, and install a new one step by step. This process usually takes about 2–3 hours for a beginner. Below you will also find an FAQ section to answer the most common questions about DIY windshield replacement.
Why Replace a Windshield Yourself?
Most car owners consider professional windshield replacement because it requires precision and safety knowledge. However, doing it yourself can save money and teach you valuable repair skills. DIY replacement is particularly attractive for older cars where insurance might not cover glass replacement or for enthusiasts who enjoy maintaining their own vehicles.
What You Need Before You Start
- Replacement windshield — specific to your car’s make, model, and year.
- Urethane adhesive — automotive-grade glue to secure the glass.
- Primer — improves adhesion and prevents rust.
- Protective gloves and safety glasses — for personal protection.
- Masking tape — to hold the windshield in place while curing.
Tools Required
- Utility knife or windshield cutting tool
- Suction cups with handles
- Caulking gun
- Plastic trim removal tools
- Clean cloths and isopropyl alcohol
Step-by-Step Instruction
Step 1: Preparation
Park your car on a flat surface and make sure it is stable. Disconnect the car’s battery to avoid any electrical risks when working near sensors or heated glass. Put on protective gloves and safety glasses. It is also advisable to cover your dashboard with a cloth to prevent scratches or adhesive stains.
Step 2: Removing the Trim and Old Windshield
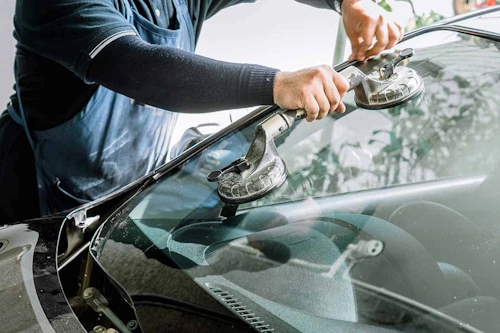
Use plastic trim removal tools to detach the weather seals and molding around the windshield. Take your time to avoid breaking clips or damaging paint. Once the trim is off, use a specialized windshield cutting tool or utility knife to cut through the urethane adhesive that holds the glass in place. After cutting through the adhesive, use suction cups to lift the windshield carefully out of the frame. If the windshield is cracked, lift it gently to prevent it from shattering further.
Step 3: Preparing the Frame
After removing the old windshield, clean the frame thoroughly. Use a scraper or razor blade to remove old adhesive. Be careful not to scratch the paint or metal underneath, as this could lead to rust. Wipe the frame with isopropyl alcohol to remove dirt and oils. Then apply primer to both the car’s frame and the edges of the new windshield to ensure strong adhesion and corrosion protection.
Step 4: Installing the New Windshield
Load your caulking gun with urethane adhesive and apply a continuous bead around the frame. The bead should be consistent in thickness and height, as gaps can cause leaks. Using suction cups, carefully align and lower the new windshield into the frame. Press gently but firmly to make sure it seats properly against the adhesive. Wipe away any excess urethane that may squeeze out.
Step 5: Securing and Finalizing
Once the windshield is in place, secure it with masking tape at the top and sides to prevent shifting while the adhesive cures. Check that the windshield sits evenly and the seals are aligned. Allow the urethane to cure according to the manufacturer’s instructions—usually 2 to 12 hours before driving. Avoid slamming doors or driving immediately, as vibrations can disturb the seal.
Tips and Safety Considerations
- Always wear gloves and glasses when handling glass.
- Use two people for lifting large windshields to prevent accidents.
- Check weather conditions; urethane adhesive sets best in moderate temperatures and low humidity.
- Never reuse old adhesive—fresh application ensures safety and durability.
- Dispose of the old windshield responsibly at a recycling facility.
Practical section
Can I really replace a windshield by myself?
Yes, but it requires patience, correct tools, and following safety procedures. For complex vehicles with sensors, professional replacement is often safer.
How long does it take for the adhesive to cure?
Curing time varies by brand, but typically ranges between 2 and 12 hours. Always check the manufacturer’s instructions before driving the car.
What is the average cost of DIY windshield replacement?
The cost depends on the car model. A windshield usually ranges from $100–$400, while adhesive and tools add about $50–$100. It is significantly cheaper than professional services.
Can I drive immediately after replacing the windshield?
No. You must wait until the adhesive fully cures. Driving too soon may cause leaks, poor adhesion, or even glass detachment during an accident.
Is it safe to reuse the old seals?
It is not recommended. Old seals may be damaged or worn out, leading to water leaks or wind noise. Always use fresh adhesive and seals for best results.