

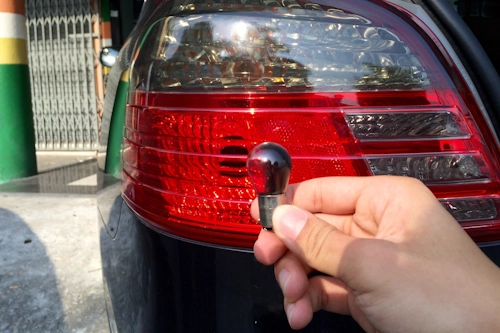
As a gearhead who's turned more wrenches than I can count, I've learned that tail light maintenance is one of those skills every driver should master. Whether you're restoring a classic or maintaining your daily driver, this step-by-step guide will transform you from novice to confident DIYer. Forget expensive garage bills—let's dive into the satisfying world of automotive self-reliance.
Why This Matters More Than You Think
Beyond avoiding traffic tickets, functional tail lights are your vehicle's communication system. They signal intentions to fellow drivers and provide critical visibility in downpours or fog. When a bulb flickers out, you're not just risking a citation—you're compromising safety. The good news? Modern vehicles make replacements surprisingly accessible.
Gear Up: Essential Tools Checklist
- Replacement bulbs: Match your vehicle's specs (check owner's manual)
- Latex/nitrile gloves: Prevent oil from skin shortening bulb life
- Trim removal tools: Plastic pry bars avoid scratches
- Dielectric grease: Protects connections from corrosion
- Flashlight/headlamp: Illuminate dark corners
- Basic screwdriver set: Phillips and flat-head varieties
The Step-By-Step Walkthrough
1. Preparation is Key
Park on level ground with engine OFF and parking brake engaged. Work in daylight or well-lit garage. Open trunk or tailgate and remove valuables to create workspace. Consult your service manual for bulb access diagrams—some require trunk liner removal.
2. Accessing the Assembly
Locate the bulb access panel behind the light assembly. Most modern vehicles use one of three methods:
- Exterior screws: Usually along the lens edges
- Interior fasteners: Plastic clips or bolts behind trunk liner
- Slide-and-lock systems: Common in Japanese models
Remove fasteners methodically, placing them in a magnetic tray. If encountering stubborn clips, apply heat from a hairdryer for 30 seconds to soften plastic.
3. Removing the Old Bulb
Gently pull the entire light housing toward you (support with one hand). Rotate the bulb socket counterclockwise—typically 1/8 turn releases it. Pull the bulb straight out without twisting. Critical: Examine the socket for melted plastic or corrosion—these require professional repair.
Veteran Move: Snap a phone photo before disconnecting wiring to document plug orientation.4. Installing the New Bulb
Handle bulbs by the base only. Apply rice-grain-sized dielectric grease to metal contacts before insertion. Align replacement bulb with socket grooves—forcing causes damage. Listen for the soft click when fully seated. Rotate socket clockwise to lock.
5. Reassembly & Testing
Carefully reposition the housing, ensuring wiring isn't pinched. Reinstall fasteners in reverse order—finger-tighten first before final torque. Test ALL functions:
- Parking lights
- Brake lights
- Turn signals
- Reverse lights (if applicable)
Have a helper confirm rear illumination while you operate controls.
Advanced Pro Tips from the Trenches
- Moisture Invasion: If condensation appears inside lens, remove assembly and dry thoroughly. Apply fresh butyl sealant around edges.
- LED Conversions: Ensure aftermarket LED bulbs are CANBUS-compatible to avoid hyper-flashing errors.
- Vintage Rides: On pre-1980s vehicles, gently polish brass contacts with emery cloth before reinstallation.
- Bulb Life Tracking: Mark installation dates on bulb bases with paint pen for maintenance records.
Safety: Non-Negotiables
● Disconnect battery negative terminal if working near wiring harnesses
● Never touch halogen bulb glass—skin oils create hot spots
● Verify lens isn't cracked—small fractures magnify heat concentration
● Replace bulbs in pairs—if one fails, the other is near expiration
When DIY Isn't Enough
Seek professional help if you discover:
- Charred/melted wiring
- Broken bulb fragments in socket
- Water intrusion in light housing
- Persistent electrical faults after replacement
The Empowered Driver's Mindset
Mastering basic repairs like tail light replacement builds mechanical confidence and deepens your connection with your machine. Each successful project fuels the addiction to self-reliance. Remember: every expert was once a beginner holding their first replacement bulb. Stay curious, respect the process, and keep rolling with illuminated pride.
Final Thought: Carry spare bulbs in your emergency kit—you'll be someone's roadside hero someday.