

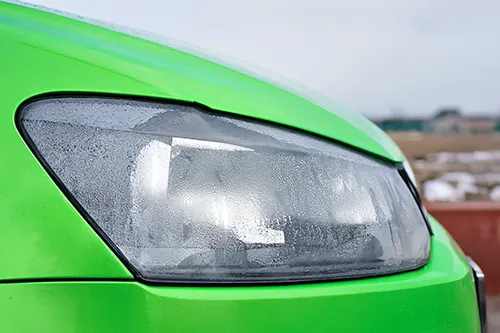
You walk out to your car on a cool morning, and there it is: a foggy, wet layer clinging to the inside of your headlight lens. Frustration sets in. Is this normal? Will it go away? Or is your headlight assembly doomed? As someone who has restored, replaced, and debugged hundreds of headlight systems over decades of turning wrenches, I can tell you that condensation inside a headlight is one of the most misunderstood problems in automotive lighting. Some moisture is harmless and expected. Other times, it’s a ticking time bomb for your electrical system, your night vision, and your wallet.
In this deep-dive guide, we’ll separate vent-related condensation (a harmless nuisance) from true seal failure (a progressive threat). You’ll learn how to diagnose which one you have, how to fix each scenario, and—most importantly—when to stop wasting time on repairs and simply replace the whole assembly. Grab a flashlight and a notepad; we’re going to shed some light on the subject.
Why Headlights Get Wet Inside: The Science of Condensation
Headlights aren’t sealed tombs. In fact, modern headlight assemblies are designed with ventilation systems to equalize air pressure and let moisture escape. Every time you turn on your headlights, they heat up. When you turn them off, they cool down. That thermal cycling creates a pressure differential—without vents, the housing would crack or pop the lens off over time.
Manufacturers install small, often J-shaped or labyrinth-style vent tubes, sometimes covered with a breathable membrane or a foam filter. These vents allow dry air to enter and moist air to exit. However, humid outside air also enters the vent. When the internal temperature drops (especially overnight), that moisture condenses on the coolest surface—typically the clear polycarbonate lens. A light mist or thin fog that appears after a rain or a car wash and disappears within 20–30 minutes of driving with the headlights on is usually normal vent-related condensation.
The problem arises when condensation turns into droplets, puddles, or persistent fog that never clears. That’s when you move from a vent issue to a seal failure.
Vent Issue vs. Seal Failure: Key Differences at a Glance
Before we dive into diagnostics, let’s lay out the telltale signs of each condition.
| Characteristic | Normal Vent Condensation | Seal Failure (Leak) |
|---|---|---|
| Amount of Moisture | Light fog, thin mist, less than 20% coverage | Large droplets, running water, pooling at bottom, or heavy fog that covers >50% of lens |
| Duration | Clears within 20–30 minutes of headlight use or warm weather | Persists for hours or days; may get worse over time |
| Location of Moisture | Evenly distributed thin haze, often at edges or corners | Water trails, drops forming at specific points (crack or seam), standing water inside |
| Accompanying Signs | No dirt or residue inside lens; no electrical issues | Cloudy residue after water evaporates (mineral deposits), corrosion on reflectors or bulbs, intermittent bulb failure |
| Effect on Light Output | Minimal or temporary reduction | Severe scattering, reduced brightness, unsafe driving at night |
Diagnostic Steps: Be a Headlight Detective
Grab a few tools: a hair dryer or heat gun (low setting), a spray bottle with soapy water, and a roll of painter’s tape. Perform these tests on a dry day, with the headlight assembly removed or still on the vehicle (but with the bulb disconnected for safety).
Step 1: The “Clear-Up” Test
Turn your headlights on high beam for 20 minutes. If the condensation disappears completely within that time, you’re likely dealing with simple vent condensation. If it remains, or if it turns into more droplets, suspect a seal issue.
Step 2: Visual Inspection for Cracks and Seam Gaps
Inspect the entire housing: the lens-to-housing seam (where the clear plastic meets the black back), the bulb access covers, and the vent tubes. Look for cracks, chips, or gaps. Pay special attention to areas near mounting brackets – they take vibration and often crack first. If you see an obvious crack or a separated seam, you’ve found your leak.
Step 3: The Low-Pressure Leak Test (DIY)
Remove the headlight assembly. Seal the vent tubes temporarily with painter’s tape. Then, using a syringe or a spray bottle with soapy water, apply the solution around the lens seam, bulb sockets, and any potential cracks. Gently blow into the bulb opening (with the bulb removed) or use a low-pressure air duster. Bubbles will form wherever air escapes – those are your leak points. Caution: Do not use compressed air above 5 psi, or you’ll damage the internal reflectors.
Step 4: Vent Inspection
Locate the vent tube(s) – usually a short rubber or plastic elbow on the back or bottom of the housing. Make sure it’s not blocked by mud, insect nests, or debris. A blocked vent can trap moisture inside, mimicking a seal failure. Also check the vent’s membrane or foam; if it’s missing or torn, humid air rushes in without regulation, causing chronic fogging.
The Vent Issue: When to Do Nothing (Almost)
If your diagnosis confirms a vent-related condensation (light fog, clears quickly, no dirt inside), the best action is often no action at all. However, you can reduce the frequency of fogging by:
- Ensuring the vent tubes are clear and pointing downward (to prevent water ingress).
- Replacing old, clogged vent filters if your headlight design allows it (some BMW and Mercedes assemblies have replaceable desiccant packs).
- Parking with the headlights facing the morning sun, or leaving them on for a few minutes after a car wash.
Some enthusiasts install small silica gel packets inside the housing (taped away from heat sources) to absorb residual moisture. It works, but it’s a band‑aid, not a cure. Remember: a vented headlight will always see some condensation in high humidity – that’s by design. Don’t let a dealership sell you a new assembly for normal behavior.
The Seal Failure: When Water Invades and Destroys
True seal failure is progressive. What starts as a few drops can lead to standing water, fried HID or LED ballasts, corroded wiring, and a permanently hazy lens from mineral deposits. Worse, the water can wick up into the bulb socket and short out the electrical system, sometimes causing a fire risk. I’ve seen headlight housings that were literally half full of water – the owner had been ignoring “that little fog” for two years.
Can You Repair a Broken Headlight Seal?
Yes, but with important caveats. The seal between the lens and the housing is usually made of butyl rubber (a gooey, black, non‑hardening adhesive) or, on older or cheaper headlights, a brittle polyurethane adhesive. Here’s the reality:
- Butyl-sealed headlights (common on many Japanese and European cars from the 2000s onward) are re-sealable. You can bake the headlight in an oven at low temperature (around 200°F / 93°C) for 5–10 minutes to soften the butyl, separate the lens, clean the old sealant, apply new butyl tape, and re-seal. This is a DIY-possible weekend job.
- Permanently sealed (welded) headlights (many modern LED units and some American cars) are not designed to be opened. You can cut them open with a Dremel, but re-sealing is difficult, often fails, and rarely looks professional. In those cases, replacement is the only reliable fix.
- Cracked housing or lens: Small cracks can be repaired with clear epoxy or specialized UV-cured headlight lens repair kits. But if the crack is near a mounting point, or if the housing is physically distorted, the repair will eventually leak again. Replace it.
Step-by-Step: DIY Resealing a Butyl Headlight (Condensed)
- Remove the headlight assembly from the vehicle.
- Remove all bulbs, ballasts, and electronics.
- Preheat oven to 200°F (93°C). Place the headlight on a baking sheet lined with cardboard or a towel. Bake for 5–10 minutes, checking every 2 minutes.
- Wearing heat-resistant gloves, carefully pry the lens from the housing using plastic trim tools. Do not use metal screwdrivers – you’ll crack the lens.
- Remove the old butyl sealant completely (use a plastic scraper and alcohol). Clean both channels until they’re spotless.
- Apply new butyl headlight sealant tape (available from any auto parts supplier) into the channel, pressing firmly.
- Reheat both parts for 5 minutes, then press the lens back onto the housing. Use clamps or tape to hold it while it cools.
- Reinstall bulbs and test for leaks with the soapy water method before putting it back in the car.
Warning: Oven temperature and time are critical. Too hot, and you’ll melt the reflectors or warp the housing. Too cold, and the butyl won’t soften. Practice on a junkyard headlight first if you’ve never done it.
When to Replace Instead of Repair
Despite your best efforts, some headlights are beyond saving. Replace the entire assembly – either with an OEM unit, a quality aftermarket replacement (like TYC, DEPO, or Valeo), or a used OEM unit from a salvage yard – in these situations:
- Internal reflector corrosion or peeling: Once the chrome reflector is pitted or flaking, the headlight will never output proper beam pattern. Repairing the seal won’t fix the ruined reflector.
- Water damage to electronics: If the ballast (for HID or LED) or internal LED driver is corroded, replacement is cheaper than trying to find individual internal parts.
- Multiple cracks or a shattered lens mount: Epoxy can’t restore structural integrity.
- Headlights that are permanently sealed (welded): As noted, cutting them open almost always leads to a weaker, leak-prone assembly and visible cosmetic damage.
- Aftermarket “cheap” headlights that leak repeatedly: Some low-budget assemblies have poor design or inferior sealants. You’ll waste hours chasing leaks. Buy a better brand or go OEM.
- Safety-critical application: If your headlight is your only source of night visibility (no auxiliary lights), and you’re not 100% confident in your DIY seal job, replace it. Your life is worth the cost.
Prevention: Keeping Headlights Dry Longer
Once you’ve solved the problem – or if you have a new set of headlights – a few habits will keep condensation at bay:
- Never pressure-wash directly at the headlight seams. High-pressure water can force past even good seals. Wash at a 45‑degree angle and stand back.
- Inspect vent tubes annually. Clear out mud, spider webs, or road salt that blocks airflow.
- Apply a hydrophobic coating to the outside of the lens. This doesn’t stop internal condensation, but it reduces external moisture clinging, which can cool the lens unevenly and promote internal fog.
- Replace cracked bulb access covers immediately – they are a common leak source.
- After driving in heavy rain or a car wash, park with headlights facing the sun or leave them on for 10 minutes. The heat drives out moisture.
The Cost Equation: Repair vs. Replace
Let’s talk real numbers. A DIY reseal using butyl tape costs about $15–25 and 2–3 hours of your time. A professional reseal at a lighting specialist might run $80–150. A new OEM headlight assembly can cost anywhere from $200 (for a basic halogen unit) to $2,000+ (for adaptive LED or laser headlights with modules). A quality aftermarket replacement (like TYC or Depo) typically costs $80–300. A used OEM unit from a salvage yard is often $50–150.
My rule of thumb: If the headlight is less than 5 years old, has no internal reflector damage, and is a butyl-sealed design, repair it. If it’s older, has yellowing or crazing on the lens, or any internal corrosion, replace it. And if it’s a critical safety part on a family vehicle – and you have any doubt about your repair skill – replace it without guilt.
Conclusion: Foggy Headlight? Don’t Panic, But Don’t Ignore It
Headlight condensation is like a small cough: sometimes it’s just allergies (normal vent operation), sometimes it’s pneumonia (seal failure). The key is accurate diagnosis. A light fog that disappears after a short drive is nothing to worry about. Standing water, persistent droplets, or a hazy lens that won’t clear means the seal has failed and moisture is now damaging your lighting system from the inside.
Armed with the diagnostic steps above, you can confidently decide between a cheap DIY reseal, a professional repair, or a full replacement. Remember that modern headlights are not just glass and bulbs – they contain delicate reflectors, advanced optics, and often expensive electronics. Keeping them dry is not about cosmetics; it’s about seeing the road clearly at night and being seen by others. A $500 headlight replacement is far cheaper than an accident caused by poor visibility.
So next time you see that foggy lens, grab your flashlight, run the tests, and take action before the water wins. Your future self – driving home on a dark, rainy night – will thank you.