

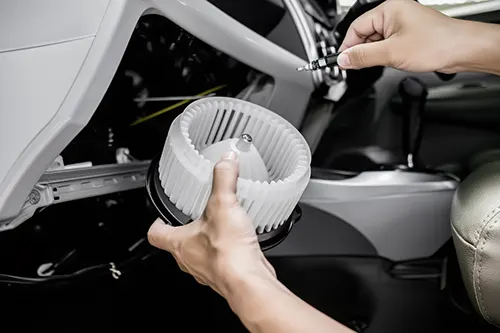
You turn the fan knob to low or medium, and nothing happens. Click it to “High” – and the air comes roaring out like a hurricane. Sound familiar? This is one of the most common HVAC (heating, ventilation, and air conditioning) complaints among car owners. The good news: the fix is usually straightforward and affordable. The bad news: you first have to figure out whether the culprit is a failed blower motor resistor pack or a failed blower motor control module (also called a blower motor controller or power transistor).
For the seasoned DIYer and the everyday driver alike, understanding the difference between these two components can save you time, money, and a lot of head-scratching. In this guide, we’ll break down exactly how each system works, the telltale symptoms of failure, and how to diagnose which part has left you with only one fan speed – and then, how to replace it like a pro.
Why Does the Fan Work on High But Not Low or Medium?
To understand the failure, you first need to understand how the blower motor speed is controlled. Your car’s blower motor is a simple DC electric motor. If you fed it full battery voltage directly, it would always run at maximum speed. To give you multiple speeds, the vehicle’s HVAC system reduces the voltage or current reaching the motor. The component responsible for that reduction is either a resistor pack or a control module – depending on the age and design of your vehicle.
When that component fails, the circuit often defaults to one of two conditions: no power at all, or a direct path to full power. In many designs, the “High” speed setting bypasses the speed control component entirely (using a dedicated relay or a direct switch contact). That’s why you still have air on High – the failure only affects the lower speeds that rely on the resistor pack or module.
The Classic Design: Blower Motor Resistor Pack
Older vehicles and many modern economy cars still use a resistor pack. This is a small board with several coiled wire resistors or ceramic resistors. Each resistor creates a specific voltage drop, giving you different fan speeds. The resistor pack is usually mounted inside the HVAC duct housing, right next to the blower motor. Why? Because it gets hot – really hot. The airflow from the blower motor keeps it from melting.
How the Resistor Pack Works
The fan switch routes power through different resistors. For example:
- Low speed: power goes through a high-resistance resistor → motor gets low voltage → slow fan.
- Medium speeds: power goes through lower-value resistors → higher voltage → faster fan.
- High speed: power bypasses all resistors entirely and goes straight to the motor through a dedicated relay or switch contact.
When a resistor burns out, that specific speed stops working. If enough resistors fail, you might lose multiple speeds. The most common failure is the thermal fuse (a small one-time safety device) blowing due to excessive heat, often caused by a worn blower motor drawing too much current or a clogged cabin air filter restricting airflow over the resistor pack.
Signs of a Bad Blower Motor Resistor Pack
- Fan works on High only (most classic symptom).
- One or more lower speeds are dead, but at least one speed works – often medium works but low doesn’t, or only high works.
- Burning smell from the vents (the resistor pack overheating).
- Intermittent operation – some speeds work sometimes, then stop.
- Physical inspection reveals a broken resistor wire or a blown thermal fuse (blackened, open circuit).
Where to Find It & How to Test
The resistor pack is typically located on the passenger side, under the dashboard, near the blower motor (which is behind the glove box or under the HVAC box). You may need to remove a plastic cover. Once you locate it (a small metal or plastic plate with a wiring connector), you can test it with a multimeter:
- Unplug the connector.
- Set your multimeter to Ohms (resistance).
- Measure between the common power input terminal and each speed output terminal. You should see a specific resistance (e.g., 1.5Ω, 2.5Ω, 4Ω). An open circuit (infinite resistance) means that resistor or thermal fuse is dead.
The Modern Design: Blower Motor Control Module (Power Transistor)
Newer vehicles (roughly mid-2000s and later) often use a blower motor control module instead of a resistor pack. This module is a solid-state electronic device that uses a transistor to vary the voltage to the blower motor smoothly, rather than in discrete steps. Many modern cars with automatic climate control use this system to offer infinite variable speeds or a dozen different fan settings.
How the Control Module Works
The HVAC control head sends a low-current signal (usually a variable voltage or a pulse-width modulated signal – PWM) to the control module. The module then adjusts the power sent to the blower motor. This method is more efficient, generates less heat, and allows for smoother speed changes. On vehicles with manual A/C but a module, you’ll typically have 4-7 fixed speeds, but the module still replaces the old resistor pack.
Signs of a Bad Blower Motor Control Module
- Fan works on High only – same as resistor failure. But sometimes the failure mode differs: the module may fail completely, giving no speeds at all, or only high if the high-speed relay is separate.
- Fan works intermittently on all speeds, or speeds change erratically.
- Fan only works on one speed (not necessarily high).
- No fan operation at all – module has failed open.
- Burning electronics smell – the module may overheat.
- Some vehicles also store diagnostic trouble codes (DTCs) for the HVAC system.
Where to Find It & How to Test
The control module is often mounted directly on the blower motor housing or very close to it, sometimes integrated into the blower motor assembly itself. To test:
- Locate the module and unplug the connector.
- With the key on, use a multimeter to check for power and ground at the module’s input.
- Check the control signal (reference voltage or PWM) from the HVAC control head. If that signal is present, the module is likely the issue.
- Apply 12V directly to the blower motor to ensure the motor itself isn’t seized or burned out.
Key Differences at a Glance
| Feature | Blower Motor Resistor Pack | Blower Motor Control Module |
|---|---|---|
| Technology | Passive resistors / thermal fuse | Solid-state transistor / PWM |
| Speed control | Discrete fixed speeds (3-4) | Variable or multiple speeds (smooth) |
| Heat generation | High (needs airflow cooling) | Lower (more efficient) |
| Typical failure mode | One or more speeds dead, often only high works | No speeds, intermittent, or only high works |
| Testing | Simple resistance check with multimeter | Requires signal check, often trial replacement |
| Location | Inside HVAC duct (airflow cooling) | On or near blower motor housing |
| Vehicle age | Older vehicles and some base models | Most vehicles from ~2005+ |
Step-by-Step Diagnosis: Which One Has Failed?
Follow this diagnostic flow to pinpoint the problem before you buy any parts.
Step 1: Check the Blower Motor Itself
Before blaming the resistor or module, make sure the blower motor isn’t seized or shorted. Locate the blower motor (usually under the passenger dash). Unplug its power connector. Use a fused jumper wire to apply 12V directly to the motor terminals (positive to the power terminal, negative to ground). Does the motor run at full speed? If yes, the motor is fine. If it doesn’t run or makes grinding noises, replace the blower motor first – a failing motor can draw excessive current and burn out the resistor or module repeatedly.
Step 2: Identify Your System Type
Look up your vehicle’s HVAC design. For cars built before 2005, you almost certainly have a resistor pack. For cars after 2010, it’s likely a control module. But there are exceptions. The easiest way: locate the speed control component near the blower motor. If it has visible coiled wire resistors or a small metal board with a thermal fuse – it’s a resistor pack. If it’s a sealed plastic box with a heatsink and multiple wires, it’s a module.
Step 3: Test the Resistor Pack (if applicable)
Remove the resistor pack (two screws, disconnect plug). Inspect for visible damage: broken resistor coils, blackened thermal fuse. Use a multimeter to check continuity between the input and each speed output. Any open circuit means failure. Also check the thermal fuse – it should have near-zero resistance. If it’s open, you can sometimes replace just the thermal fuse (soldering required), but most DIYers just replace the whole resistor pack.
Step 4: Test the Control Module (if applicable)
Testing a module is less straightforward. First, verify power and ground at the module connector (should be battery voltage). Then, with the fan switch on a medium speed, check the control signal wire (often labeled “PWM” or “REF”). It should show varying voltage (e.g., 2-7V) depending on the speed setting. If the signal is present but the motor doesn’t run, the module is bad. If the signal is missing, the issue is the HVAC control head or wiring. Also, many modules have a known failure pattern: they overheat and crack solder joints. Visual inspection may reveal burnt spots.
Step 5: Rule Out the Blower Motor Relay (for High Speed)
On many vehicles, the High speed circuit uses a separate relay. If the fan works on High but not on lower speeds, the relay is likely fine because High works. However, if no speeds work, suspect the relay or fuse.
Common Mistakes and How to Avoid Them
- Replacing the wrong part – Always diagnose first. A new resistor pack won’t fix a dead blower motor, and a new module won’t fix a broken switch.
- Ignoring the cabin air filter – A clogged filter reduces airflow over the resistor pack, causing it to overheat and fail prematurely. Replace the filter when you replace the resistor.
- Using cheap no-name parts – Resistor packs and modules are available from auto parts stores, but cheap online knockoffs may fail within months. Stick with OE or reputable aftermarket brands.
- Forgetting the thermal fuse – On some resistor packs, the thermal fuse is replaceable. But if the fuse blew, there was a reason (stuck blower motor, blocked airflow). Address the root cause.
- Not checking for power at the connector – A blown HVAC fuse or bad relay can mimic a failed resistor/module. Always check fuses first.
Replacement: DIY Tips for Both Systems
Replacing a Blower Motor Resistor Pack
- Disconnect the negative battery cable.
- Remove the glove box or lower dash panel for access.
- Unplug the electrical connector from the resistor pack.
- Remove the two screws securing the resistor pack and pull it out.
- Install the new resistor pack (apply a small amount of thermal paste if required – check manufacturer notes).
- Reconnect the plug, secure the screws, and test all speeds.
- Replace the cabin air filter while you’re there.
Cost: $15 – $50 for the part. Time: 30 minutes.
Replacing a Blower Motor Control Module
- Disconnect the battery.
- Locate the module (often attached to the blower motor housing with screws or clips).
- Unplug the electrical connectors (sometimes two: one for power/ground and one for control).
- Remove the module (may require removing the blower motor first on some vehicles).
- Install the new module and reconnect everything.
- Test all speeds and the variable function.
Cost: $30 – $150 depending on vehicle. Time: 30-60 minutes.
When It’s Not the Resistor or Module: Other Possibilities
If you’ve replaced the resistor pack or module and the fan still only works on high (or not at all), consider these other culprits:
- Blower motor itself – internal short or worn bearings causing excessive current draw, which then kills the new resistor/module again.
- HVAC control head (fan switch) – the switch contacts can burn out, especially on the lower speed positions.
- Wiring harness or connector – melted or corroded pins at the resistor/module connector are common. Repair the connector before installing a new part.
- Blower motor relay (if separate) – rare, but a stuck relay could cause only high speed, but usually it would cause no speed or continuous run.
- Ground connection – a poor ground for the blower motor or the resistor/module can cause strange behavior. Clean the ground point.
Conclusion: Get All Your Fan Speeds Back
A blower that only works on high speed is a classic automotive nuisance, but it’s rarely a major problem. By understanding whether your vehicle uses a resistor pack or a blower control module, you can quickly narrow down the diagnosis. The key takeaway: If the fan works on high but not on lower speeds, the resistor pack or control module is almost always at fault. Which one? Look at your vehicle’s age, locate the part, and test accordingly.
Remember to always inspect the blower motor and cabin air filter before replacing the speed control component – a failing motor will destroy your new part in short order. Armed with a multimeter, a few hand tools, and this guide, you can tackle this repair in your driveway and enjoy whisper‑quiet low speeds and everything in between once again. No more hurricane force air just to get a little defrost – just the perfect breeze, every time.
Stay cool (or warm), and happy driving!