

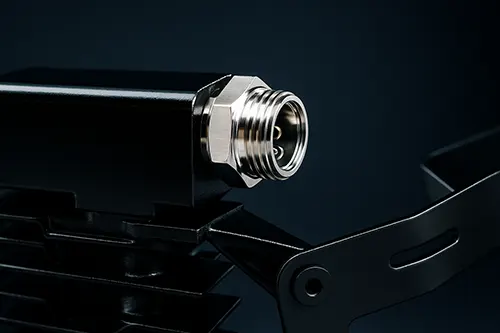
Replace Transmission Cooler Pump: Essential Guide for 2011 Chevrolet Impala 3.6L
Introduction: Why the Transmission Cooler Pump Matters
The transmission cooler pump on your 2011 Chevrolet Impala 3.6L plays a vital role in maintaining proper transmission fluid temperature. This electric pump circulates automatic transmission fluid (ATF) through an auxiliary cooler, typically mounted in front of the radiator, to dissipate heat generated during operation. A failing pump can lead to overheating, erratic shifting, and eventual transmission failure. Recognizing the signs of a faulty pump—such as unusual noises, fluid leaks, or warning lights—and addressing them promptly can save you from costly repairs. This guide walks you through the entire replacement process, from initial checks to final verification, ensuring a safe and effective repair.
Signs Your Transmission Cooler Pump Needs Replacement
Before diving into the replacement, confirm that the pump is indeed the culprit. Common symptoms include:
- Transmission overheating: If your temperature gauge climbs higher than normal, especially under load, poor fluid circulation may be to blame.
- Whining or grinding noise: A failing pump motor often emits unusual sounds from the front of the vehicle.
- Fluid leaks: Visible ATF around the pump area indicates a seal failure.
- Check Engine or Transmission warning light: Modern vehicles may trigger codes related to fluid flow or pump circuit.
- Slipping or harsh shifts: Inadequate cooling can cause fluid breakdown, leading to erratic transmission behavior.
If you experience any of these, it's time to inspect the pump.
Preliminary Checks Before Replacement
To avoid unnecessary parts replacement, perform these diagnostic checks:
- Verify fluid level and condition: Low or burnt fluid can mimic pump failure. Check the dipstick with the engine running and transmission warm. Top up if needed.
- Inspect electrical connections: Ensure the pump's wiring harness is secure and free of corrosion. A poor connection can prevent the pump from running.
- Listen for pump operation: With the engine idling and transmission in Park, listen near the pump (usually located near the radiator or front bumper) for a quiet hum. If silent, the pump may be dead.
- Check for trouble codes: Use an OBD-II scanner to look for transmission-related codes (e.g., P0740, P0971) that might point to pump issues.
- Inspect hoses and lines: Cracks, kinks, or leaks in the cooler lines can restrict flow, even with a good pump.
Tools and Materials You'll Need
Having the right tools on hand makes the job smoother. Gather these items before starting:
| Tools | Materials |
|---|---|
| Socket set (metric, 8mm-15mm) | New transmission cooler pump (OEM or equivalent) |
| Wrench set (combination) | Automatic transmission fluid (Dexron VI recommended) |
| Torx bits (T20, T25, T30) | New O-rings or gaskets (often included with pump) |
| Pliers (hose clamp pliers helpful) | Hose clamps (if original are damaged) |
| Drain pan (at least 2 quarts capacity) | Shop towels or rags |
| Jack and jack stands (if needed for access) | Brake cleaner (for cleaning around pump) |
| Multimeter (to test electrical) | Thread sealant (if required by pump design) |
| Safety glasses and gloves | Zip ties (for securing wiring) |
Step-by-Step Replacement Procedure
Follow these steps carefully. The exact location of the pump on a 2011 Impala 3.6L is typically near the front of the engine, mounted on the transmission or near the radiator. Consult your vehicle repair manual for precise location.
Step 1: Prepare the Vehicle
Park on a level surface, engage the parking brake, and disconnect the negative battery cable to avoid electrical shorts. If the pump is low, you may need to raise the vehicle with a jack and support it on jack stands. Allow the engine and transmission to cool completely—fluid can be hot enough to cause burns.
Step 2: Drain Transmission Fluid (Partial)
You will lose some fluid when disconnecting hoses. Place a drain pan under the pump. Have rags ready. Loosen the hose clamps and carefully slide hoses off the pump. Expect fluid to drain; catch it in the pan. If your transmission has a drain plug, you might consider draining more fluid to minimize mess, but it's not essential if you only disconnect the hoses quickly.
Step 3: Remove Electrical Connector
Unplug the pump's electrical connector. Release any locking tabs gently. If corroded, clean with electrical contact cleaner. Note the routing of wires for reinstallation.
Step 4: Unbolt the Old Pump
The pump is held by two or three bolts (usually 10mm or Torx). Remove them with a socket or wrench. Carefully maneuver the pump out of its mounting. It may be tight; wiggle gently. Note any spacers or brackets that may need to be transferred to the new pump.
Step 5: Compare Old and New Pump
Before installation, compare the new pump to the old one. Ensure they match in shape, port size, and electrical connector. Transfer any brackets or O-rings that are not included with the new pump. Lubricate new O-rings with a smear of transmission fluid to aid installation and prevent tearing.
Step 6: Install the New Pump
Position the new pump in place. Install mounting bolts and torque to manufacturer specifications (typically 8-10 ft-lb; check service manual). Reconnect the hoses and secure with clamps. Ensure hoses are fully seated to prevent leaks.
Step 7: Reconnect Electrical and Clean Up
Plug in the electrical connector until it clicks. Use zip ties to secure the wiring away from hot or moving parts. Wipe up any spilled fluid with brake cleaner and rags.
Step 8: Refill Transmission Fluid
Start the engine and let it idle. Check the transmission fluid level and add as needed to reach the correct level on the dipstick. Cycle through gears (P-R-N-D) to circulate fluid. Recheck level and top off.
Post-Replacement Verification
After installation, perform these checks to ensure everything is working properly:
- Leak inspection: With the engine running, check all hose connections and the pump body for signs of fluid leaks. Tighten clamps if necessary.
- Electrical test: Verify that the pump runs. You may hear a faint hum near the cooler. Alternatively, use a multimeter to check for voltage at the pump connector (should be 12V with engine on).
- Temperature monitoring: Drive the vehicle and monitor transmission temperature. It should remain within normal range, especially under load (e.g., highway driving or towing).
- Shift quality: Ensure shifts are smooth and no warning lights appear. If the check engine light comes on, scan for codes—they may indicate issues with the pump circuit.
- Fluid level recheck: After a short drive, park on level ground and recheck the fluid level with the engine running. Adjust as needed.
Common Pitfalls and Troubleshooting
- Pump doesn't run after installation: Check fuses, relays, and wiring connections. Use a multimeter to test power at the connector. If no power, trace the circuit.
- Leaks at hose connections: Ensure hoses are fully pushed on and clamps are tight. If the hose ends are damaged, trim them back or replace hoses.
- Incorrect fluid level: Overfilling or underfilling can cause transmission issues. Follow proper fill procedure.
- Noisy pump: If the new pump is noisy, it might be defective or there could be air in the system. Run the engine and cycle gears to purge air. If noise persists, consider replacement under warranty.
Maintenance Tips for Longevity
To extend the life of your new transmission cooler pump and the transmission itself:
- Regularly check transmission fluid level and condition (every 30,000 miles).
- Keep the cooler and radiator front clean of debris to ensure proper airflow.
- Address any leaks or unusual noises immediately.
- Use only the recommended Dexron VI fluid.
- If you tow frequently, consider an auxiliary cooler upgrade.
Conclusion
Replacing the transmission cooler pump on a 2011 Chevrolet Impala 3.6L is a manageable DIY project that can restore proper cooling and prevent transmission damage. By following the checks, using the correct tools, and verifying your work, you'll ensure reliable operation for miles to come. Always prioritize safety and consult a factory service manual for torque specs and specific details. If at any point you feel uncertain, don't hesitate to seek professional assistance—your transmission is a costly component worth protecting.