

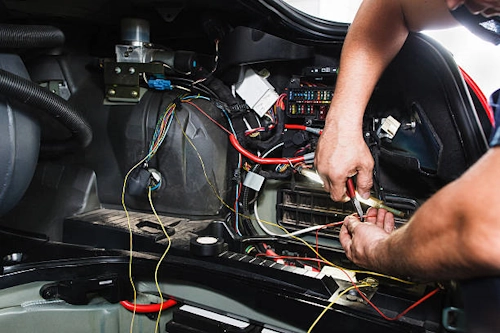
Faulty wiring in the car's cabin is one of those problems that can turn a quiet inconvenience (a dead courtesy light, intermittent window) into a frustrating electrical mystery. This guide explains where interior wires commonly break, how to protect connections from corrosion, safe panel removal, and reliable soldering and sealing methods so repairs last.
Who this guide is for
- Car owners doing DIY repairs
- Auto technicians needing a practical checklist
- Hobbyists and restorers who want durable results
Safety first
Before touching any wiring:
- Disconnect the negative battery terminal. Wait at least 5–10 minutes (longer if the vehicle has capacitive or airbag systems) to avoid accidental deployment or stored energy.
- If the repair involves SRS/airbag circuits, consult the repair manual — these circuits are safety-critical and often require dealership-level tools or procedures.
- Work in a well-ventilated area and wear eye protection when soldering.
Typical interior wiring break points
Automotive wiring in the cabin experiences movement, abrasion and moisture. The most common fail locations are:
- Door harness / door jamb — the flexing area where the door meets the body is the #1 culprit. Wires pinch or fatigue over thousands of open/close cycles.
- Seat wiring harnesses — heating elements, motors for power seats, sensors and seatbelt pretensioner wiring routed through hinges and under cushions.
- Steering column — turn signals, horn, cruise and airbag clock spring; flexing and aging can break thin conductors.
- Kick panel / under dash — wires pass through tight spaces and chafe on sharp edges or clips.
- Trunk and tailgate — liftgate harnesses are subject to bending and water ingress at grommets.
- Connector pinouts — corrosion at cabin connectors, especially floor harness connectors exposed to moisture and salt.
Diagnosing the fault
Efficient diagnosis saves time:
- Reproduce the symptom and note when it happens (door open/closed, seat position, after rain, etc.).
- Visual inspection: remove trim and look for frayed insulation, blackened wires, or crushed spots.
- Use a multimeter to check continuity and voltage. Wiggle test: while monitoring the circuit, gently flex harnesses to see if the fault appears.
- Backprobing connectors and using a test light can localize whether power or signal disappears at a particular connector.
Tools and materials
- Basic trim removal kit (plastic pry tools, panel clips remover)
- Multimeter (DC voltage, continuity, resistance)
- Wire strippers, diagonal cutters
- Soldering iron (25–60W) with a clean chisel or conical tip
- Solder — rosin-core or automotive-grade tin alloy; consider lead-free if preferred (note: leaded solders flow more easily)
- Flux (rosin flux for electronics) — improves wetting
- Heat-shrink tubing (adhesive-lined preferred) and heat gun
- Butt-splice crimp connectors (for where soldering is not possible)
- Dielectric grease, contact cleaner, abrasion tape, self-fusing silicone tape
- Protective gloves, eye protection
Panel removal — practical tips
Removing interior panels safely preserves clips and prevents damage:
- Document the process. Take photos of screw and clip locations before removal so reassembly is straightforward.
- Remove visible fasteners first. Hidden screws are often behind caps, in glove boxes, under seats or near door pulls.
- Use plastic pry tools. Metal tools will scratch or deform panels. Insert the pry tool at a corner, apply steady pressure to disengage clips.
- Work from the outer edges inward. Gently pop each clip free — panels can be fragile if cold.
- Watch for wiring and connectors. Many panels contain switches or lights. Unplug connectors before fully removing a panel; press release tabs rather than forcing.
Preparing the wire for repair
Once you find the break:
- Cut back to healthy wire — remove any blackened, brittle or corroded sections.
- Strip about 5–7 mm (¼ inch) of insulation from each conductor; avoid nicking the copper strands.
- If multiple strands are broken but present, twist strands gently to form a solid core.
- Slide the chosen heat-shrink tubing over one side of the wire before making the joint.
Soldering technique for automotive wiring
Soldering gives a reliable, low-resistance joint when done properly:
- Tinning: Heat the exposed conductor with the iron and apply solder so the strands are coated (tinned). Do this for both ends.
- Overlap splice: For best strength, use a short overlap (twist the tinned ends together so the joint has mechanical strength).
- Apply flux: A small amount of rosin flux (unless using rosin-core solder which already contains flux) improves flow.
- Heat and apply solder: Heat the wire, feed solder to the hot wire (not directly to the iron) until solder flows smoothly and fills the splice. Avoid excessive heat to prevent insulation damage.
- Inspect: A good solder joint is shiny and smooth; a dull, grainy joint may be a cold solder and should be reworked.
- Insulate: Center the heat-shrink tube over the joint and shrink it with a heat gun. Use adhesive-lined tubing for the best moisture seal.
When to crimp instead of solder
Crimp joints are preferable when vibration, mechanical stress or future serviceability are main concerns. Use high-quality insulated butt splices and a ratcheting crimper. If you crimp, still add heat-shrink tubing with adhesive and consider a dab of dielectric grease on connector contacts.
Protecting against corrosion
Corrosion often starts where moisture and salts meet bare metal. To prevent it:
- Use adhesive-lined heat shrink (sometimes called “dual-wall”) — the hot adhesive forms a water-tight seal.
- Apply dielectric grease to connector pins (not on soldered joints themselves) to repel moisture and prevent corrosion.
- Route wires away from moisture traps and sharp edges; use split loom or abrasion tape where wires cross hard surfaces.
- Seal bulkhead grommets with silicone and ensure they are seated correctly — these are common ingress points.
- Consider a light coating of a dedicated electrical contact protectant or corrosion inhibitor on exposed connectors in high-moisture areas.
Special notes on connectors and modules
When disconnecting connectors, depress the tab and pull the housing — do not pull the wires. If pins are corroded, clean with contact cleaner and a small brush; replace pins if pitted. For multiplexed or CAN bus systems, avoid removing modules unless you understand module reprogramming needs.
Testing after repair
- With battery reconnected, verify circuit voltage at the repair site and at the load (switch, motor, lamp).
- Operate the system repeatedly (open/close door, move seat) to confirm the fix holds under motion.
- Check for unintended effects — blown fuses, parasitic drains, or warning lights.
Reassembly checklist
- Ensure all connectors are fully seated and locked.
- Replace broken clips and reuse fasteners in their original positions.
- Secure harnesses with zip ties or OEM retainers — leave a small service loop near flex points.
- Run a final check of all interior functions before finishing (lights, windows, locks, airbags indicators).
Durability tips — make it last
- Avoid excessive solder that creates a rigid lump; keep a low-profile joint so it can flex slightly.
- Use service loops near hinges to reduce stress on a splice.
- Document the repair location with tape and a small tag for future reference.
Common mistakes and how to avoid them
- Cold solder joints: rework any dull or cracked solder with proper heat and flux.
- Overheating insulation: use a heat sink or quick technique and don’t hold the iron on the wire too long.
- Ignoring grommets: skipped seals let moisture into the harness — always inspect grommets.
Practical section
Can I use solder on power window motors and seat heaters?
Yes — solder provides a low-resistance joint. Ensure you mechanically secure the wire first (twist or use an overlap) and use heat-shrink with adhesive. For high current leads, verify the conductor cross-section and avoid undersized repairs; crimp + solder or high-quality crimp terminals are often best for heavy loads.
Is dielectric grease safe to use on all connectors?
Dielectric grease is safe and recommended for external connectors to repel moisture. Use it sparingly — it doesn’t conduct electricity, so don’t pack grease into connectors where you can’t seat pins correctly.
How much heat is too much when soldering automotive wires?
Avoid holding the iron on the insulation for more than a second or two. Use a properly sized iron (25–60W) and pre-tin conductors; work quickly and use heat-shrink after the joint cools to protect insulation.