

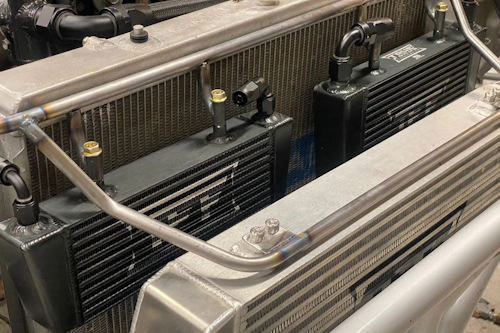
Overheating on a climb or a coolant smell after a short stop is more than an annoyance—it’s the cooling system telling you to test, not guess. This guide walks through pressure testing, dye tracing, and preventive habits that keep temps stable in traffic and on long grades.
Patterns that point to cooling issues
- Temp climbs at idle with A/C, drops on the move—airflow or fan control
- Climbs at highway load—restricted radiator or marginal pump/thermostat
- Overflow bottle smells sweet, level creeps down—small external leak
- Random spike after cold start—sticking thermostat or air pocket
Tools that save time
- Pressure tester with correct cap adapter; UV dye and lamp
- IR thermometer for across‑core radiator delta
- Block tester (CO₂) if combustion leak is suspected
Step‑by‑step: pressure & dye
- Cold engine: pressurize to cap rating. Hold for 10–15 minutes—watch for drop.
- Scan for seepage at hose ends, pump weep hole, radiator crimp seams, heater core tubes, thermostat housing.
- Add UV dye, drive, reinspect under lamp. Dry traces expose evaporated leaks you won’t see wet.
Radiator performance in one minute
With the fan commanded on, measure inlet vs outlet tanks: a healthy core shows ~10–25 °C drop depending on load and airflow. A tiny delta with high temps suggests a clogged core; a huge delta with overheat points to poor airflow or flow restriction upstream.
Preventive care that actually helps
- Change coolant on schedule; wrong chemistry corrodes seals and clogs cores
- Use OEM thermostat temperature; low‑temp myths hurt fuel/strategy
- Inspect cap seal; a weak cap lowers boiling margin
Case study
Truck overheated towing only on long grades. Static pressure test OK. Under load, IR showed tiny delta across radiator; dye later exposed dried seep at crimp seam—core replacement fixed both delta and tow temps.
Checklist
- Pressure holds? yes/no
- UV traces? location
- Rad delta at fan‑on idle: __ °C; at cruise load: __ °C
Takeaway: pressure + dye + delta‑T beats guessing—and prevents expensive head gasket mistakes.
Pro tips & FAQs
- Baseline first: document symptoms and measurements before parts. It saves money and proves the fix.
- Spec over brand: match OEM specs for fluids/seals; quality matters more than labels.
- Torque & sequence: follow VIN/platform service info—overtorque ruins aluminum and plastics.
- After the job: road‑test, recheck levels/fasteners, and log a quick post‑repair data snapshot.
Pro tips & FAQs - details
- Baseline first: document symptoms and measurements before parts. It saves money and proves the fix.
- Spec over brand: match OEM specs for fluids/seals; quality matters more than labels.
- Torque & sequence: follow VIN/platform service info—overtorque ruins aluminum and plastics.
- After the job: road‑test, recheck levels/fasteners, and log a quick post‑repair data snapshot.
Pro tips & FAQs - practical notes
- Baseline first: document symptoms and measurements before parts. It saves money and proves the fix.
- Spec over brand: match OEM specs for fluids/seals; quality matters more than labels.
- Torque & sequence: follow VIN/platform service info—overtorque ruins aluminum and plastics.
- After the job: road‑test, recheck levels/fasteners, and log a quick post‑repair data snapshot.