

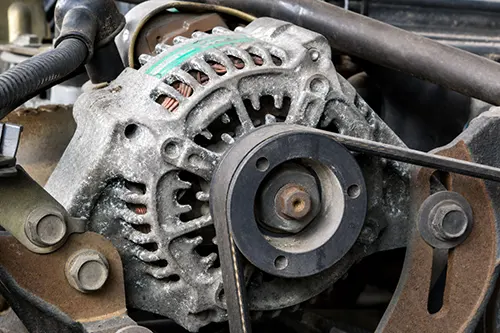
You’ve been there: a cold morning start, multimeter on the battery shows 14.2–14.7 volts, everything looks textbook. You drive for 20 minutes, stop for fuel, restart — and suddenly your voltmeter reads 12.8 volts or less. At first glance, it seems like the alternator just quit. Then, an hour later, after everything cools down, it’s charging perfectly again. Sound familiar? This frustrating, intermittent failure is more common than most mechanics admit, and it often sends owners down a rabbit hole of replacing perfectly good batteries and alternators. The culprit usually falls into one of three categories: heat‑soak failure of internal components, belt slip aggravated by heat, or wiring losses that increase with temperature. What is important is separating those three, because that is the key to a permanent fix — without throwing parts at the problem.
Why Heat Changes Everything: The Physics of Automotive Charging
Your alternator is an electro‑mechanical workhorse, but every component inside it — diodes, voltage regulator windings, brushes, slip rings — has a temperature limit. Underhood temperatures routinely exceed 200°F (93°C) on hot days, especially in modern turbocharged or tight‑packed engine bays. As components age, thermal expansion can open hidden cracks, raise internal resistance, or cause semiconductor junctions to leak. At the same time, rubber belts lose grip as they heat up and harden, and every wire, connector, and crimp picks up more resistance with rising temperature; copper’s resistivity increases about 0.4% per °C. The end result is simple. A charging system can pass every cold test, then fail exactly when you need it most — after the engine has heat‑soaked.
Three Suspects, One Symptom: How to Tell Them Apart
Before you condemn the alternator, do a simple hot‑soak test. Drive until the voltage drops, then immediately pop the hood, with the engine running, and check three things: belt tension and condition, voltage at the alternator output post versus battery positive, and any unusual noises. It is worth noting that these three checks usually point you in the right direction very quickly. The table below works as a fast diagnosis guide.
| Symptom / Test | Heat‑Soak Failure (Internal) | Belt Slip | Wiring Loss |
|---|---|---|---|
| Voltage at alternator B+ post (hot) | Low (same as battery) | Low (same as battery) | Normal (13.5V+) but battery sees lower |
| Voltage at battery terminals (hot) | Low | Low | Low |
| Belt squeal or chirp (hot idle) | No | Often yes (especially under electrical load) | No |
| Voltage jumps when you rev engine (2000 rpm) | Slight or no increase | Returns to normal (belt grips at higher speed) | Slight increase but still below target |
| Alternator case temperature (infrared gun) | Extremely hot (>240°F) | Normal operating temp (160-200°F) | Normal |
| Voltage returns to normal after cooling (10 min fan on) | Yes — classic heat soak | Yes (belt cools and contracts) | No — wiring damage often permanent |
1. Heat‑Soak Failure: The Alternator’s Internal Meltdown
This is the most common cause of “good cold / bad hot” charging. Internal components, especially the voltage regulator and rectifier diodes, can develop thermal intermittents. The voltage regulator’s semiconductor chips may form microscopic cracks that only open when hot, which makes the regulator shut down or fall back to a low “limp‑home” voltage, often 12.8V. Diodes may leak reverse current once they heat up, effectively turning the alternator into a parasitic drain. Brushes that are nearly worn out can also lose contact with the slip rings after the brush holder expands from heat. Nasty little failure, really.
How to Confirm Heat‑Soak Failure:
- Cold test: Start engine, measure voltage at battery — should be 14.2‑14.8V.
- Heat it up: Drive until voltage drops below 13.0V with normal electrical loads (lights, blower fan on medium).
- Check directly at alternator: Measure voltage between alternator B+ output terminal and alternator casing. If it matches battery voltage (low), the alternator isn’t producing enough power.
- Load test hot: Turn on high beams, rear defogger, and blower on high. If voltage plunges below 12.5V, the alternator cannot handle the load.
- Cool down test: Shut off engine, open hood, place a fan blowing on the alternator for 10 minutes. Restart — if voltage returns to 14V+, you have classic heat‑soak failure.
Fix: Replace the alternator with a high‑quality unit, OEM or from a reputable remanufacturer. Avoid cheap “white box” rebuilds; they often use substandard regulators that fail in the same way. If you run heavy electrical loads — winches, auxiliary lighting, audio systems — upgrade to an alternator rated for higher thermal duty.
2. Belt Slip: The Hidden Grip Loss That Worsens With Heat
Belts are rubber compounds with tensile cords. As they age, engine heat makes the rubber harder and less pliable, which lowers the coefficient of friction on the pulleys. A belt that stays quiet when cold may start slipping under load once it gets hot. Alternators demand significant torque — up to 5‑8 hp at full output — and a slipping belt simply can’t transmit it, so alternator speed drops and voltage goes with it. The worst part is that minor but constant slip may not squeal at all. No drama, just low charging.
How to Confirm Belt Slip:
- Visual check: Look for glazing (shiny polished ribs) on the belt. A glazed belt feels hard and slick.
- Hot tension test: With engine hot and off, push on the belt at its longest span. It should deflect no more than ½ inch (12mm) with moderate thumb pressure.
- Dynamic test: With engine running hot and voltage low, spray a small amount of water on the belt’s backside (not on alternator). If voltage jumps up for a few seconds, the belt is slipping.
- Check the tensioner: A weak automatic tensioner will allow belt flutter at high rpm. Watch the tensioner arm as a helper revs the engine — excessive movement indicates a worn tensioner.
Fix: Replace the belt with a high‑quality EPDM or aramid‑reinforced belt (Gates, Continental). Replace the tensioner and idler pulleys too, since they tend to share a similar service life. Avoid belt dressings; long term, they create more slip. On older V‑belt systems, increase tension to specification and make sure the pulleys are not grooved.
3. Wiring Loss: The Overlooked Resistance Problem
Heat raises the resistance of every conductor, connector, and ground point. A cable that loses only 0.1V cold at 50 amps can lose 0.4‑0.5V hot, and that is enough to pull a 14.2V alternator output down to 13.7V at the battery. Worse, corroded crimps or loose terminals can create a “thermal runway” — high resistance makes heat, the heat increases resistance even more, and voltage eventually collapses. The alternator’s sensing wire, often a small gauge wire that tells the regulator the battery voltage, is especially vulnerable. If that wire has high resistance, the alternator believes the battery is fully charged and cuts output back. Why chase the alternator if the cable is lying to it?
How to Confirm Wiring Loss:
- Voltage drop test (hot): With engine hot and voltage low, place multimeter leads on alternator B+ post and battery positive terminal. Read voltage while running at 2000 RPM with headlights on. Anything above 0.3V indicates excessive resistance in the charge cable.
- Ground side test: Measure between alternator casing and battery negative terminal. More than 0.2V indicates a bad engine ground strap.
- Sense wire test: At the alternator’s sense terminal (often marked “S”), measure voltage relative to battery positive. If there’s a difference of more than 0.5V, the sense circuit has high resistance.
- Touch test: After running hot, carefully feel the main battery cables, fusible links, and connections. Any hot spot (over 160°F) indicates a high‑resistance point.
Fix: Clean or replace battery terminals. Install a new alternator‑to‑battery cable using 4 AWG or larger for high‑output systems. Add an extra engine ground strap from the alternator bracket to the chassis. For the sense wire, run a direct jumper from the battery positive to the alternator’s S terminal, with an appropriate fuse, to eliminate any sensing error.
Real‑World Case Study: A 2005 Suburban That Confused Four Shops
A customer complained of dim headlights after highway driving in summer, but every cold test passed. Four shops replaced the alternator, battery, and belts — no change. Using the methods above, we found cold voltage at 14.4V. After 30 minutes of driving, voltage at the battery dropped to 12.9V. But voltage at the alternator B+ post was 14.2V. That is classic wiring loss: a 1.3V drop between alternator and battery. The main charge cable had corrosion inside the terminal lug, invisible from the outside. A new 2‑gauge cable and cleaning the junction block fixed it permanently. The previous alternators were fine; they just couldn’t push current through a resistive path.
Advanced Diagnostic Flowchart (Do This Before Buying Anything)
- Cold baseline — Record battery resting voltage (engine off), then running voltage at idle and 2000 rpm.
- Heat soak — Drive 20 minutes in stop‑and‑go traffic or until the problem appears.
- Hot running voltage — Measure at the battery again. If low (<13.0V with electrical loads), proceed.
- Measure at alternator B+ — If it’s normal (>13.5V) but the battery is low => wiring loss (fix cables/grounds).
- If alternator B+ is also low — Perform the belt spray test. If voltage jumps => belt slip (replace belt & tensioner).
- If no belt slip — Feel the alternator case. If it is extremely hot (>230°F) and voltage returns after fan cooling => heat‑soak failure (replace alternator).
- Still unsure? — Disconnect the alternator’s field connector and supply battery voltage directly to the field terminal (on a test bench only) — if it charges hot, the regulator is bad.
Preventive Measures: Keep Your Alternator Cool and Reliable
- Improve airflow — Remove engine undercovers that trap heat (if not needed for aerodynamics). Install a heat shield between exhaust manifold and alternator.
- Use synthetic belt — EPDM or aramid belts handle high heat far better than neoprene.
- Upgrade wiring — “Big 3” upgrade (alternator to battery, battery to chassis, engine to chassis) in 4 gauge or 1/0 gauge reduces voltage drop by 75%.
- Change battery every 4‑5 years — A failing battery stresses the alternator, making it run hot continuously.
- Check grounds annually — Especially on older vehicles. Remove, wire brush, and apply dielectric grease.
Summing Up: Don’t Let Heat Fool You — Diagnose Methodically
An alternator that works cold but drops voltage hot stops being a mystery once you separate the three causes. Heat‑soak failure gets most of the attention, but belt slip and wiring loss account for at least half of these complaints. A $20 multimeter and the tests above can save you from replacing perfectly good alternators. Important: voltage at the alternator tells the real story. When charging voltage at the output stud matches battery voltage, the alternator is the problem. When the two readings differ, chase the cables. And if a simple belt spray makes it charge again, don’t brush off the tensioner. With that approach, you can deal with the hot‑soak headache and get back to a solid charging system — even on the hottest summer days.
Professional tip: If you live in a hot climate, consider a “high‑temp” alternator with a remote voltage regulator or a unit rated for +125°C ambient. Also, putting a voltmeter inside the cabin, not just relying on the factory gauge, gives you real‑time feedback. Happy diagnosing — and may your volts always stay above 13.5.