

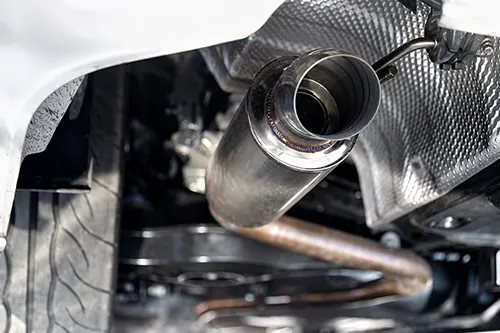
If you’ve ever heard a metallic buzzing or rattling noise that only appears when your engine hits exactly 1800 RPM – and disappears immediately above or below that – you’re dealing with a classic resonance problem. This isn’t just any loose heat shield; it’s a specific frequency-induced rattle that drives even experienced enthusiasts crazy. The good news: once you understand why it happens and how to reproduce it, the fix is often straightforward.
Why Only at 1800 RPM? The Science of Resonance
Engines create vibrations across the entire RPM range. But every exhaust system has a natural resonant frequency – a specific engine speed where the vibrations match the exhaust’s own frequency. At that point, even tiny movements become amplified. The heat shield (a thin metal layer protecting the vehicle floor from exhaust heat) starts to vibrate against the exhaust pipe, a mounting bracket, or the underbody. 1800 RPM is a common resonance point on many four‑ and six‑cylinder engines because that’s where the second‑order engine frequency aligns with the exhaust system’s structural harmonics.
Why does it disappear above or below 1800? The vibrations become either too slow (no amplification) or too fast (the shield can’t react quickly enough). Understanding this helps you reproduce the noise reliably – a crucial step before you ever crawl under the car.
How to Reproduce the Heat Shield Rattle (Without a Dynamometer)
You don’t need a shop. With a helper, you can trigger the rattle safely in your driveway or garage.
- Static test (parked): Set the parking brake firmly. Start the engine and slowly increase the RPM to 1800. Hold it steady. The rattle should appear. If not, gently vary the throttle between 1700‑1900 RPM. A helper at the exhaust pipe can listen for the source.
- Load test (on the road): Drive in a low gear (2nd or 3rd) to keep the engine at 1800 RPM at low speed. Lightly accelerate and decelerate around that mark. The noise will often be loudest under light load or deceleration.
- Use a frequency app: Some smartphone apps can measure vibration frequency. Hold the phone against the exhaust (carefully) to confirm the resonant peak. This helps differentiate a heat shield rattle from a loose converter brick or internal muffler failure.
- The “wood block” method: With the engine off and cold, use a rubber mallet or a wood block to gently tap the exhaust system at various points. If you hear a similar metallic buzz, you’ve found the problem area.
Locating the Real Contact Point – Beyond “Just a Loose Shield”
Most DIYers immediately reach for a hose clamp or a large washer. That often masks the symptom but doesn’t fix the real contact point. Here’s how to find exactly what is touching what at 1800 RPM:
- Inspect heat shield mounting points: Factory heat shields are held by small tack‑welded studs or through‑bolts with oversized washers. Over time, the washers corrode, tack welds crack, or the thin aluminum shield itself cracks around the mounting hole. Look for bright metal marks – shine indicates movement.
- Check for deformation: A heat shield that was bent during previous service (transmission removal, exhaust work) can now make contact only when vibration amplitude increases at 1800 RPM.
- Examine the exhaust pipe surface: Run your hand (gloved – sharp edges!) along the pipe. Rust buildup can create “bridges” to the shield. Also look for spots where the pipe has rubbed against a crossmember or the chassis – that’s a different problem.
- Use a GoPro or phone camera: Secure a small camera under the car (zip ties work) aimed at suspected areas. Drive briefly at 1800 RPM. The video will show exactly what moves and touches what. This is the most reliable method.
Common real contact points include:
- Heat shield edge touching exhaust pipe after a sagging exhaust mount
- A broken weld on the catalytic converter heat shield (most common)
- Shield contacting the driveshaft or rear axle (on RWD vehicles) only under load
- Loose clamp on the heat shield around the muffler
Tools & Materials for a Permanent Fix
You won’t need a full workshop. Gather these items before starting:
- Ramps or jack stands (never rely on a jack alone)
- Gloves and safety glasses
- Wire brush and rust penetrant (PB Blaster or similar)
- Large stainless steel hose clamps (2–4 inches wide)
- High‑temperature silicone (copper RTV, good to 700°F)
- Large fender washers (stainless steel preferred)
- Small piece of sheet aluminum or steel (for patching cracks)
- Nut and bolt set M6 or M8 (if a stud is broken)
- Optional: exhaust repair tape, Worm‑drive clamp with rubber lining
Step‑by‑Step Repair: Fix the Real Contact Point – Not Just the Rattle
1. Secure the vehicle and let the exhaust cool completely
Never work on a hot exhaust. Burns happen fast, and heat shields are thin enough to slice skin.
2. Remove the heat shield (if possible)
Many shields are held by 10mm or 12mm nuts. Soak with penetrant. If nuts spin the stud, use a small grinding wheel or a nut splitter. Once removed, examine the shield for cracks around mounting holes – those cracks allow movement.
3. Repair or reinforce the shield
- Cracked holes: Use a large stainless fender washer on both sides of the hole (if accessible) or use a piece of sheet metal as a backing plate.
- Missing tack welds: You can either re‑weld (MIG), or drill a small hole and secure with a self‑tapping screw and a washer. Use anti‑seize on the threads.
- Deformed shield: Gently straighten with pliers or a hammer. Ensure at least ½ inch (12 mm) clearance from the exhaust pipe and any moving parts.
4. Address the real contact source – isolators and mounts
If the shield was touching because the exhaust pipe moved, inspect rubber hangers. A sagging exhaust can lift the pipe into the shield only at resonant frequency. Replace worn hangers. Temporary fix: wrap a stainless steel clamp around the rubber hanger to stiffen it.
5. Add damping to break the resonant frequency
Sometimes the shield is intact but still rings. Apply a bead of high‑temperature silicone to the edges of the shield where it contacts mounting brackets. The silicone acts as a vibration damper. Another trick: apply a thick patch of exhaust repair tape (aluminum foil style) to the underside of the shield – it adds mass and changes the resonance point.
6. Re‑install using the “floating” method
- Use new hardware with nylon‑lock nuts.
- Install a thin rubber or silicone washer between the shield and the bracket (high‑temp safe).
- Do not overtighten – the shield should be snug but still able to “float” slightly. Over‑tightening causes cracks.
When a Simple Clamp Is the Right Fix – But Do It Properly
For inaccessible shields (e.g., around the catalytic converter), a large hose clamp around the entire shield and pipe can silence the rattle immediately. However, never clamp directly over the catalytic converter brick area – it can overheat. Instead, clamp only the heat shield to the pipe at the shield’s ends. Use two clamps spaced 2 inches apart for stability.
Heat Shield Rattle Only at 1800 RPM – Diagnosis Table
| Symptom | Likely Contact Point | Permanent Fix |
|---|---|---|
| Rattle only at 1700‑1900 RPM, disappears above 2000 | Resonance of a large, loose shield (usually converter shield) | Add fender washers to mounting points + high‑temp silicone damper |
| Metallic buzz when decelerating through 1800 RPM | Shield edge touching exhaust pipe due to sagging hanger | Replace rubber exhaust hangers; re‑position shield |
| Rattle that sounds like it’s coming from under the rear seats | Mid‑pipe heat shield cracked around mounting studs | Remove shield entirely (if safe) or secure with worm‑drive clamp |
| Intermittent rattle that changes with engine load | Catalytic converter internal brick failure (not heat shield) | Replace cat – not a heat shield problem |
| Constant buzzing at 1800 RPM but also at idle on cold start | Loose bracket or missing clamp bolt | Replace hardware, use loctite |
Professional Tricks to Pinpoint It Without Removing Anything
- Use a stethoscope or a long screwdriver: Touch the tip to various heat shields while a helper holds 1800 RPM. The loudest one is your culprit.
- Spray water trick: With the engine cold, lightly spray water on each heat shield. Start the engine and bring to 1800 RPM. The shield that dries fastest (due to exhaust heat) is the one in direct contact – but also listen for a change in rattle frequency as water dampens it.
- Thermal camera (or infrared thermometer): A shield that vibrates against a pipe will have a different temperature pattern after a short drive. The contact point will be hotter or abraded.
When to Remove a Heat Shield Entirely
Some older vehicles have heat shields that are so corroded that repair is impossible. Is it safe to remove them? On most cars, yes, but with caution. Remove heat shields only if:
- They are located far from fuel lines, brake lines, or the fuel tank (e.g., mid‑pipe shields).
- You do not park over dry grass or flammable materials – a missing heat shield can ignite grass on a hot catalytic converter.
- You replace the shield with an aftermarket blanket or reflective tape on the vehicle floor.
Never remove a heat shield above the catalytic converter or within 12 inches of the fuel tank.
Preventing Future 1800 RPM Rattles
- Apply anti‑seize to all heat shield studs – this prevents galvanic corrosion that breaks the washers loose.
- Inspect heat shields every oil change – a 30‑second visual check can catch a loose washer before it starts rattling.
- Use stainless steel hardware – it outlasts the vehicle and doesn’t rust.
- Consider adding a small rubber isolator (cut from an old hose) between the shield and bracket if the exact contact point is elusive.
Conclusion: No More Mystery Rattle at 1800 RPM
A heat shield rattle that appears only at a narrow RPM band is one of the most frustrating noises for any car owner. But it’s also one of the easiest to fix once you understand resonance. By reproducing the noise safely, identifying the exact contact point (not just assuming it’s the entire shield), and applying a precise repair – whether a reinforced mount, a damper, or a simple clamp – you can silence it permanently. Don’t waste money on a muffler shop guessing. With these DIY methods, you’ll restore the peace inside your cabin and the satisfaction of a proper fix.
Final tip: After your repair, test drive through the 1800 RPM zone under both light and heavy throttle. If the rattle is gone, you’ve fixed the real contact point. Enjoy the quiet.