

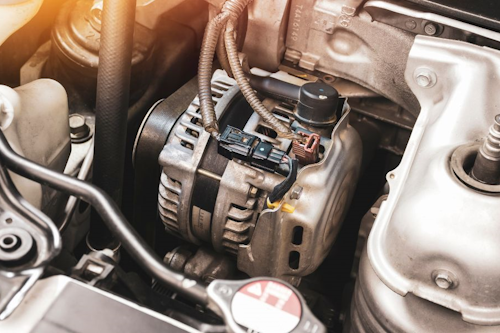
Battery lights lie; voltage drop doesn’t. Before ordering an alternator, prove the fault with a charging test, targeted voltage‑drop checks, and a quick belt/overrun pulley inspection. Replace once the numbers say so—and avoid comebacks.
Charging test—fast and decisive
- At idle, lights off: 13.8–14.6 V typical. If low, load the system and watch response.
- At 2,000 RPM with load (blower, rear defogger): voltage should hold; falling under 13.0 V hints at alternator or wiring.
Voltage drop finds wiring faults
- Alt B+ to battery + under load: <0.3 V
- Alt case to battery − under load: <0.2 V
- Higher values = corroded cables, loose grounds, or failing fusible links
Don’t skip the belt drive
- Cracked belt, noisy tensioner, or a seized overrun pulley can mimic alternator failure
Replacement highlights
- Disconnect battery; document routing; clear access
- Swap alternator; torque fasteners; reconnect wiring with dielectric grease on boots
- Re‑check drop and charging voltage; clear DTCs
Case study
“Dead alternator” diagnosed by a dim light—real fault was a 0.8 V drop on the ground path at a corroded chassis lug. Cleaned lug, added star washer—voltage restored, no parts needed.
Takeaway: test, measure, then replace—the battery light stops being a guess.
Pro tips & FAQs
- Baseline first: document symptoms and measurements before parts. It saves money and proves the fix.
- Spec over brand: match OEM specs for fluids/seals; quality matters more than labels.
- Torque & sequence: follow VIN/platform service info—overtorque ruins aluminum and plastics.
- After the job: road‑test, recheck levels/fasteners, and log a quick post‑repair data snapshot.
Pro tips & FAQs - details
- Baseline first: document symptoms and measurements before parts. It saves money and proves the fix.
- Spec over brand: match OEM specs for fluids/seals; quality matters more than labels.
- Torque & sequence: follow VIN/platform service info—overtorque ruins aluminum and plastics.
- After the job: road‑test, recheck levels/fasteners, and log a quick post‑repair data snapshot.
Pro tips & FAQs - practical notes
- Baseline first: document symptoms and measurements before parts. It saves money and proves the fix.
- Spec over brand: match OEM specs for fluids/seals; quality matters more than labels.
- Torque & sequence: follow VIN/platform service info—overtorque ruins aluminum and plastics.
- After the job: road‑test, recheck levels/fasteners, and log a quick post‑repair data snapshot.
Pro tips & FAQs - verification
- Baseline first: document symptoms and measurements before parts. It saves money and proves the fix.
- Spec over brand: match OEM specs for fluids/seals; quality matters more than labels.
- Torque & sequence: follow VIN/platform service info—overtorque ruins aluminum and plastics.
- After the job: road‑test, recheck levels/fasteners, and log a quick post‑repair data snapshot.