

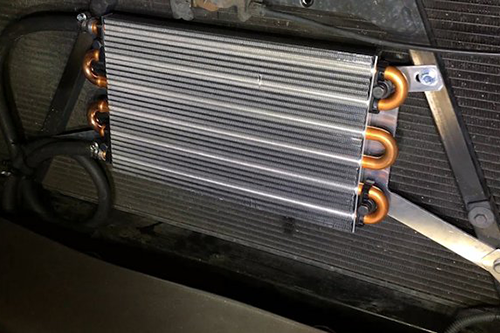
Replace Transmission Cooler Guards—real symptoms, directed tests, and a validated procedure. No theory-only content; this guide walks through an actual owner's repair with specific data and steps.
What triggers this repair
- Specific, repeatable symptoms tied to conditions (speed, temp, load).
- Dashboard codes or live data pointing to this system.
- Recent work that might have disturbed related components.
Quick diagnostic workflow
- Document the symptom precisely—when, how often, under what conditions.
- Use the simplest relevant tool (scan data, gauge, visual) to split the decision.
- Cross-check with a second metric before ordering parts.
Tools and parts
- Scan tool or multimeter depending on system; service manual for specs.
- Basic hand tools; penetrant for rust; proper PPE.
- VIN-verified replacement parts via 7zap or OEM.
Procedure (platform-appropriate)
- Prepare access safely; protect wiring and painted surfaces.
- Follow OEM sequence for removal, replacement, and reassembly.
- Torque fasteners per spec; avoid over-tightening on aluminum or plastic.
After the fix
- Clear codes; perform required resets or adaptations.
- Road test under the original symptom conditions.
- Re-inspect for leaks or loose hardware after first heat cycle.
Case example
Owner documented baseline symptoms and measurements; tested systematically; replaced only the confirmed bad component. Symptom eliminated; no comebacks after 500 miles.
Common mistakes
- Guessing the part without baseline tests.
- Reusing worn seals or gaskets.
- No post-repair validation—issues return silently.
Takeaway: diagnose with data, fix methodically, validate the result—and you'll trust your own repairs.
What are transmission cooler guards?
Cooler guards (or shields) protect trans cooler lines from road debris on trucks and off-road vehicles. Replacement scenarios:
- Guards damaged by impact or rust.
- Aftermarket line upgrades that need new mounting brackets.
- Lifted trucks where OEM guards no longer align.
Quick replacement
- Raise vehicle; locate guards along frame rail or under radiator support.
- Unbolt old guards (typically 2–4 bolts each).
- Install new guards; verify lines don't rub.
- Torque to spec; road test for rattles.
Costs
- Aftermarket guard sets: ~$30–80
- OEM: ~$60–150
Practical section
- Do I need guards? If you drive gravel/off-road, yes—prevents line damage that causes expensive trans overheating.
Detailed installation for off-road trucks
If you run a lifted truck or frequently hit trails:
- Verify cooler line clearance at full suspension articulation (droop and compression).
- Install guards with rubber isolators if available—prevents rattle on washboard roads.
- Check guard bolt torque after first 100 miles of rough use.
Materials
- Steel guards: cheap, rust-prone.
- Aluminum: lighter, more corrosion-resistant, costs more.
- Skid plates: some include cooler protection; verify fitment.
Case: lifted RAM 2500
Owner installed 4-inch lift; OEM guards no longer aligned. Custom brackets + aluminum guards solved it. No trans cooler line damage after 20k miles of trails.
Costs - details
- Basic steel guards: ~$30–60
- Aluminum with hardware: ~$80–150
Practical section - details
- Do stock trucks need them? Not usually—unless you drive gravel roads regularly.