

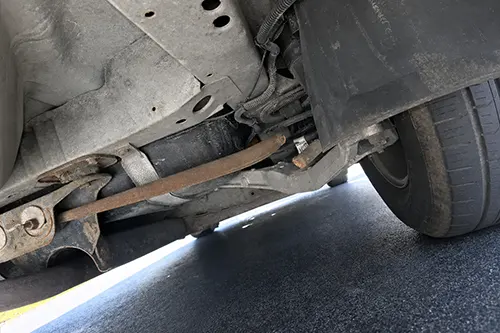
You park your car on a level surface, walk away, and come back to find it leaning — noticeably lower on one corner. That’s more than an eyesore. It’s a red flag that something in the suspension has gone sideways. As a seasoned wrench turner, I’ve watched this symptom stump DIYers, and yes, even a few pros. The culprit is almost always one of three things: spring sag (fatigue), binding shock/strut (mechanical lock), or an uneven load path (bent or misaligned suspension components). In this deep dive, we’ll unpack the science behind each failure, show you how to pinpoint the cause without guessing, and get your ride sitting level again — safely.
The Quick Symptom Check: What’s Your Car Telling You?
Before getting lost in theory, stand back and look at the car. Does it lean only after parking, then return to level after a few blocks of driving? Or is that corner low all the time? Does the low corner feel bouncy too, or weirdly rock-hard? Important clues like these narrow the suspect list fast. Use this table as your first-line diagnostic reference:
| Symptom | Likely Cause | Confidence |
|---|---|---|
| Corner stays low all the time, no change after driving | Spring sag or broken spring | High |
| Corner sits low only after parking, rises back up after driving | Binding shock (hydraulic lock) or seized strut | High |
| Low corner plus uneven tire wear (diagonal pattern) | Uneven load path (bent control arm, shifted subframe) | Medium |
| Leaning accompanied by clunking over bumps | Broken spring coil or loose shock mount | High |
| Low corner and opposite corner high (cross‑leaning) | Twisted chassis or severe bushing failure | Low |
1. Spring Sag: The Slow Creep of Metal Fatigue
Coil springs and leaf springs are built to support the vehicle’s static weight and soak up road impacts. But after years of compression cycles — millions of them — even high-quality spring steel develops micro-structural fatigue. The result is permanent height loss, or sag. Spring sag almost never appears overnight. It sneaks in over tens of thousands of miles. Then one day you notice the driver’s front fender sitting an inch lower than the passenger side, even with the car empty.
- Why it happens: Continuous overload (towing, heavy cargo), corrosion pitting, or simple age. Hot climates accelerate spring sag because heat relaxes residual stress.
- How to confirm: Measure ride height from the center of the wheel hub to the fender arch at each corner. Compare left vs right. A difference of more than 0.5″ (13mm) is suspicious. Remove the suspected spring and measure its free length against a known good spring — it will be shorter by 1″ or more.
- Visual check: Look for broken coil ends or rust-thinned spring wire. On leaf springs, check for broken leaves or a flattened arch.
- Fix: Replace springs in pairs (both front or both rear) to maintain balance. Never replace a single sagged spring; the new spring will be stiffer and can cause the opposite side to lean.
2. Binding Shock / Strut: The Invisible Lock
This is the most deceptive cause of the bunch. A shock absorber or strut that binds internally may not leak oil or show any obvious damage. Yet when you park the car, the internal piston can stick in a slightly compressed position, and because the shock mounts between the chassis and the suspension arm, it pulls that corner downward. Drive off, hit a few bumps, the resistance breaks free, and the car levels out again. Sounds strange, right? Owners often think the problem “fixed itself,” but it comes back every time they park.
- Why it happens: Internal hydraulic lock from contaminated oil, worn piston seal swelling, or a bent piston rod. On gas-pressurized shocks, loss of nitrogen charge can cause rod misalignment.
- How to confirm: Perform the “bounce and park” test. Bounce the low corner vigorously. If it feels extremely stiff and then suddenly releases with a click, the shock is binding. Remove the shock (or strut) and try to compress and extend it by hand. It should move smoothly with even resistance. Any notchiness, clicking, or intermittent lock means replace it.
- Pro tip: Some twin-tube shocks can bind when cold and free up when warm — test after the car sits overnight.
- Fix: Replace the affected shock/strut. On strut-type suspension, it is worth noting that replacing the complete strut assembly (spring + strut) makes sense if the spring is also old.
3. Uneven Load Path: When the Geometry Lies
“Load path” is the route vehicle weight takes from the body, through the suspension links, down to the wheels. If that path gets bent, twisted, or knocked out of alignment, one corner can sit lower even when the springs and shocks are perfectly fine. Common offenders include the following:
- Bent control arm — often the result of a curb strike or pothole. The arm’s mounting points shift, which forces the wheel upward into the fender.
- Twisted subframe — after a minor accident or a hard impact. The subframe (engine cradle or rear crossmember) rotates slightly and pulls one corner down with it.
- Worn or collapsed bushing — a control arm or trailing arm bushing that has disintegrated lets the arm pivot to the wrong angle.
- Body mount failure — on body-on-frame vehicles (trucks, SUVs), a collapsed rubber body mount can drop the cab or bed by 1-2 inches, mimicking suspension sag.
How to diagnose: Put the vehicle on a lift (or four jack stands). Measure the distance between suspension mounting points and compare side to side. For example, measure from the lower control arm inner bolt to the ball joint center; a difference of more than 5mm points to a bent arm. Use a trammel bar or tape measure to check wheelbase diagonally. If the left-front to right-rear distance differs from right-front to left-rear, the chassis or subframe is twisted.
Fix: Replace bent arms or subframes. Replacing bushings is often a DIY job with a hydraulic press. Body mounts, though, require lifting the body off the frame. That’s professional-job territory.
Other (Less Common) Culprits
While spring sag, binding shocks, and load path issues account for 90% of leaning cars, a few other gremlins are worth mentioning:
- Uneven tire pressure — a flat or low tire on one corner obviously drops that side. Check tire pressures first; it’s quick and costs nothing.
- Collapsed upper strut mount — the rubber bearing can separate, dropping the strut rod by 0.5-1 inch.
- Fuel/oil load distribution — some vehicles with saddle tanks or heavy batteries on one side can lean slightly when full. Not a failure, but note it.
- Broken torsion bar adjuster — on older trucks with torsion bar front suspension, a stripped adjuster bolt or broken bar causes a permanent drop.
Systematic Diagnosis: A Step-by-Step Routine for Any Enthusiast
Stop throwing parts at the problem. Follow this professional workflow:
- Level ground check — Park on a known flat concrete pad. Use a bubble level on the door sill to confirm the ground is actually flat.
- Measure ride height — at all four corners, from wheel arch lip to wheel center (or to ground if fender shape is uniform). Write the numbers down. A difference >0.5″ between left and right (front or rear) is problematic.
Example: LF: 17.0″, RF: 16.2″ → 0.8″ difference. Investigate. - Bounce test each corner — Push down firmly and release. The car should rebound 1-2 times and settle. If a corner feels like a rock (no movement) or bounces 4+ times, the shock is suspect.
- Visual inspection with weight on wheels — Look for broken springs, leaking shocks, and torn bushings.
- Raise and support the vehicle — Check for bent arms, subframe cracks, or loose fasteners. Use a large pry bar to check bushing play.
- Swap test (for shocks) — If you suspect binding, swap the left and right shock (if identical). If the lean moves to the opposite side, the shock is bad.
- Corner weight scale (advanced) — If all else fails, a set of racing corner scales will show whether the chassis is twisted. Uneven diagonal weights (LF+RR vs RF+LR) confirm a frame issue.
Real-World Stories from the Shop
I once had a 2006 BMW 3 Series that leaned an inch on the right front every night. By morning, after driving 200 meters, it leveled out. The owner had replaced springs, control arms, even the subframe. The culprit? A binding front strut that didn’t leak a drop. The piston rod was slightly bent from a previous accident — invisible until we rolled it on a surface plate. We replaced the strut, and the problem vanished.
Another case was a Ford F-150 that sat low on the left rear. The owner swore the springs were new. But when we pulled the leaf spring, we found a broken center bolt. The leaf pack had shifted sideways, dropping the axle perch. A $5 bolt and half an hour fixed a $500 misdiagnosis. Not bad, honestly.
Prevention & Long-Term Care
- Inspect suspension bushing yearly — dried or cracked rubber allows geometry to drift.
- Avoid parking with one wheel on a curb — repeated twisting like that torques the springs and can accelerate sag on the raised corner.
- Use spring isolators — rubber pads between coils reduce metal-on-metal wear and corrosion.
- Replace shocks/struts every 50-70k miles — worn shocks don’t just ride poorly; they also let the spring oscillate, which causes fatigue in the spring itself.
Summing Up: Level Up Your Suspension Knowledge
A car that sits lower on one corner after parking is never normal. It’s your suspension asking for help. By systematically checking spring sag (the gradual fatigue), binding shocks (the temporary lock), and uneven load paths (the bent geometry), you won’t just fix the lean — you’ll restore handling, tire life, and safety too. Start with the easy stuff: measure ride height and bounce the corners. Then move on to component removal if needed. And remember, when in doubt, replace suspension parts in pairs. A level stance pays you back with miles of balanced, predictable driving.
Your turn: Have you chased a mysterious lean on your own car? Share the fix — every story helps the community.