

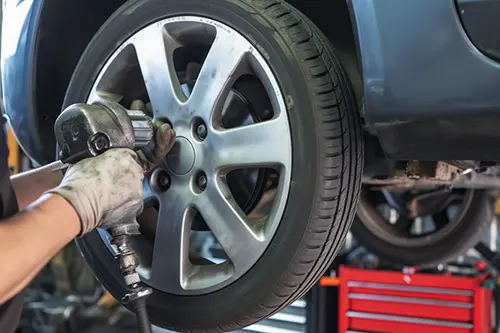
You just installed a fresh set of tires – balanced, mounted, and ready to roll. But the moment you hit the road, the steering wheel fights you. The car consistently drifts left or right, demanding constant correction. Frustration sets in. Was it the alignment? A defective tire? Or something more sinister like a dragging brake? Don't rush to blame the shop or schedule a costly alignment just yet. This guide delivers a quick, methodical isolation plan to pinpoint the true cause of a post-tire-change pull – and save you time, money, and unnecessary headaches.
Why a Pull Appears After New Tires
Before diving into diagnostics, understand that your vehicle didn't suddenly develop a suspension problem the moment new tires were installed. More often, the issue is one of three culprits: tire conicity (a manufacturing defect), brake drag, or alignment that was already marginal but masked by worn tires. Old, unevenly worn tires can hide alignment issues by "self-canceling" a pull. Fresh rubber with full, symmetric tread reveals the truth. Other possibilities include uneven tire pressure, mismatched tire sizes, or a bent wheel – but the big three are alignment, conicity, and brake drag.
The Quick Isolation Plan – Step by Step
Follow these steps in order. You'll need a safe, straight, flat road (or empty parking lot), a tire pressure gauge, and basic tools to swap tires (jack, stands, lug wrench).
Step 1: Verify the Basics – Pressure and Visual Inspection
Before any complex diagnosis, eliminate the obvious. Check cold tire pressure and adjust to door-jamb specifications. A single underinflated tire on one side creates a pull toward that side. Also inspect for any visible damage, bulges, or foreign objects. Ensure all lug nuts are properly torqued. If the pull disappears after correcting pressure, you're done. If not, proceed.
Step 2: The Road Test – Characterize the Pull
Take detailed mental notes during a test drive on a crown-free road (if possible, a multi-lane highway with a flat center lane). Answer these questions:
- Does the pull occur only while braking? If yes, suspect a brake drag or stuck caliper.
- Does the pull happen during acceleration or steady cruise? Likely tire conicity or alignment.
- Is the steering wheel off-center but the car tracks straight? That's a steering wheel centering issue, not a pull.
- Does the pull change direction or intensity when you switch lanes? Road crown influence – normal.
A true pull means you must apply constant steering effort to keep the vehicle going straight. If the car tracks straight but the wheel is crooked, that's a different problem (toe adjustment).
Step 3: Swap Front Tires Left to Right – The Tire Conicity Test
This is the single most effective DIY test for tire-induced pull. Conicity is a manufacturing defect where the tire's belt is slightly cone-shaped, causing it to roll like a cone rather than a cylinder. When mounted on the front axle, a conical tire will pull the car toward the side of the cone's apex.
Procedure: Swap the two front tires left-to-right (do not change rotation direction if directional tires – then skip to step 4 or rotate front-to-back). On a non-directional tire, swapping sides is safe. After swapping, test drive again.
- If the pull changes direction (left becomes right, or vice versa): You've identified a tire conicity problem. The defective tire is now on the opposite side. Replace or warranty that tire.
- If the pull remains exactly the same direction: Not tire conicity. Move to Step 4.
- If the pull disappears: It could be a mild conicity that canceled with road crown or a temporary tire "set." Drive further to confirm. If it returns, re-evaluate.
Note for directional tires: Do not swap left-right. Instead, rotate front to rear on the same side. If pull changes intensity or moves, suspect conicity. Better yet, move both front tires to the rear and bring rears to front. If pull goes away or changes, the original front tires are suspect.
Step 4: Brake Drag Check – Temperature and Free Spin
A dragging brake caliper can mimic a pull, especially after tire service if the technician compressed the caliper piston improperly or dislodged a dust boot. Symptoms: pull that worsens with braking, a hot wheel after driving, or a burning smell.
Quick test: Drive normally for a few miles without heavy braking. Stop safely and carefully feel each wheel's center (near lug nuts) – use an infrared thermometer for accuracy. A dragging brake will show significantly higher temperature on that wheel (often 50-100°F hotter than the opposite side). Also, jack up the suspect wheel and spin it by hand. It should rotate freely with slight resistance from the pads. If it's hard to turn or grinds, the caliper is sticking.
If brake drag is confirmed, inspect the caliper slides, piston, and brake hose. A collapsed hose can act as a one-way check valve, holding pressure. This requires professional repair.
Step 5: Alignment Verification – When All Else Fails
If tire swapping and brake checks show no issue, the pull is likely caused by incorrect wheel alignment – specifically excessive cross-camber or cross-caster. Worn tires can mask a misalignment for thousands of miles. New tires reveal the truth.
Alignment is not a DIY check for most home mechanics (though you can check toe with strings). The proper solution: visit an alignment shop with a modern laser machine. Ask for a printout of before and after measurements. Key angles that cause pull:
- Cross-camber – difference in camber left vs. right. More than 0.5° difference will pull to the side with more positive camber.
- Cross-caster – difference in caster. The side with less caster (more negative) will cause a pull toward that side. Many vehicles use caster offset to compensate for road crown.
- Thrust angle – rear axle misalignment that pushes the rear sideways, requiring steering correction.
Before paying for alignment, ensure the shop checks for worn suspension components (ball joints, tie rods, bushings). Aligning a car with loose parts is a waste of money.
Diagnostic Decision Tree – At a Glance
| Test / Symptom | Action | Likely Cause |
|---|---|---|
| Pull appears immediately after tire change, no prior pull | Swap front tires left-right | Tire conicity (if pull changes direction) |
| Pull direction changes after front tire swap | Replace the tire that moved to the pulling side | Conicity – defective tire |
| Pull direction unchanged after front tire swap | Check brake drag (temperature, spin test) | Alignment or brake issue |
| One wheel significantly hotter than others | Inspect caliper, slides, hose | Brake drag |
| Pull remains after all tire swaps and brake check | Professional alignment check | Cross-camber/caster misalignment |
| Pull only during braking, no pull while coasting | Inspect brake components on both sides | Stuck caliper piston or uneven pad wear |
What About Radial Pull (Tire Ply Steer)?
Less common but real: radial tire pull (also called ply steer) is caused by the way the tire's steel belts are aligned during manufacturing. It differs from conicity in that ply steer creates a pulling force that is not reversed when the tire is swapped to the opposite side. In fact, ply steer can be masked. The definitive test requires a special machine (Tire Uniformity Tester). For most drivers, if swapping left-right doesn't change the pull direction, and alignment and brakes are fine, consider a warranty claim for all four tires. Some manufacturers have a "tire pull" warranty.
Common Mistakes to Avoid
- Assuming alignment is the culprit first. Alignment shops are happy to take your money, but tire conicity is far more common after a fresh tire install. Always swap tires before paying for alignment.
- Ignoring road crown. Most roads slope right for drainage, causing a slight right drift. That's normal. Test on a flat, crown-free road or the center lane of a highway.
- Swapping tires incorrectly on directional or staggered setups. Directional tires have arrows – they must stay on the same side. Staggered setups (different front/rear widths) cannot be swapped front-to-rear. In those cases, you may need a tire shop to dismount and remount tires to test conicity.
- Forgetting to re-torque lug nuts. Loose wheels can cause vibration that feels like a pull, but it's dangerous. Always torque to spec after 50-100 miles.
When to Seek Professional Help
If your isolation plan leads to brake drag or alignment, professional assistance is wise. Brake work requires proper bleeding and safety procedures. Alignment requires specialized equipment. However, you can walk into the shop armed with data: "I swapped front tires, pull remained, brake temperatures are even, please check cross-camber and caster." That saves diagnostic time and avoids unnecessary part sales.
Preventive Measures for Future Tire Changes
To minimize the chance of post-tire-change pulls:
- Request a road force balance – this machine measures tire uniformity and can detect conicity before installation.
- Have your alignment checked before installing new tires if you suspect uneven wear on the old set.
- Ask the tire shop to mark the "lowest radial force variation" position relative to the wheel – though conicity is a different measurement.
- After installation, drive gently for the first 200 miles to allow the tires to "break in." Some minor pulls may self-correct as tread wears evenly.
Conclusion: Be Methodical, Not Emotional
A steering pull after new tires is frustrating, but it's rarely a mystery. By following the isolation plan – verify pressures, swap front tires, check for brake drag, then consider alignment – you can identify the real cause in under an hour. Most often, it's a simple tire conicity issue that a warranty replacement will solve. Only after eliminating those possibilities should you spend money on an alignment. Keep this guide handy, and you'll save yourself from unnecessary repairs and enjoy straight, confident driving.
Final tip: Document your test drive findings. If you need to return tires, the shop will appreciate clear data: "Pull to the left, swapped front tires, pull changed to the right – conicity confirmed." That's the mark of an informed enthusiast.