

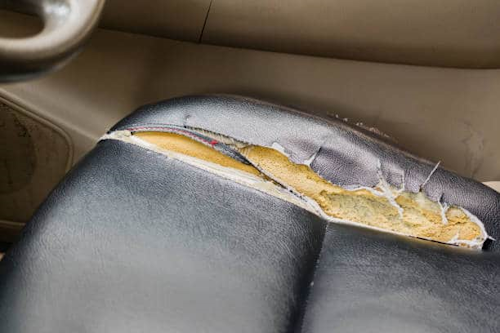
Every car owner eventually faces the same issue — worn, scratched, or torn upholstery. Whether it’s a leather seat showing cracks or a fabric one with small burns and tears, these imperfections can make even the most well-maintained car interior look neglected. Fortunately, you don’t need to be a professional upholsterer to restore your seats to a respectable state. With the right tools, patience, and technique, minor car upholstery repair can be handled at home.
Understanding the Types of Upholstery Damage
Before reaching for your repair kit, you should identify the type and extent of the damage. Common problems include:
- Surface scratches or cracks on leather due to wear and sunlight exposure.
- Small holes or burns on fabric from cigarettes or sharp objects.
- Loose seams or fraying edges on both leather and textile materials.
- Discoloration caused by UV rays, cleaning chemicals, or daily use.
The repair approach depends on both the upholstery material and the type of defect. Leather, vinyl, and fabric each require different tools and substances to achieve a lasting fix.
Choosing the Right Repair Kit
Modern repair kits are surprisingly effective, especially for small-to-medium damage. The key is to select one that matches your upholstery type. Here’s what to look for:
For Leather and Vinyl Seats
A quality leather repair kit should include:
- Color compounds (base tints and pigments to mix the right shade)
- Filler compound for cracks and scratches
- Heat-transfer tool or curing patches
- Sandpaper and alcohol wipes
- Protective finishing coat
Good kits come with color charts and mixing instructions. The goal is to replicate the exact tone of your seat — even small color differences become visible after curing.
For Fabric Seats
Fabric repair kits usually contain:
- Adhesive and backing patches
- Fabric fibers in different colors
- Mixing tools and applicators
- Heat-curing paper
Some kits even provide color-matching powders, allowing you to blend fibers to the precise tone of your seat fabric. For patterned or textured upholstery, visual perfection can be more difficult — focus on making the damage less noticeable rather than invisible.
Preparing the Surface
Surface preparation is the most critical stage of any upholstery repair. Neglecting this step can cause filler to detach or discolor later.
- Clean the area thoroughly using a mild upholstery cleaner. Avoid silicone-based products — they leave residue that prevents bonding.
- Dry completely before applying any product. Moisture trapped under filler or adhesive will lead to bubbling or peeling.
- Sand gently around cracks or worn spots (for leather) using fine-grit sandpaper. This improves adhesion and levels the surface.
Once the area is prepared, protect the surrounding material with masking tape or plastic film to avoid accidental staining.
Repairing Leather and Vinyl Upholstery
Small cracks and tears can be fixed at home in under an hour. Follow these steps:
- Apply filler into the crack or tear using a spatula. Smooth out excess material and allow it to dry (or heat-cure if the kit requires it).
- Sand the repaired area lightly until it’s flush with the rest of the seat.
- Apply color compound with a sponge or brush, blending gradually from the center of the repair outward.
- Use the curing tool or a heat patch to set the pigment. Follow manufacturer temperature and timing instructions carefully.
- Finish with protective coating — this step seals the repair and restores the original sheen.
The trick lies in layering color gradually and using fine strokes rather than thick coatings. Too much filler or pigment at once will cause uneven texture.
Repairing Fabric Upholstery
For fabric seats, the process is slightly different but equally manageable. Here’s how to restore small tears or burns:
- Trim loose fibers and clean the damaged area gently.
- Insert a backing patch under the tear to provide structure for the adhesive.
- Apply adhesive around the edges of the hole using a toothpick or spatula.
- Mix fibers to match the color of your seat, then sprinkle them evenly over the adhesive.
- Press lightly and let it dry completely. Use a small iron or heat patch if required by the kit.
The result won’t be entirely invisible, but if color and texture match well, the repaired area will blend seamlessly with its surroundings. For deeper or wider damage, replacing the affected panel is usually a better solution.
Pro Tips for Professional Results
- Test all products on a hidden section before applying them to visible areas.
- Work under natural light to see true color and texture.
- For leather, apply conditioner after 24 hours to prevent drying or cracking.
- Use minimal heat when curing — excess temperature can warp vinyl or discolor leather.
- Patience is essential: allow each layer to dry completely before proceeding.
Remember that every upholstery type reacts differently to temperature and pressure, so always start gently and build up as needed.
When to Seek Professional Help
DIY repair kits are best for minor damage under 3 cm in length or surface-level wear. For larger tears, foam deformation, or structural issues with seat frames, it’s more cost-effective to contact a professional upholsterer. They can replace panels, re-sew seams, or re-foam cushions while maintaining the seat’s ergonomic shape and safety features.
Also, if your car has heated or ventilated seats, do not attempt deep repairs without checking the location of wiring and sensors beneath the upholstery.
Maintaining Your Upholstery After Repair
After your seats are restored, maintenance becomes the key to longevity. Follow these tips:
- Regular cleaning with pH-neutral products prevents dirt from embedding into pores or fabric fibers.
- Use UV protection sprays for leather to avoid fading and cracking under sunlight.
- Avoid sharp objects like belt buckles, keys, or zippers — they’re common culprits of new damage.
- Condition leather twice a year with specialized balms.
- Vacuum cloth seats regularly to prevent dust buildup and friction wear.
Proper upkeep not only preserves appearance but also increases resale value — clean, well-maintained interiors always attract more buyers.
Conclusion
Repairing your car’s upholstery may seem intimidating, but modern DIY kits make the process straightforward and rewarding. Whether your seat has a small tear, a cigarette burn, or faded color, you can restore it with minimal tools and cost. The secret is patience, surface preparation, and precise color matching.
By learning a few hands-on techniques, you gain both practical experience and the satisfaction of saving hundreds of dollars while keeping your car’s interior in great shape. A careful repair can easily last several years — and make every drive feel a bit more comfortable and personal.