

There’s nothing more frustrating on a cold, frosty morning than watching your rear window defrost in patches—a clear strip here, a foggy band there—while the rest stays stubbornly iced over. You end up craning your neck or wiping with a sleeve, wondering why your vehicle’s rear defroster has suddenly taken up abstract art. In most cases, the culprit is not the fuse or the switch. More often, uneven heating points straight to one of three root causes: a broken grid line, increased resistance at the electrical tabs, or a loss of power/ground feed. This guide will help you figure out exactly which one you’re dealing with and show you how to fix it like a pro.
Understanding Your Rear Window Defroster Grid
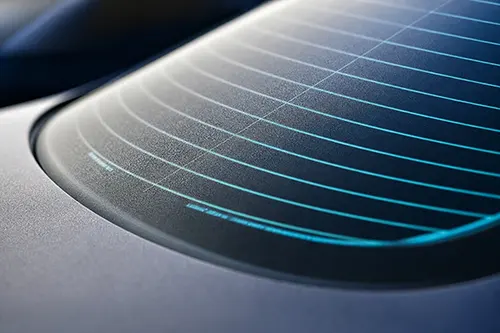
Your vehicle’s rear defroster is basically a simple electrical circuit painted onto the glass. A series of horizontal ceramic‑silver lines, the grid, are screen‑printed onto the inner surface of the rear window. At the edges, two vertical bus bars—thick silver‑colored strips—carry current to and from the grid lines. One side of the window receives 12V power through a tab connector, while the opposite side is grounded. When you press the defroster button, current flows through each horizontal line, resistance creates heat (Joule heating), and that warmth melts frost, ice, or condensation.
The catch is that the grid lines are extremely delicate—only about 0.5 mm wide and microns thick. One scratch from an ice scraper, a careless window tint install, or simply years of thermal cycling can break a line. Once a line breaks, that entire horizontal strip stops heating. Worse, the break may not be complete; a tiny crack can raise resistance in one local area, creating a hot spot or no heat at all. Add corroded tab connections or a failing electrical feed, and you get that classic “striped” defrost pattern. Not exactly what you want before backing out of the driveway.
Symptom Analysis: What Your Defrost Pattern Tells You
Before you grab a multimeter, take a close look at the rear window on a foggy or frosty morning—or mist it with a spray bottle. The pattern of cleared lines tells a pretty clear diagnostic story:
- Completely dead window (no heat anywhere): Likely a blown fuse, failed relay, broken power feed, or poor ground connection – not a grid issue.
- One or more horizontal stripes not clearing, but others work fine: Classic broken grid line(s) on those specific rows.
- Entire left or right half of the window not heating: Usually a broken bus bar or a damaged tab on that side.
- Random small spots or a thin line with no heat – but the rest of the row works: Partial break or high resistance at a particular point.
- Whole window heats weakly or takes too long: High resistance in the power feed or corroded tab connectors causing voltage drop.
Take a picture with your phone, flash on. The contrast often reveals breaks that are almost impossible to see with the naked eye. Many pros use a digital camera with an IR filter, but a simple visual inspection in good lighting can already narrow the cause down quite a bit.
Common Culprit #1: Broken Grid Lines
Grid breaks are, by far, the most frequent cause of uneven defrosting. A single broken line will not heat at all beyond the break point. If the break is incomplete—a hairline crack—you may get a hot spot where resistance builds, but not uniform heating. How do these breaks happen?
- Mechanical damage: Ice scrapers, window squeegees, or even cleaning cloths catching on a line.
- Window tint removal: Aggressive scraping to remove old tint can slice through grid lines.
- Adhesive from stickers or mounts: Peeling off a GPS or dashcam mount can lift the delicate conductive paint.
- Age and thermal cycling: Over years, expansion and contraction cause micro-cracks.
How to Pinpoint a Grid Break
Tools needed: A digital multimeter (DMM) with sharp probes, and optionally a 12V test light.
- Turn the rear defroster ON (engine running to keep voltage stable).
- Set your DMM to DC volts (20V scale).
- Place the black probe on a clean ground point (e.g., door striker or unpainted bolt).
- Touch the red probe to the positive tab (usually on the driver’s side of the window). You should read ~12V.
- Now, starting from the positive bus bar, touch the red probe to the center of a horizontal grid line that you suspect is broken. Slowly move along the line toward the ground side.
- On a good line, voltage will drop gradually from ~12V at the power side to ~0V at the ground side. On a broken line, you’ll see a sudden jump: before the break, voltage reads ~12V; after the break, it reads ~0V (or a low value if there’s a high resistance path). The exact point where voltage changes is the break.
Pro trick: If you don’t have a multimeter, use a 12V test light with two sharp probes. Ground one end, then touch the other along the line. The light will glow brightly on the power side of the break and go dark past the break. That transition point is your break location.
Common Culprit #2: Tab Resistance (Connector Corrosion or Loose Connection)
The electrical tabs are the points where the vehicle wiring harness snaps onto the grid’s bus bars. These tabs are often made of brass or copper, and over time they can corrode—especially if you live in a salt-belt state or near the ocean. Corrosion adds resistance, which creates a voltage drop before current even reaches the grid. The result is that the entire defroster still works, sort of, but each line gets less than 12V. That leads to weak, uneven heating, or a few lines that feel barely warm.
Sometimes the tab itself loosens because of vibration or a broken clip. A loose tab creates intermittent contact, so the defroster works sometimes and then, well, doesn’t.
How to Test Tab Resistance and Connection
- Voltage drop test: With defroster ON, touch one multimeter probe to the battery positive terminal and the other to the power tab on the window. A reading above 0.5V indicates excessive resistance in the feed circuit (wiring, relay, or tab).
- Ground side drop: Measure from the negative battery terminal to the ground tab on the window. Anything above 0.2V suggests a poor ground or corroded tab.
- Visual inspection: Look for greenish/white crusty deposits on the tab or the mating connector. Also check whether the connector is fully seated and clicks into place.
- Temperature test: After running the defroster for 2-3 minutes, carefully feel the tab itself (with gloves). An excessively hot tab means high resistance at that point.
Repair Options for Tab Issues
- Clean corrosion with electrical contact cleaner and a small brush. Apply dielectric grease after reconnecting.
- If the tab is broken or the silver paste has worn off the glass, you can buy special grid repair kits (like Permatex 15067) that include conductive adhesive to re-bond the tab.
- If the wiring pigtail is damaged, replace the connector – many auto parts stores sell universal defroster tab repair kits.
Common Culprit #3: Power Feed Loss (Broken Wire, Bad Relay, or Fuse)
When no horizontal lines heat at all, the problem is upstream of the grid. That includes:
- Blown fuse: Typically a 10A, 15A, or 20A fuse in the interior or under‑hood fuse box. Check owner’s manual for “RR DEFOG” or “DEFROSTER”.
- Failed relay: You can swap with a similar relay (e.g., horn or headlight) to test.
- Broken wire in the hatch/trunk hinge: Very common on SUVs and hatchbacks – the constant flexing breaks copper strands inside the rubber boot between body and tailgate.
- Defective switch or timer module.
Diagnosing Power Feed Loss
- Turn on the defroster and listen for the relay click (usually from the fuse box). No click? Suspect relay, switch, or control circuit.
- Check voltage at the two grid tabs. Both should show ~12V between power tab and ground, and <0.5V from ground tab to chassis ground. No voltage at either tab means a power feed issue.
- Inspect the hatch wiring harness: open the rubber bellows and look for broken or chafed wires. A common failure is a green or black wire (ground) or a red/white (power).
If you find a broken wire in the hinge area: solder it back together and use heat shrink tubing. Do not just twist and tape it, because that repair will fail again pretty quickly from vibration and flexing.
Step‑by‑Step Diagnostic Decision Tree
| Observed Symptom | Most Likely Cause | Next Action |
|---|---|---|
| No heating anywhere on rear window | Power feed loss (fuse, relay, broken hatch wire) | Check fuse, then voltage at tabs |
| Only certain horizontal lines not heating | Broken grid line(s) | Visually locate break and use multimeter to pinpoint |
| Whole window heats weakly (warm but not hot) | High resistance in tab or feed circuit (voltage drop) | Measure voltage at tabs – should be >11V; clean tabs |
| Heating comes and goes (intermittent) | Loose tab connector or broken wire in hinge area | Wiggle the hatch wiring while defroster on; check tab click |
| One entire side (left or right) of the grid cold | Broken bus bar or detached tab on that side | Inspect the vertical silver strip; repair with conductive paint |
How to Repair a Broken Grid Line (DIY)
Fixing a grid break is surprisingly easy with a rear window defroster repair kit, available at any automotive store for $15‑$25. Popular brands include Permatex, Frost Fighter, and Loctite. Each kit contains conductive silver‑filled epoxy, a small brush or syringe applicator, and sometimes masking tape.
- Clean the area: Use the provided alcohol wipe or isopropyl alcohol to degrease the glass around the break. Do not use standard glass cleaner, which often leaves a residue.
- Mask off the line: Apply two strips of masking tape about 2‑3mm apart, leaving only the broken section exposed. This keeps the repair neat and the same width as the original line.
- Apply the conductive compound: Using the brush or syringe, deposit a thin layer of the silver paint across the break, overlapping about 1/4 inch on each side of the break.
- Remove tape immediately: Pull the tape off while the compound is still wet, so you don’t lift the edges.
- Let it cure: Most kits require 24 hours of drying before using the defroster. Some fast‑cure versions need only 30 minutes – read instructions.
- Test: After curing, turn on the defroster. The repaired line should heat evenly. For confirmation, mist the window—the repaired area will clear frost just like the others.
Pro tip: If you have multiple broken lines, repair each break individually. Never bridge two separate grid lines together. That will create a short circuit and could damage the timer or wiring.
When to Replace the Entire Rear Window
While grid repairs work well for a few breaks, sometimes the damage is simply too extensive. Consider replacement if:
- More than half of the grid lines are broken (the window looks like a zebra).
- The bus bars themselves are severely damaged or peeling off the glass.
- The glass has a deep scratch or crack that also affects the defroster.
- You’ve attempted multiple repairs but new breaks keep appearing due to delamination of the conductive material (common on older vehicles).
Replacement means installing a new rear window, or having a glass shop re‑print a new grid on the existing glass—which is possible, but expensive. In many cases, aftermarket stick‑on defroster kits are a cheaper alternative. These are flexible grid mats that adhere to the inside of the glass and plug into your existing wiring. It is worth noting that they work surprisingly well for classic cars or vehicles where replacement glass is rare.
Prevention: How to Keep Your Rear Defroster Healthy
- Never use sharp ice scrapers on the inside of the rear window. Use the defroster’s own heat and give it 5‑10 minutes. If you must scrape, use a soft plastic blade or a foam snow brush.
- Be gentle when cleaning: Use a microfiber cloth and ammonia‑free glass cleaner. Wipe parallel to the grid lines, not across them, so you don’t snag them.
- Remove suction cups and adhesives carefully: Heat the area with a hair dryer to soften adhesive before peeling off dashcam mounts or parking passes.
- Inspect hatch wiring periodically: Every year or two, pull back the rubber boot and look for cracked insulation. Proactively repair any worn wires with flexible silicone tape.
- Apply a sealant to the grid? Some enthusiasts coat the grid lines with a thin layer of clear nail polish or specialized protective coating—but this is controversial because it can insulate and reduce heating. Not recommended unless you’ve confirmed no effect on resistance.
Expert FAQ: Common Rear Defroster Myths
Myth 1: “Using the defroster with broken lines will damage the rest of the grid.” – False. A broken line simply stops conducting current. It does not affect other rows. However, if two broken lines touch, for example after an improper repair, they can create a short.
Myth 2: “A grid repair kit is just temporary; you need to replace the glass.” – False. A properly applied conductive epoxy lasts for years. Many professional body shops use the same kits for warranty repairs.
Myth 3: “You can solder a broken grid line.” – Do not attempt it. Soldering iron heat will crack the glass. Conductive paint is the only safe method.
Myth 4: “Aftermarket window tint always kills defrosters.” – Not if installed correctly. High‑quality tint shops apply film without cutting grid lines, and they avoid scraping the inner surface. The danger comes when old tint is removed the wrong way.
Summing Up: Don’t Drive Blind – Diagnose and Repair Confidently
Uneven rear defroster heating is rarely much of a mystery once you know what to look for. A quick visual inspection often reveals a broken line. A multimeter confirms the exact break point or uncovers hidden tab resistance. And if the whole grid is dead, tracing power feed loss through fuses, relays, and hatch wiring will usually pinpoint the fault. With a $15 repair kit and an hour of your time, you can restore full, even heating across the entire rear window, which means clear visibility and safer winter driving.
What is important is that your rear defroster is not just a convenience feature; in many jurisdictions, driving with an obstructed rear view is illegal. So the next time you see that zebra‑striped pattern, don’t just curse the cold. Grab your multimeter, find the break, and fix it like the automotive enthusiast you are.
Stay warm, stay safe, and keep that glass clear.