

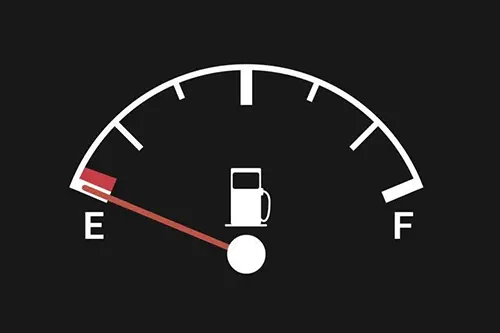
The Phantom Fuel Drop: A Common Automotive Mystery
You turn the key, the fuel gauge reads half a tank. You drive two miles, and suddenly the needle plummets toward empty — only to creep back up or stop moving entirely after another few minutes. This frustrating and confusing behavior is more common than most drivers realize, and it has sent countless car owners down expensive diagnostic rabbit holes, often ending with unnecessary fuel pump replacements or instrument cluster swaps.
The phenomenon — a rapid initial drop in the indicated fuel level followed by stabilization — typically points to two primary suspects: a worn or sticking fuel level sender unit (also called a fuel sending unit or float arm assembly) or a faulty gauge reading within the instrument cluster itself. But how do you tell which one is lying to you? And why does the problem seem to disappear after a few minutes of driving?
In this deep-dive guide, I’ll draw on decades of hands-on experience with everything from vintage carbureted rigs to modern CAN-bus-equipped daily drivers. We’ll explore the inner workings of the fuel level monitoring system, break down the unique failure modes of sender units versus cluster electronics, and give you a clear, step-by-step diagnostic plan — no guesswork, no parts-throwing, just results.
How Your Fuel Gauge System Actually Works
Before diagnosing a problem, you need to understand the system’s anatomy. Despite the complexity of modern vehicles, the basic fuel level sensing principle has remained remarkably consistent for over half a century.
- The Sending Unit (Fuel Level Sensor): Located inside the fuel tank, attached to the fuel pump module or as a standalone assembly. It consists of a float connected to a metal arm that sweeps across a variable resistor (a “card” or “winding”). As the fuel level changes, the float moves, altering the resistance. Typical resistance ranges: empty = 0–10 ohms (GM) or 240–250 ohms (Ford/European), full = 90–100 ohms (GM) or 10–20 ohms (Ford).
- The Wiring Harness: A two-wire (signal and ground) or three-wire (signal, ground, low-fuel warning) connection between the sender and the instrument cluster. Corrosion, chafing, or loose pins are frequent troublemakers.
- The Instrument Cluster (Fuel Gauge): The gauge itself is a moving-coil meter (older cars) or a stepper motor-driven gauge (1990s and later). The cluster also contains a voltage regulator or microprocessor that interprets the resistance signal and moves the needle accordingly. Modern clusters apply damping (averaging) to prevent needle bounce.
When you first start the car, the system powers up, and the gauge reads the sender resistance almost instantly. If the sender is worn — especially at the typical “half-tank” position where the float arm spends most of its life — the resistance signal may jump erratically or read much lower than actual fuel level. After a few minutes of vibration and fuel sloshing, the float arm may settle into a slightly different position, and the gauge stabilizes at a more accurate reading. Alternatively, a failing voltage regulator in the cluster can cause the gauge to spike or drop dramatically at startup, then slowly recover.
Why “Drops Fast Then Stabilizes” Points to Specific Causes
The unique symptom pattern — a sudden drop within the first few minutes of driving, followed by normal behavior — eliminates many common fuel gauge problems. Here’s what typically does not cause this pattern:
- Stuck float (would cause constant wrong reading, not transient)
- Broken ground wire (would cause intermittent or no reading at all)
- Empty tank (gauge would stay low, not recover)
- Purely mechanical gauge failure (would be consistently wrong)
The transient nature points to either a mechanical hysteresis in the sender unit or a thermal/electrical drift in the cluster’s gauge driver circuit. Let’s examine each.
1. Sender Unit Wear: The “Card” and Wiper Degradation
Inside the sender, a small metal wiper slides over a resistive track (often a ceramic or phenolic card with printed resistive ink). Over time and mileage, the track wears unevenly — especially at the positions corresponding to half and quarter tank, where the float spends the most time. A worn track causes:
- Dead spots: At certain float positions, the wiper loses contact or hits a high-resistance patch, causing the gauge to suddenly drop to empty.
- Stiction (sticky friction): The float arm may not move smoothly due to corrosion or dried lubricant. When the car starts moving, vibration overcomes the stiction, and the arm “jumps” to a new position — often downward if the arm was hung up on a high reading.
- Intermittent open circuit: A cracked resistive card can momentarily lose connection, sending an “empty” signal (infinite resistance on most systems) before vibration reconnects it.
2. Cluster Reading Error: Voltage Regulator or Damper Failure
Older vehicles (pre-1990s) often use a magnetic voltage regulator or “instrument voltage regulator” (IVR) that pulses 12V down to about 5V for the gauges. When the IVR fails, the output voltage can spike at startup, causing the gauge to read artificially high — or if the regulator fails to oscillate, it may drop to zero, causing the gauge to plummet. After a few minutes, the regulator may warm up and begin functioning normally again.
In newer vehicles (CAN-bus, stepper motor clusters), the gauge reading is a digital signal processed by a microcontroller. Capacitors in the power supply can age, causing unstable voltage to the stepper motor driver at cold start. As the capacitors warm up (electrolytic reforming), the reading stabilizes.
Step-by-Step Diagnostic Guide: How to Check the Culprit
You don’t need a professional scan tool for most of these tests — just a digital multimeter (DMM), a few hand tools, and a methodical approach.
Step 1: Replicate the Symptom Safely
Park on level ground. Note the exact fuel gauge reading after sitting overnight (cold start). Start the engine and watch the gauge for 3-5 minutes. Does it drop rapidly within the first minute, then slowly climb back? Or does it drop and stay low? Record the behavior.
Step 2: Perform the “Cluster Self-Test” (if available)
Many 1990s-2010s vehicles have a hidden gauge sweep test. For Ford, hold the odometer reset button while turning key to ON. For GM, press and hold the “Info” and “Reset” buttons simultaneously. For European cars, consult forums. The test will sweep all gauges to full and back. If the fuel gauge sweeps smoothly without dropouts, the cluster electronics are likely fine — pointing to the sender or wiring.
Step 3: Resistance Check at the Sender (The Definitive Test)
Locate the fuel pump/sender connector (usually under the rear seat, behind a trunk panel, or under the vehicle). Disconnect the harness. Using a DMM set to ohms (Ω), measure across the sender terminals (refer to vehicle-specific pinout). Then:
- With ignition OFF, manually move the float arm through its full range (access may require removing the sender unit — but first, try tapping the tank with a rubber mallet while watching the ohmmeter). If resistance jumps erratically at a specific position, the resistive track is worn.
- Perform a “wiggle test”: Gently tug the sender wires while monitoring resistance. Any fluctuation indicates an internal open or poor connection.
Step 4: Voltage Drop Test on Ground and Signal Wires
A bad ground can mimic sender wear. Set DMM to DC volts. Connect black lead to battery negative, red lead to the sender ground terminal at the connector. Start engine — voltage should be less than 0.1V. If you see more than 0.5V, you have a ground issue.
Step 5: Bypass the Sender to Test the Gauge
With the sender connector unplugged, use a resistor substitution box or a set of fixed resistors to simulate full, half, and empty. For a GM vehicle (0-90Ω), connect a 90Ω resistor across the signal and ground pins — the gauge should read full. A 45Ω resistor should read half. A 0Ω jumper should read empty. If the gauge responds accurately, the cluster is good; the sender is the problem. If the gauge still behaves erratically, the issue is in the cluster or wiring.
Step 6: Monitor Real Fuel Level with a Scan Tool (OBD-II vehicles)
For vehicles 1996 and newer, a generic OBD-II scanner can read the “Fuel Level Sensor” PID (parameter ID). Compare the scanner’s fuel level percentage to the dash gauge. If the scanner shows a stable percentage while the gauge drops, the cluster is faulty. If both drop, the sender or wiring is at fault.
Common Failure Patterns and What They Mean
| Symptom | Most Likely Cause | Action |
|---|---|---|
| Gauge drops to empty within first minute, then slowly rises back over 2-3 minutes | Sender resistive track worn at “mid-tank” position | Replace fuel sender unit (often sold with fuel pump module) |
| Gauge drops 1/4 tank immediately, then stabilizes but never returns to original reading | Float arm stiction or binding | Clean or replace sender assembly; check for debris in tank |
| Gauge fluctuates rapidly (bounces) before stabilizing | Loose connection or worn wiper | Check connector pins; replace sender if internal |
| Gauge drops only on left turns or acceleration | Float arm hitting internal baffle or loose wiring | Inspect tank internals; secure wiring |
| Gauge reads accurately after 10+ minutes of driving, but drops on cold start | Aging capacitor in cluster power supply (stepper motor clusters) | Rebuild or replace instrument cluster |
| All gauges (temp, fuel, battery) drop together then recover | Common voltage regulator failure (older vehicles) or CAN bus issue (newer) | Replace instrument voltage regulator or repair CAN network |
Real-World Example: The 1998-2002 GM Pickup Syndrome
If you’ve owned a Chevrolet Silverado or GMC Sierra from this era, you’ve likely experienced the “fuel gauge drops to empty after starting” phenomenon. These trucks are notorious for sender wear, specifically the resistive card made by Delco. The float arm spends most of its life between 1/2 and 3/4 tank, causing a deep groove in the card. On a cold start, the wiper lands in the groove and loses contact, sending an open circuit (infinite resistance) which GM’s gauge interprets as empty. After a few minutes of vibration, the wiper vibrates out of the groove and the gauge returns to normal. The fix is a new sender — but many owners have successfully “bent” the wiper arm slightly to ride on a fresh track, or rotated the card 180 degrees if possible.
Lesson: Always check service bulletins and forums for model-specific quirks before replacing parts.
How to Check Without Removing the Tank (Quick Tests)
Not everyone has a lift or a fuel tank strap tool. Here are three driveway-friendly diagnostics:
- The Tap Test: While the engine is running and the gauge is reading low, tap the bottom of the fuel tank with a rubber mallet (or the back of a screwdriver wrapped in cloth). If the gauge suddenly jumps up, the sender wiper was stuck — indicating sender wear or debris.
- The Additive Test: Add a bottle of fuel system cleaner (like Techron) to the tank. Sometimes the cleaning agents remove varnish from the sender card, restoring contact. This is not a permanent fix, but if it temporarily improves the reading, you’ve confirmed sender wear.
- The Parked Observation: With the engine off, turn the key to “ON” (not start) and watch the fuel gauge for 30 seconds. If the needle drops slowly on its own without any movement of the vehicle, the cluster voltage regulator is likely failing.
Prevention and Long-Term Solutions
- Keep the tank above 1/4 whenever possible: The sender wear is most aggressive at low fuel levels because the float rests on the bottom stop, causing the wiper to press harder against the card. Also, fuel cools and lubricates the sender.
- Avoid cheap “universal” senders: Aftermarket senders often use inferior resistive materials that wear out in 1-2 years. Stick with OEM or high-quality brands like Delphi, VDO, or Denso.
- Consider a cluster rebuild: For vehicles known for capacitor failures (many 2000s German and American cars), sending the cluster to a specialized rebuilder is often cheaper than a new sender — and fixes all gauges at once.
When to Replace the Entire Fuel Pump Module vs. Just the Sender
Most modern vehicles integrate the fuel level sender into the fuel pump module (the assembly that contains the pump, strainer, and float). While you can often buy the sender separately, labor to drop the tank is the same. My professional advice: if your vehicle has over 100,000 miles and the original fuel pump, replace the entire module. The pump is already aged, and you’ll pay the same labor twice if it fails six months later. If the pump is relatively new, a sender-only replacement is fine.
Final Diagnostic Flowchart (Simplified)
- Does the gauge drop only at startup and recover within 5 minutes? → Yes → Proceed to step 2.
- Perform cluster self-test (if available). Does the gauge sweep smoothly? → No → Cluster issue (repair/replace).
- Yes → Measure sender resistance with DMM. Does resistance change erratically when moving float? → Yes → Replace sender.
- No → Perform voltage drop on ground. High resistance? → Repair ground.
- Ground good? → Substitute resistor at sender connector. Does gauge respond correctly? → Yes → Sender issue. No → Wiring or cluster issue.
Conclusion: Trust, But Verify
The “drop fast then stabilize” fuel gauge symptom is rarely a sign of impending doom, but it will drive you crazy if you ignore it. More importantly, it can leave you stranded if the gauge suddenly decides to read full when you’re actually on empty. By methodically testing the sender, wiring, and cluster with basic tools, you can avoid the common mistake of replacing the fuel pump (expensive and time-consuming) when the real problem was a $2 capacitor in the dashboard.
Remember: the fuel gauge is a secondary reference. If you suspect a problem, always cross-check with the trip odometer — reset it at each fill-up and know your vehicle’s typical range. That habit has saved me more times than I can count. Now go forth, diagnose with confidence, and keep that needle honest.
Pro tip: After any fuel system repair, always test the gauge by adding fuel in small increments (2-3 gallons at a time) while watching the needle. A sticky sender may work fine for weeks, then fail again. The ultimate test is 10+ key cycles over different fuel levels.