

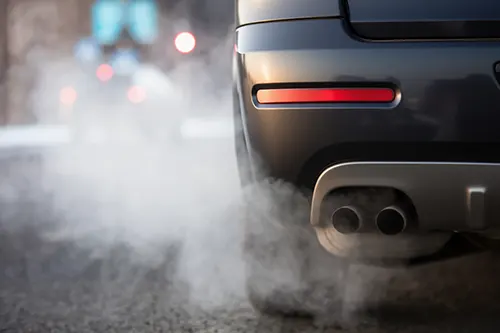
That unmistakable smell of exhaust gases inside your car’s cabin when you’re sitting at a stoplight or waiting in a parking lot isn’t just annoying—it’s a serious health and safety hazard. Exhaust fumes contain carbon monoxide (CO), a colorless, odorless gas that can cause drowsiness, headaches, confusion, and even death in high concentrations. If you can smell exhaust, you are already inhaling harmful compounds. For automotive enthusiasts who spend hours behind the wheel or in the garage, understanding where these leaks originate and how to safely confirm their location is essential knowledge. This guide provides a systematic checklist to track down the source of that unpleasant smell, plus proven, safe testing methods that won’t put you or your engine at risk.
Why Does Exhaust Enter the Cabin at Idle?
At idle, your engine is running at its lowest RPM. The exhaust system operates at lower pressure and flow velocity compared to higher speeds. That means small leaks that might be barely noticeable at highway speeds (where airflow under the car can disperse fumes) become significant at idle. Additionally, when the vehicle is stationary, there is no forward motion to push exhaust gases away from the underside. If the engine compartment or underbody seals are compromised, the natural convection of hot gases can draw fumes up into the HVAC intake (often located near the base of the windshield) or through gaps in the firewall, floor pans, or doors.
Common entry points for exhaust gases include:
- Open windows or sunroof (creates a low-pressure zone that can suck in fumes)
- HVAC system set to “fresh air” mode (draws outside air from the cowl area)
- Worn door seals, trunk seals, or rubber grommets in the firewall
- Rust holes in the floor pan or wheel wells
- Poorly sealed aftermarket components (stereo wiring, gauge pods, etc.)
But before addressing entry points, you must locate the actual exhaust leak. A complete exhaust system from the engine to the tailpipe should be gas-tight. Any breach allows toxic gases to escape before they exit behind the vehicle.
Health & Safety Warning: Do Not Ignore This
Before diving into diagnostics, understand the risks. Carbon monoxide poisoning symptoms mimic the flu: headache, dizziness, nausea, fatigue, confusion. Prolonged exposure at low levels causes cumulative damage. Never attempt to locate a leak in an enclosed space like a closed garage. Work outdoors or in a well-ventilated area. If you feel unwell at any time, stop, get fresh air, and seek medical attention. If the leak is severe, have the vehicle towed to a shop. Your life is worth more than a DIY repair.
Systematic Leak Location Checklist: Start from the Engine, Work Backwards
The best approach is to inspect every component of the exhaust system while the engine is cold initially for visual clues, then perform a safe hot test. Follow this checklist in order.
1. Pre-Inspection (Engine Cold, Safe to Touch)
- Raise the vehicle safely: Use jack stands on a level surface. Never rely on a floor jack alone.
- Visual check of all exhaust components: Look for rust holes, cracks, broken welds, or separated joints. Pay special attention to the exhaust manifold, manifold-to-downpipe connection, catalytic converter, muffler, and pipe bends.
- Check flange gaskets: Any flange (where two sections bolt together) should have a visible gasket. Look for black soot trails around the flange—this is a dead giveaway of a leak.
- Examine flex pipe (if equipped): The braided metal flex section can fray and develop pinhole leaks. Look for black carbon deposits on the braiding.
- Inspect the oxygen sensor bungs: Ensure sensors are tight and not cross-threaded. Missing or loose sensors create direct exhaust paths.
- Check the exhaust manifold for cracks: Cast iron manifolds develop hairline cracks, especially between cylinders. Look for dark, sooty lines on the metal.
2. Cold Start & Initial Listening (Outdoors Only)
- Start the engine from cold. As the engine warms up, metal expands and may seal small leaks temporarily. The first 30-60 seconds often reveal leaks at manifolds and gaskets.
- Use your ears: A ticking or puffing sound that increases with engine RPM indicates a leak. Use a mechanic’s stethoscope (or a long screwdriver with the handle to your ear) to pinpoint noise—keep away from moving parts.
- Feel for puffs: With the engine cold and idling, carefully move your hand (protected by a glove) around the exhaust manifold and joints. Do not touch hot surfaces. Feel for intermittent puffs of exhaust gas against your palm.
3. The Soapy Water Test (Cold Engine, Safe Method)
This is the safest and most effective DIY method for locating pinhole leaks and small cracks.
- Mix a solution of dish soap and water in a spray bottle (heavy concentration).
- With the engine cold (completely cool to the touch), spray the solution generously over all potential leak points: manifold flanges, gaskets, welds, flex pipe, and any suspect rust spots.
- Start the engine and let it idle. Observe the sprayed areas. A leak will blow bubbles in the soapy water. Be patient—small leaks may take a few seconds to bubble.
- Repeat the test on the rest of the system, moving from the engine back to the tailpipe.
- Important: The engine will quickly heat the exhaust. Do this test immediately after starting and work efficiently. If you need to repeat, let the system cool down.
4. The Smoke Test (Professional Method – Or DIY with a Smoke Machine)
Many shops use an exhaust smoke testing machine that pumps non-toxic smoke into the tailpipe. The smoke escapes from any leak, making it highly visible. For home mechanics, you can build a DIY smoke machine using a paint can, baby oil, and a heater element, but this requires caution. Alternatively, a less precise but accessible method is to block the tailpipe with a rag (temporarily) and listen for hissing, but this can pressurize the system and make small leaks more obvious. Be careful not to stall the engine.
5. The Visual Soot Trail Method (Hot Inspection, Use Caution)
After the engine has been running for a few minutes, with the engine off, look for black, powdery soot marks. Exhaust leaks leave telltale carbon deposits around the exit point. This works especially well at flange gaskets and manifold cracks. Use a flashlight and a mirror on an extension to see hard-to-reach areas.
Safe Confirmation Steps: Don’t Rely on Smell Alone
Once you suspect a leak location, you need to confirm it without risking CO poisoning or burns. Follow these confirmation steps:
- Use a CO detector inside the cabin: Portable battery-powered carbon monoxide detectors are inexpensive (under $30). Place one in the cabin at idle with windows closed and HVAC on fresh air. A reading above 9 ppm is unsafe. This confirms the leak is real, but not the source.
- Tailpipe blockage test (for leaks between manifold and tailpipe): Have a helper loosely cover the tailpipe opening with a folded rag while the engine idles. Do not seal it completely—just create slight backpressure. Any leak between the engine and the tailpipe will hiss or puff louder. Use a piece of hose as a listening tool: hold one end to your ear and move the other end along the exhaust path.
- Infrared thermometer check: An exhaust leak will often create a hot spot due to escaping gases. With the engine at operating temperature, use an IR thermometer to scan along the system. A sudden temperature spike (compared to surrounding areas) can indicate a leak. But note: the manifold itself is very hot—this method works best on pipes after the catalytic converter.
- The “hand-over-tailpipe” test (advanced): With the engine idling, place the palm of your hand about an inch from the tailpipe opening, not covering it. You should feel steady pulses. Then, move your hand around the underside near suspected leak areas. If you feel the same type of pulsation on a joint, that’s a leak. This is subjective but works for large leaks.
Most Common Leak Locations at Idle (Based on Real-World Experience)
From 30 years of turning wrenches, here’s where I find 90% of cabin exhaust smell issues:
| Location | Why it’s Common | Typical Fix |
|---|---|---|
| Exhaust manifold gasket | Heat cycling causes gasket to shrink or blow out | Replace gasket, check manifold flatness |
| Manifold-to-downpipe donut gasket | Spring bolts lose tension; donut cracks | Replace donut and springs |
| Cracked exhaust manifold | Cast iron fatigue, especially on older engines | Replace manifold or weld (if cast) |
| Flex pipe (braided section) | Internal failure, rust, or abrasion | Replace flex section or whole pipe |
| O2 sensor bung or loose sensor | Cross-threading, missing seal, or damaged threads | Retighten or repair threads (helicoil) |
| Rusted-through muffler or pipe | Corrosion from inside out, especially near water traps | Replace section or whole system |
| Flange gasket after catalytic converter | Gasket fails, bolts rust away | New gasket, hardware, sometimes new flange |
Immediate Actions to Reduce Fumes Until Repair
If you cannot fix the leak immediately, take these precautions every time you drive:
- Set HVAC to recirculation mode. This closes the fresh air intake and prevents outside air (including exhaust) from entering the cabin.
- Do not idle for long periods. If stuck in traffic, crack a window slightly on the opposite side of the suspected leak? Actually, best to keep windows closed and recirc on. Avoid using the sunroof.
- Drive with windows slightly open only if you are moving at speed – but at idle, close them.
- Install a carbon monoxide alarm inside the car – it will warn you before symptoms become severe.
- Have the exhaust system inspected professionally as soon as possible. Exhaust leaks only get worse.
Step-by-Step Repair Guide for Common Leaks (Enthusiast Level)
Once you’ve pinpointed the leak, here’s how to address the most frequent culprits. Always use new gaskets and hardware.
Replacing a Manifold-to-Downpipe Donut Gasket
- Spray all nuts and bolts with penetrating oil (PB Blaster or equivalent) and let soak for an hour.
- Remove the two spring bolts at the flange. They may be rusted; use a breaker bar and heat if necessary.
- Separate the pipe from the manifold. Remove the old donut gasket (often a graphite or metal ring).
- Clean both flange surfaces with a wire brush. Check for warpage.
- Install a new donut gasket. Reassemble with new spring bolts and nuts. Tighten evenly.
- Start the engine and check for leaks using soapy water or listening for puffs.
Fixing a Small Hole or Crack (Temporary vs. Permanent)
For a pinhole or hairline crack, exhaust repair putty (e.g., Permatex Ultra Copper) can be a temporary fix. Clean the area, apply putty, and let it cure per instructions. For a permanent fix, welding is best. Muffler shops can weld a patch for $50-$100. Do not use regular duct tape or fiberglass wrap meant for heat insulation only—they will not seal gases.
Replacing a Rusted Flex Pipe
If the flex pipe is leaking, the best repair is to cut out the damaged section and weld in a new universal flex pipe. This requires an angle grinder and MIG welder. Alternatively, replace the entire front pipe assembly (often bolt-on).
When to Call a Professional
Some exhaust repairs are not DIY-friendly. Call a shop if:
- You don’t have a safe workspace (level ground, jack stands, ventilation).
- Bolts are seized and you risk snapping studs in the cylinder head (manifold bolts).
- The leak is in the catalytic converter (welding is possible but often replacement is needed).
- You are not comfortable working near hot, rusty components under the vehicle.
A professional exhaust shop can usually locate and repair a leak in under an hour. The cost is far less than a hospital visit for CO poisoning.
Final Checklist: Don’t Miss These Steps After Repair
- Verify the leak is gone using soapy water or smoke test.
- Start the engine, let it idle, and walk around the vehicle – no unusual sounds or smells.
- Drive the car with windows closed and HVAC on fresh air. If no smell returns, success.
- Consider replacing any damaged rubber seals (door, trunk) that may have allowed fumes in originally.
- Install a permanent battery-powered CO detector in the cabin for peace of mind (especially if you sleep in your vehicle or have a camper).
Conclusion: Protect Your Health and Your Ride
Exhaust smell in the cabin at idle is never normal. It’s a clear sign that toxic gases are escaping before they reach the tailpipe. By following this systematic checklist—visual inspection, soapy water test, listening, and using safe confirmation steps—you can pinpoint the leak with confidence. Whether you fix it yourself or take it to a professional, addressing the issue promptly will save you from headaches (literally) and ensure every drive is safe. Remember: your exhaust system is as important to your well-being as your brakes and tires. Treat it with the same respect, and your car will reward you with clean, odor-free air.