

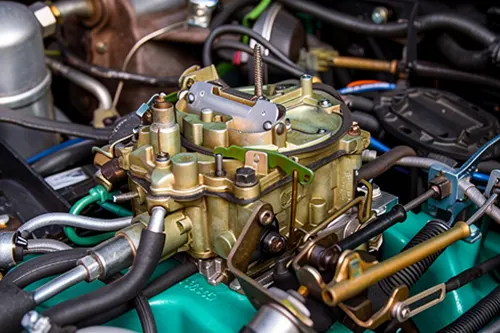
Vacuum leaks on the Pontiac Firebird and Chevy Camaro (1993–2002) LT1 and LS1 V8 cause rough idle, P0171/P0174 codes, and poor brake assist. This guide covers the unique vacuum routing on F-body cars and the leak points that waste diagnostic time.
LT1 vacuum layout
- Main source: intake manifold vacuum port (rear of manifold)
- Brake booster: large hose direct to manifold; one-way check valve critical
- EVAP purge: solenoid on driver's side of intake; hose to canister
- EGR: vacuum-operated on LT1 (LS1 uses electronic)
- PCV: integrated into valley cover; hose to intake
LS1 vacuum differences
- Simpler system (no EGR vacuum on LS1)
- PCV routed differently; valley not sealed like LT1
- Brake booster and EVAP purge primary circuits
Common leak points (F-body specific)
- Brake booster check valve: fails ~80k–120k; causes hard pedal and vacuum leak codes.
- Intake manifold gaskets (LT1): plastic gaskets crack; updated composite gaskets fix permanently.
- PCV hose (LS1): cracked hose at valve cover nipple; $6 fix for rough idle.
- EVAP purge solenoid: sticks open; causes rich idle and fuel smell.
Diagnostic approach
- Connect vacuum gauge to manifold port; baseline reading 17–22 inHg at idle (sea level).
- Spray carb cleaner around suspected areas; RPM change confirms leak.
- Check brake booster: clamp hose, note idle change; significant = booster or check valve issue.
- Inspect PCV and EVAP hoses visually—cracks often visible.
F-body-specific access notes
- LT1: Opti-Spark distributor blocks rear intake access; work from sides.
- LS1: better access overall; intake manifold removal easier if needed.
- Both: tight engine bay; extensions and swivels required for some fasteners.
Repair costs
- Brake booster check valve: $15–30
- PCV hose: $6–12
- Intake manifold gasket set (LT1): $60–120
- EVAP purge solenoid: $40–80
For Firebird/Camaro vacuum diagrams
Check 7zap: Pontiac, Chevrolet.
F-body insight: most vacuum issues trace to brake booster check valve or PCV hose—test these first before tearing into intake manifolds.
F-body vacuum system diagram (LT1 comprehensive)
Manifold vacuum port (rear) ├─ Brake booster (large hose, check valve) ├─ EGR valve (solenoid-controlled on LT1) ├─ EVAP purge solenoid → charcoal canister ├─ PCV system (valley cover → intake) └─ MAP sensor (small line, critical for fuel/timing)
Check valve testing (brake booster)
- Disconnect hose from booster; apply vacuum with hand pump.
- Should hold 15+ inHg for 30+ seconds.
- If drops quickly, replace check valve (~$20).
LT1 vs LS1 PCV differences
- LT1: sealed valley with PCV integrated into valley cover; complex but effective.
- LS1: open valley; PCV in valve cover; simpler routing but more leak points.
Opti-Spark consideration (LT1 only)
When working on intake manifold or vacuum lines on LT1:
- Protect Opti-Spark distributor from coolant drips—located in timing cover, below water pump.
- Moisture in Opti causes misfires; expensive to replace ($300–600).
F-body tools and access
- Extensions: 6" and 12" required for rear manifold bolts
- Swivel sockets: necessary for angled bolts near firewall
- Vacuum gauge: analog preferred; easier to see fluctuations