

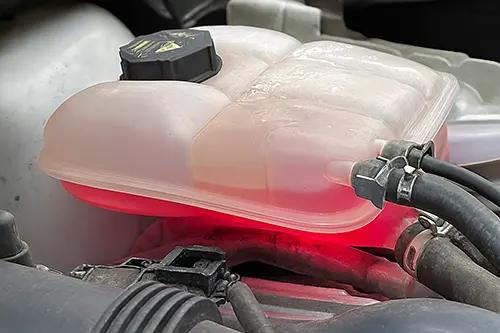
You pop the hood to check your coolant level, and the reservoir is low—again. You filled it just two weeks ago. But there's no telltale green, orange, or pink puddle under your car, no steam from the radiator, and no obvious dripping. Where is the coolant going? This is one of the most frustrating and common mysteries in automotive maintenance. A dropping coolant level without visible external puddles often points to three hidden culprits: a faulty radiator overflow cap, a leaking heater core that creates mist instead of drips, or a slow external seep that evaporates before it hits the ground. Understanding these three scenarios can save you from unnecessary repairs, prevent engine overheating, and protect your cooling system's health.
Why Coolant Disappears Without Leaving Traces
Before diving into specific causes, it's essential to understand why coolant loss can go unnoticed. Unlike engine oil, which leaves dark stains, coolant is mostly water mixed with ethylene or propylene glycol. It can evaporate quickly on hot engine surfaces, turn into steam, or be burned inside the combustion chamber. Additionally, modern cooling systems operate under pressure (typically 12–16 psi), raising the boiling point of coolant. A tiny leak under pressure can spray a fine mist that never forms a drip. By the time you park and inspect, the evidence has vanished. This is why many car owners face the "no puddle" puzzle despite losing significant coolant over weeks or months.
Suspect #1: The Radiator Overflow / Coolant Reservoir Cap
The humble pressure cap on your radiator or overflow tank is often the first and most overlooked suspect. It's not just a lid—it's a precision pressure-regulating device. Most caps have two internal valves: a pressure relief valve and a vacuum relief valve. When the engine heats up, coolant expands and pressure builds. The cap allows excess coolant to flow into the overflow reservoir. When the engine cools, the vacuum valve allows coolant to be sucked back from the reservoir into the radiator.
How a Bad Cap Causes Coolant Loss Without a Puddle
A failing pressure cap—usually due to a worn or hardened rubber seal—can release pressure too early or allow coolant to escape as vapor. The leaked coolant may turn into steam that dissipates instantly, leaving no liquid on the ground. Alternatively, if the cap's vacuum valve fails, coolant might not return from the overflow tank, causing the radiator to appear low while the reservoir stays full. Over time, repeated heat cycles cause the cap's spring to weaken, lowering the opening pressure. This allows coolant to boil at lower temperatures and escape as invisible vapor. Many drivers replace hoses, water pumps, and even head gaskets before realizing a $10 cap was the culprit.
Diagnosing a Faulty Cap
- Visual inspection: Remove the cap (engine cold!) and examine the rubber gaskets. Cracks, flattening, or hardened rubber are red flags. Also check for corrosion or debris on the sealing surfaces.
- Pressure test: A cooling system pressure tester can be attached to the cap to see if it holds the specified pressure (stamped on the cap, usually 13–16 psi). If it leaks pressure immediately, replace it.
- Check for "dry" coolant stains: Look for white or light-colored residue around the cap's neck and overflow tube. That's dried coolant—proof of vapor loss.
- After a hot drive: Carefully (use gloves) feel the cap's area. Any hissing or smell of hot coolant when the engine is off but still warm indicates a leaking cap.
Replacing the cap is inexpensive and often solves the mystery. Always buy a cap that matches your vehicle's pressure rating—using a higher pressure cap can damage your radiator or heater core.
Suspect #2: Heater Core Misting (Internal Evaporation)
The heater core is a small radiator located inside your dashboard, responsible for providing cabin heat. Coolant flows through it, and a fan blows air across its fins to warm the interior. If the heater core develops a tiny pinhole leak, coolant can spray as an almost invisible mist into the HVAC system. This mist is then blown into the cabin or out through the vents, evaporating instantly without ever forming a puddle under the car. You might never see a drop of coolant, but your level will slowly drop—often a quart every few hundred miles.
Classic Signs of a Leaking Heater Core
- Sweet smell inside the cabin: Coolant has a distinct sweet odor (like maple syrup). If you notice this smell when the heater or defroster is on, suspect a heater core leak.
- Foggy or oily film on windows: The mist can leave a thin, greasy residue on the inside of your windshield that's difficult to wipe off. It may also cause windows to fog up excessively in humid conditions.
- Unexplained coolant loss with no external drips: The classic symptom. You keep adding coolant, but the ground stays dry.
- Wet passenger floorboard: In more advanced leaks, coolant can drip inside the car, usually on the passenger side footwell. But early stage "misting" may not produce enough liquid to soak carpets.
- Coolant smell with A/C on: Even with the heater off, some air circulation may pull the smell from the heater core area into the cabin.
Diagnosing and Addressing Heater Core Misting
To confirm a heater core leak, a mechanic can perform a pressure test on the cooling system while monitoring the HVAC vents. A borescope inserted into the heater core housing can also reveal wetness or staining. Unfortunately, heater core replacement is labor-intensive (often requiring dashboard removal) and expensive—typically $800 to $1500. For older vehicles, some owners bypass the heater core by connecting the inlet and outlet hoses under the hood. This stops the leak but eliminates cabin heat. It's a valid temporary or permanent fix in warm climates. For those who want to keep heat, adding a high-quality stop-leak product designed for heater cores can sometimes seal tiny pinholes, but use caution: stop-leaks can also clog radiator passages. The best long-term solution is professional replacement.
Suspect #3: Slow External Seep That Evaporates Before Dripping
The third possibility is a slow external leak from a hose, gasket, water pump weep hole, or radiator seam. But unlike a gushing leak, this seep is so minor that the coolant either drips onto a hot engine part (like the exhaust manifold) and evaporates instantly, or the leak rate is so slow that it dries before forming a puddle. You may see small white or crusty deposits around the leak point—these are coolant minerals left behind after water evaporates. This is the "hidden drip" scenario.
Common Slow External Seep Locations
- Water pump weep hole: The water pump has a small hole that allows coolant to escape when internal seals fail. At first, only a tiny drop may appear, and it can evaporate on the hot engine block. Look for a rusty or whitish trail below the water pump.
- Radiator end tank seams: Plastic-aluminum radiators often develop micro-cracks where the plastic tank meets the aluminum core. Under pressure, a fine mist escapes. You might never see a drip, but a UV dye test can reveal the trace.
- Upper or lower radiator hose connections: A slightly loose clamp or a hose that has hardened can seep coolant when hot. The fluid can run along the hose and drip onto the engine, evaporating quickly.
- Thermostat housing gasket: A slow weep from the thermostat housing can produce crusty buildup without active dripping.
- Heater control valve or hoses to the firewall: Small cracks here can spray fine mist directly onto hot engine surfaces.
How to Track Down an Invisible External Leak
Because these leaks are elusive, standard visual inspection often fails. Try these advanced techniques:
- UV dye test: Add a small amount of fluorescent dye (available at any auto parts store) to your coolant. Drive for a few days, then inspect the engine bay in the dark with a UV flashlight. The dye will glow brightly at even the tiniest leak source.
- Pressure test while cold and hot: A cooling system pressure tester can pressurize the system when the engine is cold. Pump it to the cap's rated pressure and watch for pressure drop. Then, start the engine and let it reach operating temperature—some leaks only appear when the system is hot and under maximum pressure.
- Inspect after a highway drive: Slow leaks often only manifest at higher RPMs and pressures. Drive for 20 minutes on the highway, then park over clean cardboard or white paper. Any drips will be visible, but for evaporation leaks, immediately use a flashlight to look for wet spots or steam.
- Check the overflow tube: If the cap is fine but the coolant is being pushed out through the overflow hose, you might see dried coolant residue at the end of the hose (usually near the front of the engine bay).
Other Less Common Causes of Hidden Coolant Loss
While the three main suspects cover most cases, there are other possibilities worth mentioning:
- Internal head gasket leak: Coolant can be drawn into the combustion chamber and burned. You might see white smoke from the exhaust (steam) or smell sweet exhaust. A compression test or exhaust gas analyzer can confirm. This is a serious repair.
- Cracked cylinder head or engine block: Similar to a head gasket failure, but rarer. Coolant can enter cylinders or mix with oil (milky oil).
- Intake manifold gasket leak: On many V6 and V8 engines, coolant flows through the intake manifold. A failed gasket can allow coolant to be sucked into the intake ports and burned. Often no external leak or puddle.
- Coolant reservoir crack at the seam: The plastic reservoir itself may have a hairline crack that only leaks when the engine is hot and pressure is high. The coolant can run down and evaporate on the hot engine.
Step-by-Step Diagnostic Flowchart for the DIY Enthusiast
When you notice a dropping coolant level with no puddle, follow this systematic approach:
- Check the cap first: Inspect and pressure test the radiator/overflow cap. Replace if any doubt. This solves 30% of "no puddle" cases.
- Smell inside the cabin: Turn the heater to max. Sweet smell? Suspect heater core misting. Also check passenger floor for dampness.
- Perform a UV dye test: Add dye to coolant, drive normally for 2-3 days, then inspect the entire engine bay at night with a UV light. This will reveal external seeps and also confirm if the cap is leaking (dye around the cap area).
- Pressure test the cooling system: Using a rental tool from a parts store, pressurize the cold system to the cap rating. Watch the gauge for 15 minutes. If it drops but you see no external wetness, the leak could be internal (heater core, head gasket, or intake gasket).
- Check for white smoke from exhaust: Have a friend start the car while you watch the tailpipe. Persistent white smoke (not just condensation on a cold day) indicates coolant burning in the engine.
- Inspect the oil: Remove the oil dipstick and check the oil filler cap. A milky, chocolate-mousse-like residue indicates coolant in the oil (usually a head gasket or cracked block).
Prevention and Long-Term Maintenance
Preventing mysterious coolant loss starts with routine cooling system care. Replace your coolant every 2-5 years depending on the type (older green coolant every 2 years, extended-life HOAT or OAT every 5 years). Old coolant becomes acidic and eats away at gaskets, seals, and the water pump. Also, replace the radiator cap every 3-4 years as a preventive measure—it's cheap insurance. Inspect hoses for swelling, cracking, or soft spots annually. If you drive a vehicle with a known weak heater core or water pump, consider proactive replacement at higher mileages (80k-100k miles).
One often overlooked habit: always check coolant level when the engine is cold. A hot system will show a higher level due to expansion, and opening a hot radiator cap is dangerous. Use a quality coolant that matches your manufacturer's specification (check your owner's manual). Mixing incompatible coolants can cause gelling and seal damage, leading to invisible leaks.
Conclusion: Don't Ignore the Drop
A dropping coolant level without a visible puddle is not a mystery you should live with. Left unchecked, even a slow loss can lead to overheating, engine damage, and costly repairs. By systematically investigating the three most likely culprits—a faulty overflow cap, heater core misting, or a slow external seep—you can pinpoint the problem. Start with the simplest and cheapest: replace the cap. Move to the UV dye test for external seeps. And don't ignore the sweet smell inside your car; your heater core might be sending you a warning. With patience and the right diagnostic tools, you can stop chasing the invisible leak and keep your cooling system healthy for miles to come.
Final Pro Tip: Keep a small notebook in your glove compartment. Log your coolant level every time you fill up gas (engine cold). If you notice a consistent drop pattern (e.g., 1/2 inch per week), you'll catch the problem early—often before any puddle or symptom appears. Your engine will thank you.