

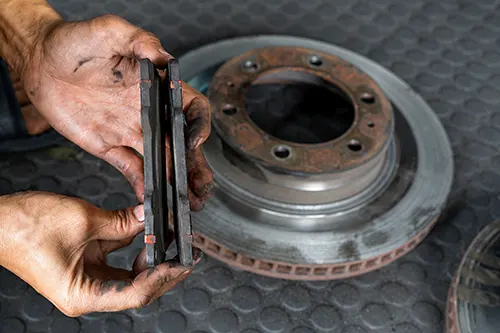
Understanding the Asymmetry: Why One Side Wears Faster
You’ve just replaced your brake pads, but after a few thousand miles, you notice something troubling: the left front pad is down to 3mm while the right front still has 8mm of friction material left. Or maybe the rear left is nearly metal‑to‑metal and the rear right looks almost new. Uneven brake pad wear from left to right is one of the most common—and most misunderstood—brake problems. It’s not just an annoyance; it can pull your vehicle during braking, increase stopping distances, and lead to premature rotor damage.
Most enthusiasts immediately suspect a stuck caliper slide pin. And often, they’re right. But there are two other frequent culprits that are less obvious: a restricted flexible brake hose acting as a one‑way check valve, and your own driving pattern—yes, the way you turn, brake, and even the roads you drive can cause a measurable difference in pad wear left to right. In this guide, we’ll break down each possibility, give you a step‑by‑step diagnostic process, and show you how to fix the problem for good.
The Anatomy of Even vs. Uneven Wear
Before diving into causes, let’s establish what “normal” looks like. Under ideal conditions, pads on the same axle (left and right) should wear at nearly the same rate. A 1‑2mm difference after 30,000 miles can happen due to manufacturing tolerances or slight variations in driving. But a difference of 4mm or more, or one side completely worn out while the other has 70% life left, indicates a problem.
- Even wear across both pads on the same wheel: Good sign, caliper sliding properly.
- One pad (inner or outer) more worn on the same wheel: Usually points to slide pin or piston issues.
- Uneven between left and right wheels on the same axle: Three main suspects – slide pins, hose restriction, or driver pattern.
Culprit #1: Sticking or Seized Slide Pins (Most Common)
On floating calipers (the vast majority of production cars), the caliper must slide laterally on two pins or bolts. When you apply the brakes, the piston pushes the inner pad against the rotor; then the caliper body slides outward, pulling the outer pad into contact. If the slide pins are corroded, dried out, or have damaged boots, the caliper can’t slide freely.
When the caliper sticks in the “applied” position, the inner pad may remain in light contact with the rotor, causing rapid wear on that inner pad. But more importantly for left‑to‑right unevenness: a stuck caliper on one side will cause that wheel to brake harder than the other, even under light pedal pressure. The wheel with the sticky caliper will generate more heat, more dust, and its pads will wear significantly faster than the opposite side.
How to diagnose slide pin issues:
- Visual inspection: Remove the caliper. The pins should slide in and out of the bracket with light finger pressure. Any resistance, grit, or rust means trouble.
- Boot condition: Torn or missing boots allow moisture and dirt to enter, killing the grease and causing corrosion.
- Uneven pad thickness on the same wheel: If the inner pad is dramatically thinner than the outer, the slide pins are likely frozen.
- Vehicle pull: If the car pulls to the left when braking, suspect a stuck left caliper or slide pins.
Fix: Remove pins, clean all old grease and rust with brake cleaner and a wire brush. Use high‑temperature silicone brake grease (not anti‑seize) to lubricate pins. Replace damaged boots. If pins are pitted or worn, buy a new hardware kit (usually under $20).
Culprit #2: Restrictor (Collapsed) Brake Hose – The Hidden Check Valve
This is the sneakiest cause of uneven left‑to‑right wear. A flexible brake hose can fail internally without any external leak or visible damage. The inner rubber layer delaminates and acts like a one‑way flap: when you press the brake, fluid rushes past the obstruction and applies the caliper. But when you release the pedal, the flap blocks the return flow, trapping pressure in the caliper. The result? That caliper remains slightly engaged all the time.
The pads on that wheel will overheat, glaze, and wear out in a fraction of the normal mileage—while the opposite side works perfectly. This is especially dangerous because the driver may not feel a pull at first, only noticing the rapid pad wear and sometimes a smell of hot brakes.
Diagnosing a restricted brake hose:
- After a drive, touch the wheels carefully (heat test): One wheel (the affected side) will be noticeably hotter than the other on the same axle. Use an infrared thermometer for accuracy – a 50°F or higher difference under light braking is a red flag.
- Cracked bleeder test: With the vehicle safely lifted, crack open the bleeder screw on the suspect caliper. If a strong jet of fluid squirts out under pressure even when the brake pedal is not pressed, the hose is holding residual pressure.
- Compare caliper piston retraction: After releasing the brake, a healthy caliper piston should retract slightly. On a restricted hose side, you may need a tool to push the piston back – it fights you.
- Visual hose inspection: Look for cracks, bulges, or swelling. But remember: internal failure shows no external signs.
Fix: Replace the brake hose on the affected side. Always replace in pairs (both left and right hoses on the same axle) for even performance. Then flush the entire brake system with fresh DOT fluid.
Culprit #3: Driver Pattern – Left Turns vs. Right Turns and Road Crown
This is the cause that many mechanics overlook. Your driving habits and the roads you frequent can cause asymmetrical pad wear – and it’s completely normal. It doesn’t mean there’s a mechanical fault, but it does mean you might need to adjust your maintenance approach.
Consider these factors:
- Left‑turn bias: In countries where you drive on the right side of the road (USA, Canada, most of Europe), left turns are longer, higher‑speed maneuvers than right turns. You spend more time braking while turning left, which loads the right‑side brakes more? Actually, careful analysis shows that on a left turn, weight transfers to the right side. But the wear pattern depends on whether you brake in the turn or before. Most drivers brake before the turn, then accelerate through. The most consistent finding: the side that does more “trail braking” (braking into the corner) can see increased wear. But a more common factor is the daily commute with many right‑hand turns – that can wear left front pads faster because the left front works harder when turning right under braking? Let's clarify.
- Road crown: Most roads are slightly higher in the center and slope toward the shoulder for drainage. On a crowned road, the vehicle naturally wants to drift right. To drive straight, you constantly apply slight counter‑steering, which can cause very subtle drag on one side’s brakes? In reality, road crown has a minor effect, but combined with other factors it can become measurable.
- Roundabouts and cloverleaf interchanges: If your daily route includes several roundabouts where you always turn left (or always right), the outside front brake (the one opposite the turn direction) may work harder. For a left‑hand roundabout, the right front brake sees more load.
- Individual driving style: Some drivers consistently brake later and harder into right turns, others left turns. Over tens of thousands of miles, this creates a wear difference of up to 3‑4mm between left and right pads.
How to determine if it’s driver pattern:
- Check for any mechanical issues first (slide pins, hoses). If both are perfect, driver pattern is likely.
- Monitor your own driving: Do you frequently take the same on‑ramp or off‑ramp? Do you have a “favorite” direction when cornering?
- If the wear difference is consistent across multiple brake pad replacements (always the same side wearing faster) and all mechanical checks pass, you’ve found the cause.
Mitigation: You don’t need to change your driving – just rotate your pads? Not recommended. Instead, rotate your tires more often and inspect pads regularly. Consider using a more aggressive pad compound on the fast‑wearing side if the difference is extreme, but the best solution is simply to accept it and replace pads as needed – or start taking some right turns for balance!
Comparison Table: Three Culprits at a Glance
| Diagnostic Sign | Slide Pins | Hose Restriction | Driver Pattern |
|---|---|---|---|
| Pad wear difference | Usually 4mm+ difference; inner pad on one side may be worse | Extreme difference (one side wears 2-3x faster) | Mild to moderate (2-4mm difference over pad life) |
| Heat after normal drive | Slight warmth on affected side | Very hot on one side, normal on the other | Both sides similar temperature |
| Pedal feel | Normal or slight pull | Normal; no pull until drag builds heat | Normal, no pull |
| Bleeder screw test | No residual pressure | Pressure squirts out when cracked | No residual pressure |
| Slide pin movement | Rough, stuck, or dry | Normal | Normal |
| Fix | Clean and lube or replace pins | Replace brake hose (pair) | No mechanical repair; monitor and adjust driving |
Step‑by‑Step Diagnostic Workflow (For Your Garage)
Follow this process to pinpoint the cause of left‑right uneven brake pad wear:
- Safety first: Lift the vehicle, support on jack stands, remove wheels.
- Inspect pads visually: Note which side of the vehicle (left or right) and which pad (inner/outer) is more worn. Record thicknesses.
- Check for heat signature: After a short drive (5-10 minutes with normal braking), use an infrared thermometer on each rotor near the caliper. A difference of more than 40°F (22°C) between left and right suggests a dragging caliper – usually a hose or slide pin issue.
- Perform the bleeder crack test: With engine off, attach a clear hose to the bleeder on the suspect caliper. Crack open the screw. If fluid squirts out under pressure and the caliper releases, the hose is the problem.
- Check slide pins: Remove caliper, pull out pins. Clean, inspect, relube. Test smoothness.
- Check piston retraction: Use a large C‑clamp or brake piston tool to push the piston back. It should move with moderate effort. If it’s extremely hard to retract and the hose passed the test, the caliper piston or bore is corroded – replace caliper.
- If all mechanical checks pass: Consider driver pattern. Ask yourself about your regular routes, cornering habits, and whether the faster‑wearing side has been consistent across multiple pad replacements.
Prevention and Long‑Term Solutions
Regardless of the cause, you can reduce uneven wear with these habits:
- Annual brake service: Clean and lubricate slide pins every 12‑15,000 miles or during pad replacement. Replace pin boots if cracked.
- Brake fluid flush every 2 years: Old, moisture‑laden fluid accelerates corrosion inside hoses and calipers.
- Inspect brake hoses at every tire rotation: Look for cracks, bulges, or signs of rubbing against suspension components.
- Rotate tires regularly (5‑8k miles): While you’re there, check pad thickness and rotor temperatures.
- If you drive a performance car or track occasionally, consider upgrading to stainless steel braided hoses. They don’t expand and are much less prone to internal collapse.
When to Replace Calipers vs. Hoses vs. Pins
Many enthusiasts wonder whether to rebuild or replace. Here’s a quick guide:
- Just slide pins sticking: Clean, lube, new boots – no need for caliper replacement. Use only silicone brake grease, not chassis grease.
- Collapsed brake hose: Replace the hose (and the opposite side for balanced response). Flush entire system. Caliper is usually fine unless it overheated and caused piston seal damage.
- Caliper piston seized in bore: If the piston won’t retract and the hose is good, replace or rebuild the caliper. Rebuilding is possible but requires a piston, seal kit, and honing tool – most DIYers prefer a loaded caliper (with new bracket, pads, and hardware).
- Driver pattern: No parts needed – just awareness and more frequent pad inspections on the fast‑wearing side.
Conclusion: Don’t Blame the Pads – Find the Real Cause
Uneven brake pad wear from left to right is rarely a problem with the pads themselves. It’s a symptom of something else in the system. By systematically checking slide pins, brake hoses, and then evaluating your driving patterns, you can solve the mystery. Start with the simplest and most common (slide pins), then move to the hidden danger (hose restriction), and finally accept that sometimes, your own daily commute is the culprit.
The reward for proper diagnosis is longer pad life, better braking feel, and a vehicle that stops straight and true every time. So next time you see one pad wearing out while its opposite‑side twin looks fresh, don’t just slap on new pads – dig deeper. Your brakes (and your wallet) will thank you.
Remember: Always torque caliper bracket bolts and lug nuts to manufacturer specs. A loose bracket can mimic uneven wear and cause serious safety issues. And never ignore a brake pull – it’s your car telling you something is wrong.