

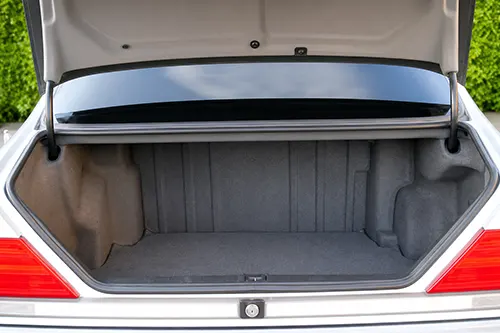
There’s something quietly frustrating about a trunk lid that refuses to latch with a gentle drop. Instead, you end up doing that awkward, shoulder-jarring slam—while hoping the neighbors don’t think you’re mad at your car. Annoying, yes, but it can also be a clue: a trunk that needs excessive force to close may be pointing to alignment trouble, worn rubber, or even a safety issue, like a lid that pops open over a bump. As an automotive enthusiast with decades of hands-on experience, I’ve chased this problem on everything from classic sedans to modern liftbacks. In most cases, the usual suspects are three: striker position, weatherstrip drag, and hinge misalignment. So let’s dig into each one, because a trunk that closes with a soft, satisfying “thunk” is one of those small signs a vehicle is truly well kept.
Why a “Slam” Is a Symptom, Not a Solution
Your trunk latch is meant to engage with very little effort—typically, a drop from 6–8 inches (150–200 mm) should do it. If slamming is the only thing that works, something is getting in the way of the latch clicking into its secondary and primary positions. The most common mechanical roadblocks are these:
- Striker misalignment: The metal loop on the trunk floor (or on the lid) doesn’t line up with the latch mechanism.
- Weatherstrip drag: The rubber seal around the trunk opening is too thick, hardened, or displaced, creating excessive resistance.
- Hinge or torsion bar wear: Worn hinges or weak torsion springs allow the lid to sag, or bind, preventing proper engagement.
Less common culprits include a damaged latch assembly, debris in the mechanism, or even a bent trunk lid from a previous accident. Still, in 90% of daily drivers, those three are where you start. Why chase ghosts first? Let’s diagnose each one systematically.
Tool Check & Safety First
Before you begin, gather the following:
- Phillips and flathead screwdrivers
- Set of metric / SAE sockets and wrenches (usually 10mm, 12mm, 13mm, 14mm)
- Masking tape and a fine-point marker (to mark original positions)
- Rubber mallet
- White lithium grease or silicone spray
- Ruler or digital caliper
- Flashlight
Safety note: Work in a well‑lit area. If your trunk has a torsion bar system, remember that it is under tension—don’t remove bars unless you really know what you’re doing. Always support the trunk lid when adjusting hinges, or it can come crashing down on your head or hands. Not the kind of lesson you want to learn the hard way.
1. The Striker: Heart of the Latching System
The striker is the U‑shaped metal loop the latch grabs onto. On most sedans and coupes, it’s mounted to the rear body panel, though on some hatchbacks it may be on the trunk lid itself. If it’s off by even a few millimeters, the latch can strike the side of the loop instead of centering cleanly into the jaw.
Diagnosis: The “Chalk Test” & Visual Inspection
Apply a thin layer of chalk, grease, or even lipstick to the striker. Then gently lower the trunk lid—don’t latch it—and open it again. Look at the latch mechanism. You want to see a centered contact mark. If the mark is off‑center, whether left/right or up/down, the striker needs adjustment. It is worth noting, too, that a deep wear groove on the striker usually means replacement time has arrived.
Adjustment Procedure
Most strikers are held in place by two bolts, often Torx or hex. Loosen them only enough that the striker will move with light taps from a rubber mallet. Use the chalk test again and again if needed until the striker sits centered in the latch jaw. Also verify vertical height: the latch should engage the striker about 2–3 mm below the striker’s centerline. Too high, and the latch won’t reach. Too low, and the lid will sit proud.
Tighten the bolts to factory torque, typically 15–20 Nm, and test again. If the trunk now closes with a normal drop, you’re finished. If not, move on to the weatherstrip.
| Symptom | Likely Striker Issue | Fix |
|---|---|---|
| Latch makes a clicking sound but won’t fully close | Striker too low – latch hits top of the loop | Raise striker by 1–2 mm |
| Trunk lid sits flush on one side but gaps on the other | Lateral misalignment | Slide striker toward the side with the larger gap |
| Visible wear groove on striker | Worn metal from years of slamming | Replace striker (inexpensive part) |
2. Weatherstrip Drag – The Silent Resistance
Modern trunk seals are thick, spongy rubber, and over time they can harden, swell, or simply stay too resilient for proper closure. If the weatherstrip is new after a replacement, or if it has been treated with the wrong conditioner, it may push back against the trunk lid and keep the latch from reaching the striker. This shows up especially often on older cars, where the rubber has turned into a stiff ridge.
The Telltale Signs
- The trunk lid rebounds slightly when you try to close it gently.
- You see pinch marks or shiny spots on the weatherstrip.
- The gap between the lid and the body is uneven, but the lid itself isn’t visibly bent.
- Slamming works, but the lid pops up a few millimeters after release.
Diagnosis: The Dollar‑Bill Test
Place a dollar bill, or just a strip of paper, between the weatherstrip and the trunk lid at several points around the perimeter. Close the lid and try pulling the bill out. If it slides free with almost no resistance everywhere except one area, that spot is where the seal is being compressed too much. Another option is to dust talcum powder on the weatherstrip, close the lid, then open it again—the transfer pattern on the lid’s inner surface will show you exactly where contact is happening.
Fixes for Weatherstrip Drag
- Lubrication: Wipe the weatherstrip with a quality rubber conditioner (like 303 Aerospace Protectant) or silicone spray. Avoid petroleum-based products – they dry out rubber.
- Check for twists: Sometimes the weatherstrip is installed twisted, creating a bulge. Re‑seat it carefully.
- Trim or replace: In extreme cases where the seal is too thick (e.g., aftermarket generic seal), you can carefully trim a small amount from the inner lip. Or better, buy the correct OEM‑style weatherstrip.
- Adjust striker first! Many people wrongly blame weatherstrip when the striker is too high, forcing the lid to compress the seal excessively. Always verify alignment before cutting rubber.
3. Hinge Misalignment & Torsion Bar Fatigue
Trunk hinges connect the lid to the body, and like any moving hardware, they wear. Over the years, hinges can bend, pivot points can loosen up, and mounting bolts can shift a little. The result is a sagging lid that meets the striker at the wrong angle, which means—yes—you slam it. Torsion bars, the coiled rods that help lift the lid, can also lose tension and change the way the weight settles during closing.
Quick Check
- With the trunk open, grab the lid and try to wiggle it side‑to‑side. Excessive play indicates worn hinge bushings.
- Close the lid slowly and watch if the center of the lid shifts laterally as it nears the latch. This indicates hinge binding.
- Measure the gap between the lid and the rear quarter panels. Uneven gaps (tapering from 4mm on left to 8mm on right) point to hinge misalignment.
Adjusting Hinges
Most hinges attach to the trunk lid through slotted holes. Mark the original position with masking tape first. Then loosen the bolts, usually four per hinge, and shift the lid up/down or left/right in very small increments. Tighten and test. This is really a two‑person job: one person holds the lid, the other tightens the bolts. Pay close attention to the gap along the rear window and at the sides. If the gap is too large at the back, the lid is too far forward, so adjust accordingly.
Torsion Bar & Spring Assistance
If the trunk lid won’t stay open on its own, weak torsion bars may be part of the problem. That can affect closing as well, because the lid’s weight distribution changes. Some vehicles have adjustable torsion bar notches, and moving the bar to a higher-tension notch can help. What is important here is caution: these bars can snap violently. If you’re not comfortable with that kind of work, let a professional handle it.
Other Potential Culprits (But Less Common)
- Latch mechanism corrosion: Spray penetrating oil into the latch (use brake cleaner first to remove old gunk, then lubricate with white lithium grease).
- Bent trunk lid: Accident damage can twist the lid – a body shop with a frame measuring system can diagnose.
- Aftermarket spoiler: Added weight can alter the closing dynamics. You may need stronger torsion bars.
- Ice or debris: In winter, ice buildup in the striker cup is a classic nuisance – clear it out.
Step‑by‑Step Diagnostic Workflow
Instead of guessing, work through this sequence:
- Visual & tactile inspection – Look for rust, bent parts, foreign objects.
- Lubricate the latch and striker – many problems disappear with a simple cleaning.
- Check striker alignment – use the chalk test. Adjust if needed.
- Check hinge alignment & gaps – measure and correct.
- Check weatherstrip resistance – dollar‑bill test; lubricate or replace.
- If all else fails – inspect for hidden damage, like a collapsed trunk floor pan (common on older unibody cars after a rear collision).
Maintenance Tips to Keep Your Trunk Closing Smoothly
- Every oil change, wipe the weatherstrip with rubber conditioner – prevents hardening and cracking.
- Spray the latch mechanism with white lithium grease once a year.
- Check the striker bolts for tightness – they can work loose over time.
- Don’t overload the trunk with heavy items that push up against the lid – this can bend the lid over time.
When to Call a Professional
If you’ve gone through all three adjustments—striker, weatherstrip, and hinges—and the trunk still needs a slam, or if there’s evidence of structural damage, it’s time for a body shop. They have specialized tools, including door gap gauges and frame straightening equipment. Important: a trunk that doesn’t seal properly can allow exhaust fumes into the car, and that’s a serious safety hazard.
Summing Up: The Art of the Perfect “Thunk”
A trunk that closes with a gentle, confident click is one of those little pleasures that makes a car feel properly engineered. By checking striker position, weatherstrip drag, and hinge alignment in a logical order, you can usually bring back that satisfying closure without brute force. Start with the easy stuff—a little lubricant, a minor striker tweak—and work upward only as needed. Most of the time, the fix reveals itself in under an hour. And the next time you’re at a cars and coffee, you’ll notice it right away: no more angry slams, just the quiet pride of a well-sorted ride.
Pro tip: After making adjustments, test the trunk with the rear seats folded down. Listen from inside the cabin. At first glance it may seem a bit fussy, but you’ll hear exactly where the latch is struggling. A little patience, and these steps will turn your slam into a soft touch.