

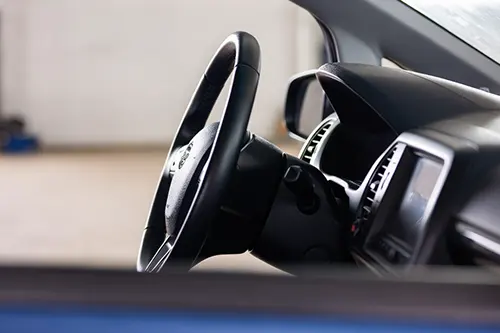
You just paid for a professional alignment. The printout shows all angles in the green. Yet as you drive away, the steering wheel sits noticeably off-center—pointing at 11 o’clock or 1 o’clock when you’re going straight. Your first instinct might be to blame the alignment shop. But the truth is more nuanced. An off-center steering wheel after alignment can stem from two very different root causes: improper tie-rod adjustment during the alignment process, or a shifted front subframe (also called cradle or engine cradle). Misdiagnosing one for the other leads to wasted time, unnecessary parts, and lingering frustration. This guide will teach you exactly how to tell them apart, what to check, and how to fix each issue like a seasoned chassis technician.
Why the Steering Wheel Must Be Centered – It’s Not Just About Comfort
Before diving into diagnostics, understand why steering wheel centering matters beyond annoyance. Modern vehicles rely on steering angle sensors for stability control (ESC), traction control, lane-keeping assist, and even torque vectoring. A steering wheel that’s off by even 5 degrees can confuse these systems. More importantly, a crooked wheel often masks underlying alignment or suspension problems. Driving with a permanently off-center wheel forces you to compensate subconsciously, leading to uneven tire wear, reduced fuel economy, and driver fatigue on long trips. So when you notice that wheel isn’t straight, it’s a legitimate safety and performance concern.
What Happens During a “Thrust Angle” or “Steering Wheel Centering” Alignment?
Most modern alignments are thrust-angle alignments on vehicles with a solid rear axle, or four-wheel alignments on independent suspension cars. The procedure: technicians attach sensors to all four wheels, measure current angles, then adjust front toe (and sometimes rear toe) to bring everything into spec. Critically, the steering wheel must be locked or held dead straight while front toe is set. If the technician fails to center the wheel before adjusting tie-rods, the final result will be perfect toe angles but a crooked steering wheel. That’s the first cause: tie-rod adjustment error.
But there’s a second, more sinister cause: a shifted front subframe. The front subframe holds the steering rack, lower control arms, and often the engine mounts. If the subframe shifts—due to a curb impact, rusted bolts, or improper service—the entire steering geometry shifts relative to the body. Even with perfect tie-rod adjustments, the steering wheel will no longer align with the straight-ahead position of the rack. This is far less common but much more expensive to fix.
Cause #1: Tie-Rod Adjustment Error (The Most Common Culprit)
What it is: During toe adjustment, the technician adjusts the tie-rods to change the angle of the front wheels. If they don’t lock the steering wheel exactly at center, or if they bump it while turning the tie-rods, the final wheel position will be “indexed” incorrectly. The total toe may be perfect, but the steering rack’s centered position no longer corresponds to the steering wheel’s centered position.
Typical symptoms:
- The steering wheel is off by a constant angle (e.g., always 10° to the right) regardless of road crown.
- The vehicle tracks straight when you let go of the wheel, but the wheel itself is crooked.
- No pulling or drifting; just an off-center steering wheel.
- Alignment printout shows front toe within spec (often green).
How to diagnose: This is surprisingly easy to confirm. On a straight, flat road, note how many degrees the steering wheel is off. Then, pull over and adjust both tie-rods equally in the same direction (shorten one side, lengthen the other by the exact same amount). This changes the steering wheel centering without altering total toe. If the wheel becomes centered after such adjustment, the problem was purely tie-rod indexing. Many alignment shops will correct this for free—it’s a 10-minute redo.
DIY fix: With the front wheels straight ahead (use a helper or steering wheel holder), measure the off-center angle. Jack up the front, secure on stands. Turn the steering wheel to its natural center (it will stay there). Then adjust each tie-rod: if the wheel points left, shorten the left tie-rod and lengthen the right by the same number of turns (typically 1/4 turn per 5° of error). Re-check. This requires a tape measure to ensure total toe remains unchanged. Not recommended for novices, but understanding the process helps you communicate with your shop.
Cause #2: Subframe Shift (The Hidden Menace)
What it is: The front subframe is bolted to the unibody via four or six large bolts, often with locating dowels or eccentric washers. A hard impact (pothole, curb, accident) or loose bolts can shift the subframe rearward or sideways by just a few millimeters. Because the steering rack is bolted to the subframe, a shift moves the rack relative to the body. Now, even with tie-rods perfectly adjusted, the rack’s internal centering spring will return to a position that makes the steering wheel off-center. Worse, subframe shift often alters caster and camber on one side, causing a pull.
Typical symptoms:
- Steering wheel is off-center and the vehicle pulls to one side, even after alignment.
- Alignment printout shows caster or camber out of spec on one front corner, or rear toe is fine but front caster is asymmetric.
- You recall a recent impact: hit a deep pothole, slid into a curb, or had subframe bolts loosened during other repairs (e.g., oil pan replacement).
- Uneven tire wear appears quickly after alignment.
How to diagnose – visual inspection: Look at the subframe mounting points. Rust streaks or clean metal marks around bolt heads indicate movement. On many vehicles (Honda, Subaru, BMW), there are alignment marks stamped into the subframe and body—if they don’t line up, the subframe has shifted. Measure the distance from a fixed body point (like a strut tower bolt) to a subframe reference hole on both sides. Differences >3mm suggest a shift.
How to diagnose – suspension angles: Compare the alignment printout before and after. If caster changed on one side by more than 0.5° without any replaced parts, suspect subframe shift. Also, a thrust angle that’s fine but a steering wheel angle error that cannot be corrected by tie-rod adjustment (because you run out of adjustment threads) is a classic sign.
Professional diagnostic step: A shop will loosen the subframe bolts, use a pry bar to shift the subframe while monitoring alignment sensors, and re-torque. This is called “subframe alignment” or “cradle adjustment.” Some vehicles have eccentric bolts for fine adjustment.
Side-by-Side Comparison: Tie-Rod Error vs Subframe Shift
| Feature | Tie-Rod Adjustment Error | Subframe Shift |
|---|---|---|
| Vehicle pulls? | No – tracks straight, only wheel off | Often yes – pull to one side |
| Alignment printout | Front toe green, caster/camber symmetric | Caster or camber asymmetric, possibly rear toe issues |
| History of impact? | Not necessary | Likely (pothole, curb, accident) |
| Fix difficulty | Easy – re-center tie-rods | Moderate to hard – subframe realignment |
| Cost to correct | $20–$50 (or free redo) | $150–$400 (depends on labor) |
Step-by-Step Diagnostic Flowchart for DIY Enthusiasts
Follow this logical sequence before touching any tools or returning to the shop:
- Verify the basics: Check tire pressures (uneven pressure can cause a mild pull but not a pure off-center wheel). Inspect for uneven tire wear.
- Road test: On a flat, straight road with no crown, release the steering wheel. Does the car go straight? If yes → likely tie-rod error. If it pulls → subframe shift or other alignment issue.
- Check alignment printout: Look at front caster difference. If caster split exceeds 0.5° and no parts were replaced, suspect subframe shift. Also note if front toe was adjusted but steering angle sensor wasn’t zeroed (on EPS cars).
- Inspect subframe visually: Look for rust marks, clean witness lines, or misaligned paint dots. Use a tape measure from fixed body points to subframe holes.
- Perform the “tie-rod test”: With the car safely on jack stands, turn the steering wheel to its natural center (the rack’s internal spring will center it). Observe the position of the steering wheel. Now, have a helper turn the wheel slightly left and right – note the equal travel. If the natural center of the rack corresponds to a crooked wheel, but the tie-rods are equally threaded on both sides, you likely have subframe shift.
- Measure tie-rod thread exposure: Count exposed threads on each inner tie-rod. If one side has many more threads showing than the other (e.g., 12 threads left, 4 threads right), the subframe may have shifted, or a previous mechanic tried to compensate with uneven toe. Uneven thread counts alone aren’t definitive, but large differences >8mm suggest a deeper issue.
Fixing Tie-Rod Adjustment Error: The Right Way
Most alignment machines have a “steering wheel centering” procedure. If you’re returning to a shop, ask them to redo the alignment with special attention to locking the wheel. For DIY correction after confirming it’s not subframe shift:
- Place the steering wheel straight using a locking tool or a helper.
- Loosen both tie-rod jam nuts.
- Turn both tie-rods equally in the same direction (e.g., both turn clockwise as viewed from the wheel). One will shorten, the other lengthen.
- One full turn on most tie-rods changes steering wheel angle by about 10-15°. Make small adjustments.
- After adjustment, re-check total toe. Use a toe gauge or the string method. Total toe must remain within spec. If you’re uncomfortable, have a shop do it.
Warning: Never adjust only one tie-rod. That changes total toe and will cause rapid tire wear.
Fixing Subframe Shift: What You Need to Know
Correcting a shifted subframe is not a driveway job for most vehicles, but understanding it helps you avoid unnecessary tie-rod replacements.
- Professional realignment: A technician will loosen the subframe bolts, attach alignment sensors, and use hydraulic jacks or pry bars to shift the subframe until caster/camber and steering wheel centering come into spec. Then they tighten bolts to factory torque (often very high, 80-150 lb-ft).
- Some vehicles have adjustment slots: On Subarus and some Fords, subframe bolts go through slotted holes. There are even alignment tools (e.g., Subaru front subframe alignment pins) to set the cradle perfectly.
- If bolts are rusted or damaged: They may need replacement. Also check subframe bushings if equipped.
- After realignment: A full four-wheel alignment must be performed again. The steering wheel centering should then be possible via tie-rods.
Cost reality: A subframe realignment typically runs 1.5–2.5 hours of labor ($150–$400). It’s not cheap, but it’s far cheaper than replacing tires every 5,000 miles or living with a dangerous pull.
Case Study: A Real-World Example
Vehicle: 2018 Honda Accord. Owner hit a deep pothole at 40 mph. After alignment at a chain shop, steering wheel was 15° off-center to the right. Car tracked straight. Alignment printout showed all green. Shop insisted nothing was wrong. Owner measured tie-rod threads: left side had 8mm more exposed thread than right. That asymmetry, combined with the known impact, pointed to subframe shift. A specialist loosened the subframe, shifted it 4mm toward the driver side, retorqued bolts, and performed a new alignment. Steering wheel became perfectly straight, and caster difference dropped from 0.7° to 0.1°. The original shop had tried to compensate by adjusting tie-rods unevenly, which masked the subframe shift but couldn’t fix the root cause.
Prevention: Avoiding This Headache After Future Alignments
Not all alignment technicians are created equal. Protect yourself:
- Always ask for a printout before and after alignment. Review caster split and steering wheel angle reading (many Hunter machines report “steering wheel angle” after alignment – it should be 0°).
- Before any alignment, mention any past curb impacts or subframe-related repairs.
- If you DIY, invest in a steering wheel holder and a quality toe gauge. Never guess tie-rod adjustments.
- If you feel a persistent off-center wheel after alignment, don’t live with it. The first fix (re-centering tie-rods) is quick and cheap. Insist the shop redo it.
Conclusion: Knowledge Is Your Best Alignment Tool
An off-center steering wheel after an alignment is not a mystery—it’s a diagnostic puzzle with two primary solutions. The vast majority of cases are simple tie-rod indexing errors, easily corrected by a competent technician in minutes. However, when a subframe shift is the culprit, no amount of tie-rod tweaking will fully resolve the problem; you’ll just chase uneven tire wear and a crooked wheel forever. By learning to distinguish between these causes—using the pull test, alignment printout analysis, visual subframe inspection, and tie-rod thread comparison—you become an empowered car owner. You’ll save money, time, and frustration, and your vehicle will drive as straight and true as the day it left the factory.
Remember: Safety first. If you’re unsure about any diagnosis, consult a trusted alignment specialist with experience in subframe alignment. And always re-torque all fasteners to manufacturer specifications. A straight steering wheel is not just a comfort; it’s a sign of a properly engineered chassis.