

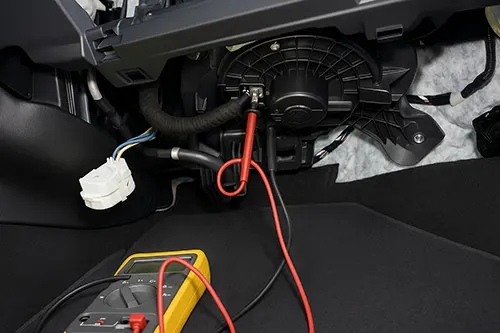
Fan works only high
Most DIY owners meet this problem the same way: the cabin fan is dead on speeds 1–3, but it suddenly roars back to life on the highest setting. That symptom is not random—it usually means the blower resistor pack (or its connector) is no longer handling the lower-speed circuits, while the high-speed circuit still bypasses the resistors.
This guide is meant to be practical: a few checks you can do in minutes, then one or two electrical measurements that keep you from replacing the wrong part.
Fast checks before disassembly
- Confirm the pattern: does it fail only on certain speeds, or does it cut out on bumps?
- Listen for the motor: if you hear the fan trying to spin, suspect the motor or a tight cabin filter rather than the resistor.
- Smell check: a burnt-electronics smell near the passenger footwell often points to an overheated connector.
- Cabin filter: a clogged filter can overwork the blower motor and cook the resistor over time.
Locate resistor pack
On most layouts the resistor pack sits in the HVAC air stream (so it can be cooled), usually near the blower motor under the dash. Look for a small module held by 2–3 screws with a multi-pin connector. If you can see the blower motor housing, you’re usually one step away from the resistor pack.
Multimeter tests in place
You don’t need lab-grade testing. With the connector accessible, you can verify that the control side is behaving:
- Power present: with the fan switch on, confirm battery voltage (~12–14 V) on the power feed where applicable.
- Ground integrity: check for a solid ground; a loose ground can mimic a bad resistor.
- Heat clue: if the connector plastic is browned or distorted, treat the connector as part of the failure.
If the connector is heat-damaged, replacing only the resistor can create a repeat failure because contact resistance stays high and the new part runs hot again.
Blower motor current check
A resistor pack often fails because the blower motor is drawing too much current. If you have a clamp meter, measure blower motor current on high speed. A motor that is dragging can overheat the resistor and the connector. If you don’t have a clamp meter, use a practical proxy: does the fan sound strained, start slowly, or change pitch abruptly? Those are red flags.
Wiring and connector inspection
Pull the connector and inspect the terminals. You’re looking for:
- Loose pin fit: terminals that slide on/off too easily.
- Darkened metal: heat discoloration is a sign of high resistance.
- Melted housing: replace the pigtail/connector if the plastic is warped.
Small resistance at a terminal becomes heat under load. That’s why “it worked yesterday” can turn into “it’s dead today.”
Replace resistor safely
- Turn ignition off and remove the key (or power down the vehicle).
- Unplug the resistor connector by releasing the latch—don’t pull the wires.
- Remove the mounting screws and slide the resistor pack out.
- Install the new pack firmly so it seals in the HVAC duct (airflow matters for cooling).
- If the connector is heat-damaged, replace the connector/pigtail now rather than later.
After-repair verification drive
Verify all fan speeds in place, then run the blower on medium for 3–5 minutes and recheck for heat at the connector area. The goal is not just “it turns on,” but “it runs without cooking the connector again.”
Costs and time range
- DIY time: typically 30–75 minutes depending on access under the dash.
- Parts: resistor pack is usually a modest-cost part; a replacement connector/pigtail is often cheap insurance if heat damage exists.
- Hidden cost: ignoring an over-amp blower motor can turn a resistor fix into a repeat repair.
When to stop
If you confirm power and command are present but the blower still behaves inconsistently across all speeds, step back and test the blower motor and control module path. At that point, guessing gets expensive—one measured test beats three parts purchases.