

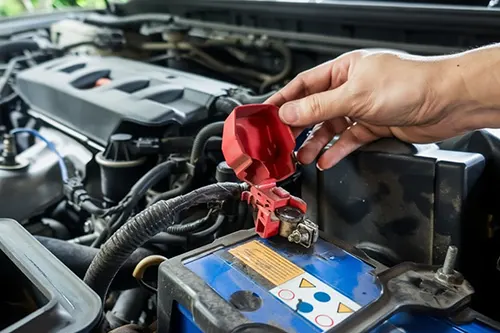
You park your car in the evening with a fully charged battery. Next morning—click, click, click. The engine won't crank, the dome light is barely glowing, and you're late for work. If this scenario sounds painfully familiar, you're likely dealing with a parasitic draw (sometimes called a parasitic drain). Before you blame the battery or the alternator, understand this: a healthy battery should hold its charge for weeks when the vehicle is off. When it dies overnight, something is quietly sipping power from your electrical system while you sleep. The good news? You don't need a $10,000 diagnostic scanner. With a simple digital multimeter and about an hour of your time, you can track down the culprit yourself.
What Exactly Is a Parasitic Draw?
A parasitic draw refers to the electrical current that continues to flow from your battery after the ignition is turned off and all doors are closed. Modern vehicles are never truly "off"—computers, security systems, clock, radio presets, and keyless entry modules all require a tiny amount of standby power. Normal parasitic draw typically ranges from 20 to 50 milliamps (0.020 to 0.050 amps). Some newer luxury cars with advanced telematics might tolerate up to 85 milliamps. Anything above that, and you have a problem. A draw of 200 milliamps (0.2 amps) can drain a healthy battery in 2-3 days. A draw of 1 amp or more? That battery will be dead by morning.
Before You Test: Rule Out the Obvious
Jumping straight into electrical diagnostics is tempting, but first eliminate the simple stuff. Parasitic draw tests can be time-consuming, so don't waste effort on an easily fixable issue:
- Check interior lights: A glove box light stuck on, a trunk light that won't turn off, or a vanity mirror light left open can kill a battery overnight. These are extremely common and easy to miss.
- Test your battery health: A battery that is already sulfated, has a dead cell, or is more than 4-5 years old may fail to hold a charge even with zero draw. Have it load-tested at any shop.
- Check alternator diodes: A failed alternator diode can allow AC current to leak back and drain the battery. With the engine running, set your multimeter to AC voltage. If you read more than 0.1V AC across the battery terminals, your alternator is likely faulty.
- Look for aftermarket accessories: Dash cams, GPS trackers, aftermarket stereo amplifiers, or poorly installed remote starters are prime suspects. Disconnect them and see if the problem goes away.
Tools You'll Need
Nothing exotic required. Most of these items are either in your garage or available for under $40:
- Digital multimeter (DMM): It must have a DC amp scale (10A or 20A setting). A $20 basic unit from any hardware store works perfectly.
- Test leads with alligator clips: Makes holding probes in place much easier while you pull fuses.
- Fuse puller or small pliers: To remove fuses from the fuse box.
- Notepad and pen: To record current readings as you remove each fuse.
- Battery terminal wrench: To disconnect the negative cable.
- Safety glasses and gloves: Batteries contain sulfuric acid and can produce explosive hydrogen gas.
Step-by-Step Parasitic Draw Test
Follow these steps carefully. The key is not waking up the car's computers once you've connected the meter. Modern vehicles have many modules that "go to sleep" several minutes after the ignition is turned off. If you disturb them, you'll get false high readings.
Step 1: Prepare the Vehicle
Park in a safe, well-ventilated area. Turn off the ignition and remove the key. Turn off all lights, interior lamps, radio, climate control fan, and any accessories. Make sure all doors, the trunk, and the hood are closed. If your hood has a pin switch that activates a "hood open" light or alarm, you may need to tape it closed or disconnect it temporarily. Also, if your vehicle has a hands-free key fob or passive entry, place the key at least 30 feet away from the car to prevent it from constantly "waking" the system.
Step 2: Let the Car Go to Sleep
Modern vehicles take anywhere from 15 minutes to over an hour to fully enter "sleep mode" after the ignition is turned off. During this time, modules are communicating and shutting down. If you attempt the test immediately, you'll see artificially high current that will drop over time. Wait at least 30 minutes (consult your service manual for exact sleep time). Pro tip: Open the hood and close all latches, then set a timer.
Step 3: Disconnect the Negative Battery Cable
With a wrench, loosen and remove the negative battery terminal clamp (black cable). Move it safely aside so it cannot accidentally touch the battery post. Do not disconnect the positive terminal—that's unnecessary and increases the risk of sparks.
Step 4: Set Up Your Multimeter for DC Amps
Plug your multimeter leads correctly:
- Black lead into COM port.
- Red lead into the 10A or 20A port (not the mA port).
- Set the dial to DC Amps (A with straight line and dashed line). Choose the highest amp range if manual ranging.
Step 5: Connect the Multimeter in Series
This is the most critical step. You are placing the multimeter between the negative battery post and the negative cable clamp. Current will now flow through the meter. Connect one lead to the battery post and the other to the cable clamp. Use alligator clips to maintain solid contact. The polarity doesn't matter for the reading (it will just show a negative sign if reversed).
Important: Do not turn the ignition on or open any doors while the meter is connected. The initial inrush current could blow the meter's internal fuse (most 10A circuits can handle a brief spike, but it's risky). If you accidentally open a door, disconnect, reset the sleep timer, and start over.
Step 6: Read the Initial Parasitic Draw
After the vehicle has been asleep, observe the multimeter reading. It should be relatively stable. A normal reading is 0.02 to 0.05 amps (20-50mA). If you see 0.10 amps (100mA) or higher, you have excessive draw. If it's 0.5 amps or more, you have a major drain that will kill the battery in hours.
Step 7: Isolate the Problem Circuit – Pull Fuses One by One
Now the detective work begins. With the meter still connected and the vehicle asleep, start removing fuses one at a time. Watch the multimeter display after each fuse removal. When the current drops to the normal range (or drops significantly), you've found the circuit responsible for the draw.
- Begin with the interior fuse box (usually under the dash or kick panel), then move to the under-hood fuse box.
- Pull one fuse, note the amperage change, then reinsert it before pulling the next fuse (unless you find the culprit). Reinserting keeps all other circuits intact.
- Use your notepad to record: fuse position, amp rating, and the current reading after removal.
- If you see a dramatic drop (e.g., from 0.30A to 0.04A), that fuse's circuit is the problem.
Step 8: Narrow Down Within the Circuit
Once you've identified the fuse, consult your owner's manual or fuse box diagram to see what components are on that circuit. It may power multiple items (cigarette lighter, radio, interior lights, etc.). From there, you can:
- Visually inspect each component for damage or signs of shorting.
- Disconnect each component one by one while monitoring the meter.
- Common culprits: stuck glove box light, faulty door lock actuator, aftermarket stereo with poor wiring, seat heater module, or a failing body control module.
Understanding Your Readings: What's Normal vs. Problematic
| Current Draw (Amps) | Milliamps (mA) | Status | Time to Drain 60Ah Battery |
|---|---|---|---|
| 0.020-0.050 | 20-50 mA | Normal | 50-120 days |
| 0.075 | 75 mA | Borderline (monitor) | 33 days |
| 0.100 | 100 mA | Excessive draw | 25 days |
| 0.250 | 250 mA | Problematic | 10 days |
| 0.500 | 500 mA | Serious drain | 5 days |
| 1.000+ | 1000+ mA | Kills battery overnight | 2-3 days |
Common Parasitic Draw Culprits (Real-World Cases)
Over years of tracking down electrical gremlins, certain problems appear again and again. Here's what to check first:
- Glove box or trunk light stuck on: The switch fails, but you never notice because the light is hidden. Check by putting your phone on video recording inside the closed glove box or trunk.
- Faulty alternator diode: Allows battery voltage to leak backward through the alternator. Test with AC voltage as mentioned earlier.
- Aftermarket remote start or alarm: Poor installation or aging modules. Disconnect power to the aftermarket unit and re-test.
- USB charger left plugged in: Some cheap USB adapters draw 50-100mA even with nothing connected. Unplug them all.
- Door lock actuator that keeps trying to cycle: You may hear a faint whirring sound inside the door panel.
- Bluetooth or telematics module: On some GM vehicles, the OnStar module can fail and draw continuous power.
- Brake light switch out of adjustment: Brake lights stay on dimly, invisible during daylight. Check by looking for light bleeding through the rear window at night.
What If You Don't Find the Culprit?
Sometimes parasitic draw is intermittent or caused by multiple circuits. Try these advanced techniques:
- Voltage drop test across fuses: Instead of pulling fuses, you can measure millivolts across each fuse's test points. Each fuse type has a known resistance, and you can convert mV to current using a chart. This is non-invasive and doesn't wake modules.
- Thermal imaging: Use an infrared thermometer or thermal camera. The circuit with excessive draw will often be slightly warmer than others.
- Check for relay sticking: A relay that remains closed after the ignition is off will keep a component powered. Tap each relay with a screwdriver handle while watching the meter; if the current drops, that relay is sticking.
Preventing Future Battery Drain
Once you've fixed the draw, take these steps to avoid repeating the nightmare:
- Install a battery disconnect switch: If you store a vehicle seasonally, a simple knife switch on the negative terminal guarantees zero draw.
- Use a battery maintainer (trickle charger): For vehicles driven infrequently, a smart maintainer keeps the battery at full charge without overcharging.
- Keep your battery clean: Dirt and corrosion on the battery top can create a conductive path for small current leaks. Clean with baking soda and water.
- Replace aging batteries proactively: Most batteries last 3-5 years. If yours is older, replace it even if it tests okay—internal resistance increases with age, making it more susceptible to small draws.
When to Call a Professional
Parasitic draw testing is DIY-friendly, but some situations warrant professional help:
- You've pulled every fuse and the draw remains above 50mA. This suggests a main feed or alternator issue.
- The vehicle has multiple computer modules and you're uncomfortable disconnecting them.
- You suspect a short in the wiring harness behind the dash or under the carpet—tracking that requires special tools like a tone generator or thermal imager.
- After repairs, the draw is gone but the battery still dies. You may have a bad battery with internal short.
A professional shop will use an inductive amp clamp (no need to disconnect battery) and can perform a "battery parasitic draw test" with sophisticated scan tools that monitor module sleep patterns. Expect to pay $100-$200 for diagnosis.
Final Thoughts: You've Got This
A battery that dies overnight is frustrating, but it's almost always solvable. The parasitic draw test with a multimeter is one of the most empowering diagnostic skills a car owner can learn. It requires patience—waiting for modules to sleep, pulling fuses one by one, and methodically recording results—but the payoff is huge. You'll save hundreds of dollars in diagnostic fees, avoid being stranded, and gain a deeper understanding of your vehicle's electrical system.
Remember: safety first. Work in a dry area, wear eye protection, and never smoke near a battery. If you're ever unsure about a step, stop and consult a factory service manual or seek help from an experienced friend. Now go find that electrical vampire and enjoy mornings with a fully charged battery again.